To back up and restore the Docker Desktop data, the user needs to create a backup of Docker containers, volume, and images. To create the backup of the Docker volume, the user needs to access the mounted volume from the container using the “–volumes-from” option. To create the backup of the Docker container, use the “docker commit <container-name> <image-name>” command.
What is Docker Desktop?
Docker Desktop is an open-source Docker GUI tool that is used to manage and operate Docker components such as Docker containers, images, and Docker volume interactively. Sometimes, users are required to clean up the disk space or want to move the Docker desktop environment to another system or to declutter the Docker environment. In such scenarios, the Docker user is usually required to create a backup of Docker containers.
How to Start a Container in Docker?
For creating a backup of the Docker container, we are required to design and start a basic container that uses every component of Docker such as Docker volume, image, and network. To do so, follow the following steps.
Step 1: Create New Docker Volume
First, create a new volume that will be mounted with a Docker container. The volume is an external file system that is used to persist the data of the Docker container. To create the volume, use the “docker volume create <vol-name>” command:
docker volume create demo-vol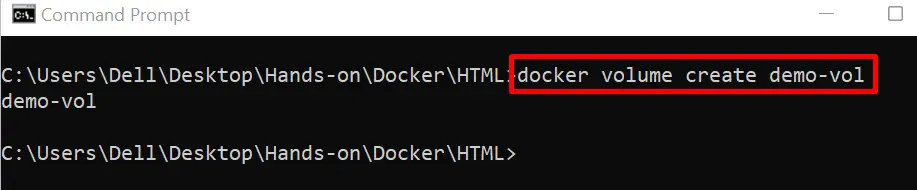
Step 2: Make Program File
Next, make a new file named “index.html” and type the mentioned code to the file:
<!DOCTYPE html>
<html>
<head>
	<title>Sample Application</title>
	<style>
		body {
			background-color: #D2B48C;
		}
		.container {
			text-align: center;
			padding: 50px;
		}
		p {
			color:#800000;
			font-weight: bold;
		}
	</style>
</head>
<body>
	<div class="container">
		<h1>Welcome to Hands-On.Cloud</h1>
	</div>
</body>
</html>
Step 3: Create Dockerfile
Create a new file named “Dockerfile”. This file does not contain any file extensions. Now, type the below-mentioned commands into the “Dockerfile”:
FROM nginx:latest
COPY index.html /usr/share/nginx/html/index.html
ENTRYPOINT ["nginx", "-g", "daemon off;"]
In the code block, the “FROM” specifies the parent or base image of the container, the “COPY” statement will copy the program file to the container path, and the “ENTRYPOINT” sets the default runnable points of the container.
Step 4: Build Container’s Snapshot
Generate the container’s snapshot from the Dockerfile through the given command. Here, the “-t” will tag the snapshot or image:
docker build -t demo-img .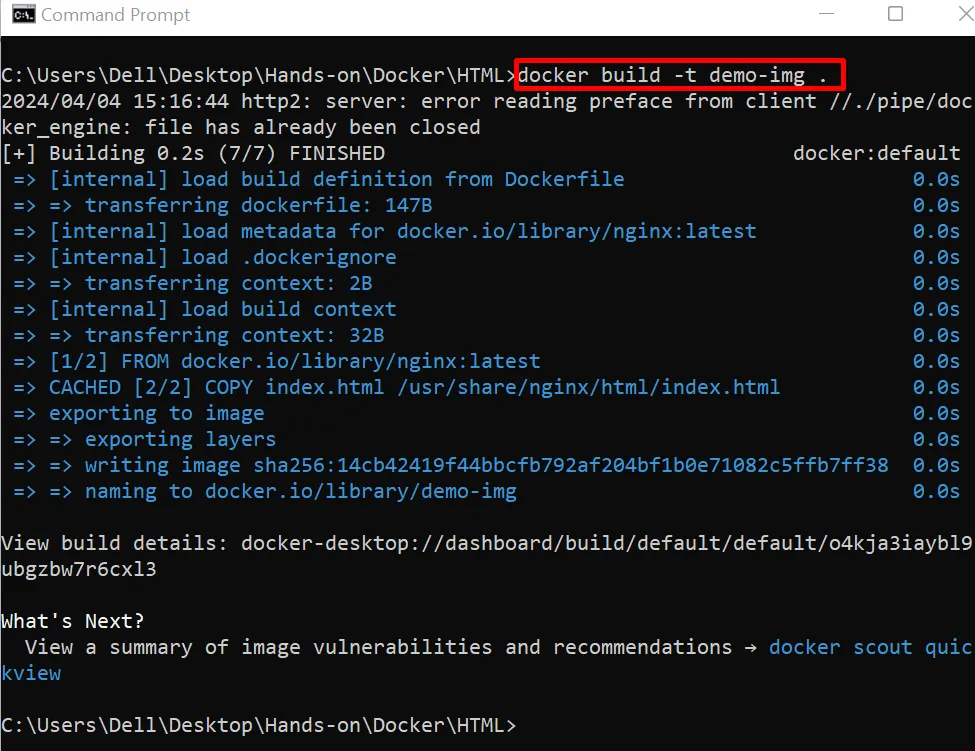
Step 5: Run Image to Fire up the Container
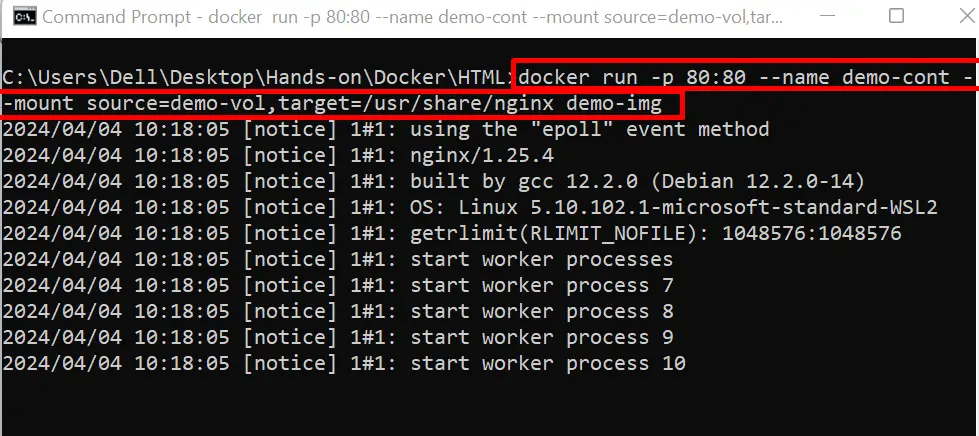
Execute the container by running its image. For this purpose, utilize the command mentioned below:
docker run -p 80:80 --name demo-cont --mount source=demo-vol,target=/usr/share/nginx demo-imgHere,
- “-p” publishes the container on port 80.
- “–name” option sets the container’s name
- “–mount” option mounts the external volume with the container. It passes two values: “source” and “target”. The “source” value specifies the container’s external volume that is being mounted with the container and the “target” value specifies the path where the volume will be mounted:
For verification, navigate to the “http://localhost:80” and check if the container is exposing on the specified port of localhost or not:

Note: When users are using a container that is mounted with the external file system or volume, then the backup of the Docker container may not be needed. Because external volume persists in all the container data and is totally independent of the life cycle of the container.
Backup and Restore Docker Desktop Data?
While deleting the Docker desktop data or doing a clean purge of the Docker desktop environment, users are required to create the backup of Docker containers and Docker volume that preserves the container’s data. Usually, a backup of the container is created through the “docker commit”. This will generate a new image from the container and then these images can be pushed to Docker registries to store the container’s snapshots.
However, the problem with this technique is it only creates the backup of the container but never includes the backup of the mounted volume, and users are required to create the backup of the volume separately.
To completely backup and restore the Docker desktop, follow the below-listed procedure:
- Backup and Restore the Volume of the Docker Container
- Create the Backup of the Docker Container
- Restore Docker Container From Backup Image
Backup and Restore the Volume of the Docker Container
As “docker commit” does not include the backup of the Docker volume. So, users are required to create the backup of the volume separately. For this purpose, follow the below steps.
Step 1: Start a New Container
To create the backup of the container, first build the new container. For instance, we generated the “backup-cont” container. Here, the “-v” option is used to mount the external volume to the Docker container:
docker run -d -v demo-vol:/usr/share/nginx/ --name backup-cont demo-img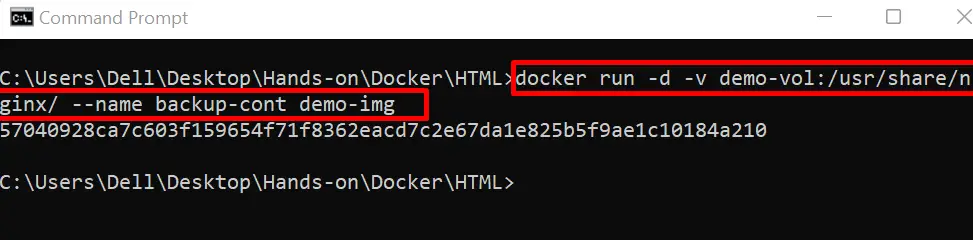
Step 2: Create a Backup of the Volume
Now, create the backup of the Docker volume that is mounted with the “backup-cont” container using the below command. In the mentioned command, we will create the “backup.tar” file in the currently opened directory:
docker run --rm --volumes-from backup-cont -v %cd%:/backup nginx tar cvf /backup/backup.tar /usr/share/nginx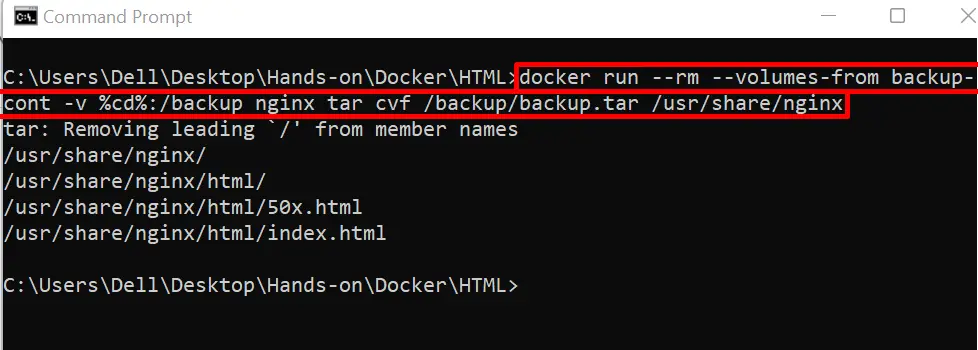
For confirmation, list down the files and folders of the working directory. Here, you can see we have created the volume backup in the “backup.tar” file:
dir
Step 3: Restore Volume
To restore the Docker volume in the Docker environment, utilize the following command. This command will restore the volume from the “backup.tar” file that is created in the above step:
docker run --rm --volumes-from backup-cont -v %cd%:/backup bash -c "cd /usr/share/nginx && tar xvf /backup/backup.tar"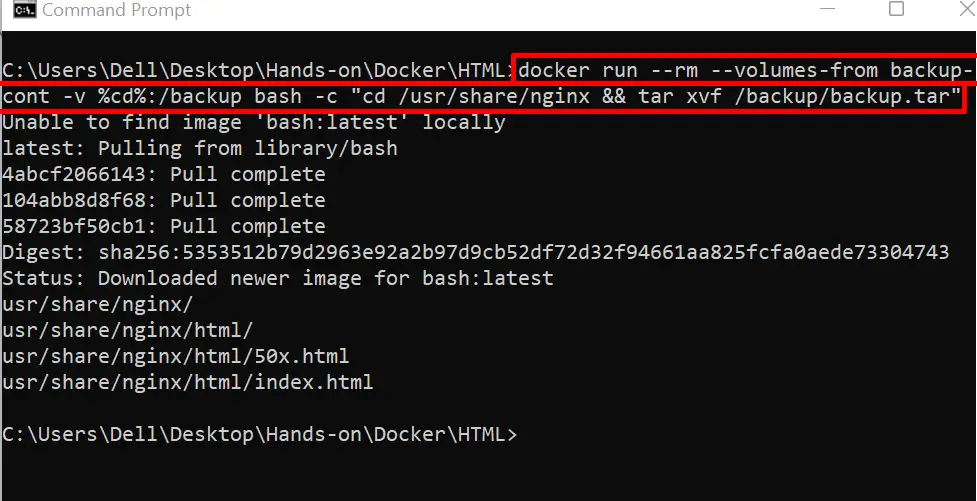
Create the Backup of the Docker Containers
After creating the backup of the Docker volume, the user can create the backup of the Docker containers. To do so, follow the following steps.
Step 1: List Down the Containers
First, list down all Docker containers. For demonstration, we will create the backup of “demo-cont” that is created in the first section of the article:
docker ps -a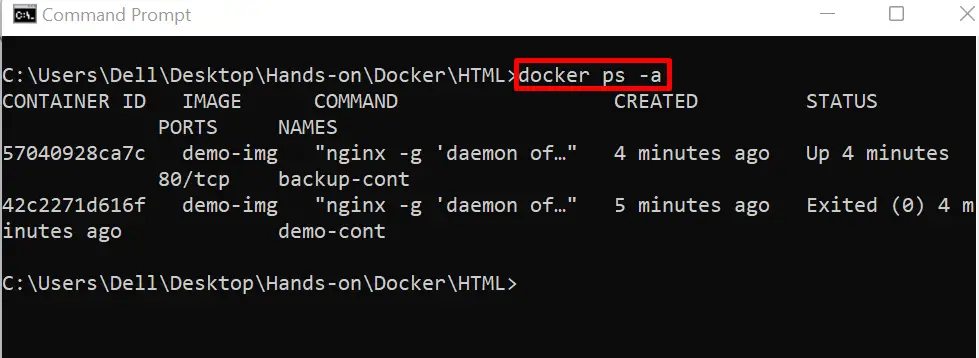
Step 2: Commit the Docker Container
To create the backup of the container, commit the container and save the container commits in a new Docker image. To do so, execute the “docker commit <container-name> <image-name>” command:
docker commit demo-cont backup-imgHere, we have generated an image from “demo-cont” with the name “backup-img”:

Step 3: List the Docker Images
To check if the “backup-img” is created or not, list down all Docker images using the given command:
docker images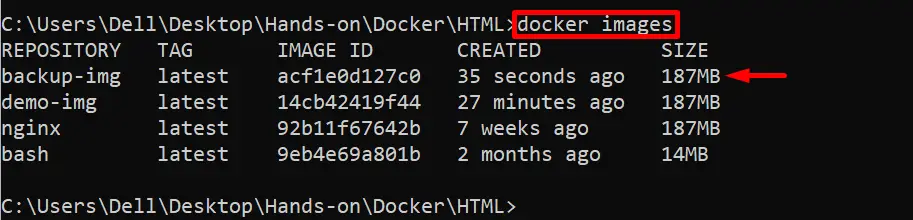
Step 4: Tag the Image
Now, tag the image with the repository name to push it into the Docker hub repository. Here, we have tagged the image to push it in our Docker repository “handsoncloud”. For this purpose, use “docker tag <image-name> <repository-name/image-name:tag>” command:
docker tag backup-img handsoncloud/backup-img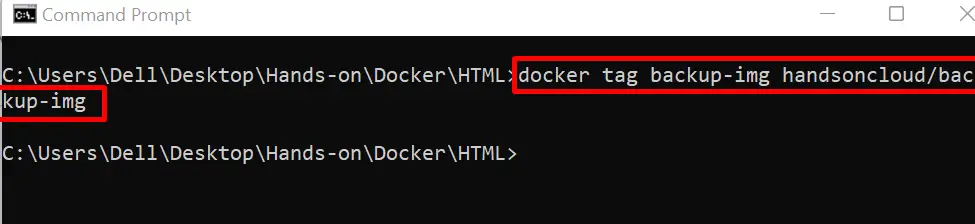
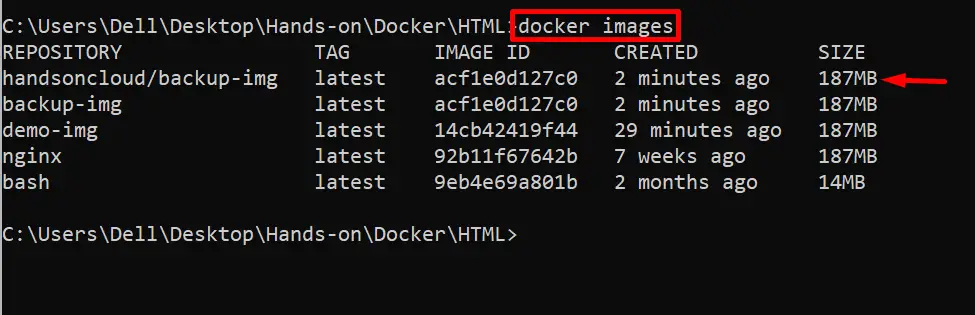
Again list down the images and verify if we have tagged the image or not:
docker imagesHere, we have effectively tagged the “backup-img”:
Step 5: Push the Image
Now, push the Docker image to the Docker registry using the “docker push <image-name>” command:
docker push handsoncloud/backup-img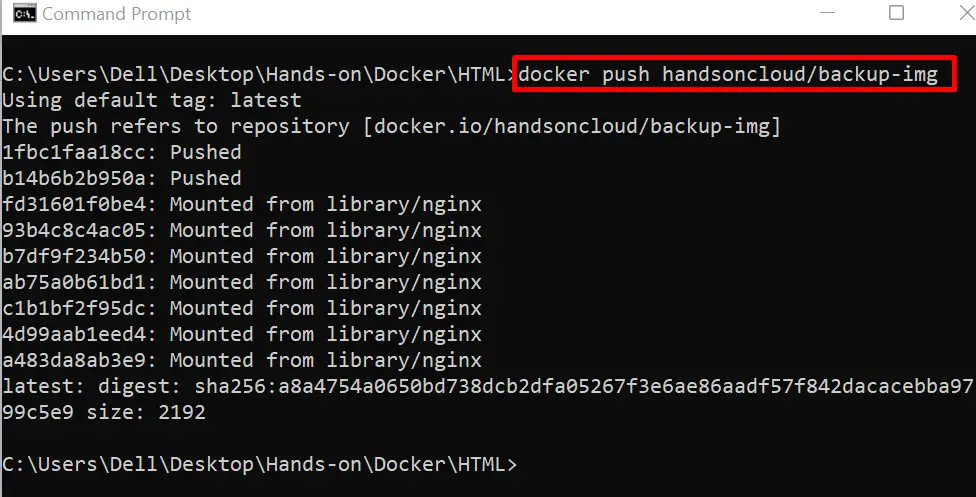
That is how users can create a backup of the Docker container.
Step 6: Prune the Docker
After creating the backup, now the user can remove the Docker containers, and images or completely clear the Docker development environment. For this purpose, run the “docker system prune -a” command:
docker system prune -a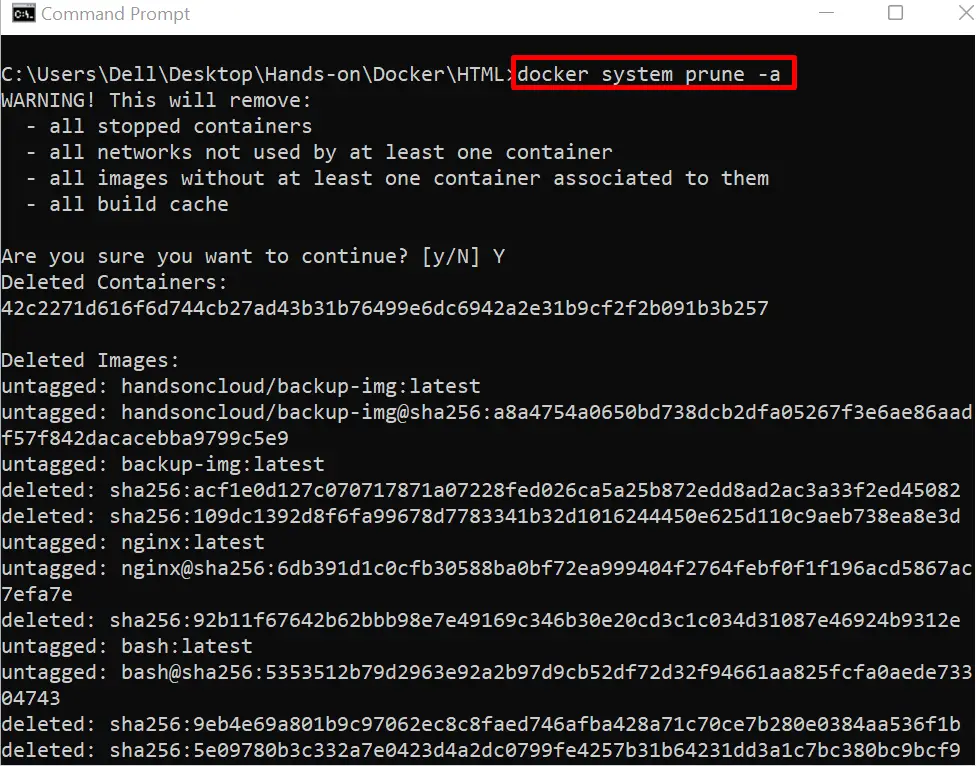
For verification, view the Docker images:
docker imagesHere, you can see we have cleared the data from the Docker Desktop application:

Let’s move toward the below section to restore the Docker image and container.
Restore Docker Container From Backup Image
To restore the Docker container from a backup image, users are required to download the image from the Docker registry and execute it to start the new instance of the container.
To restore the Docker container, follow the given instructions.
Step 1: Pull the Backup Image
First, pull the backup image from the Docker hub registry. For this purpose, use the “docker pull <image-name>” command:
docker push handsoncloud/backup-img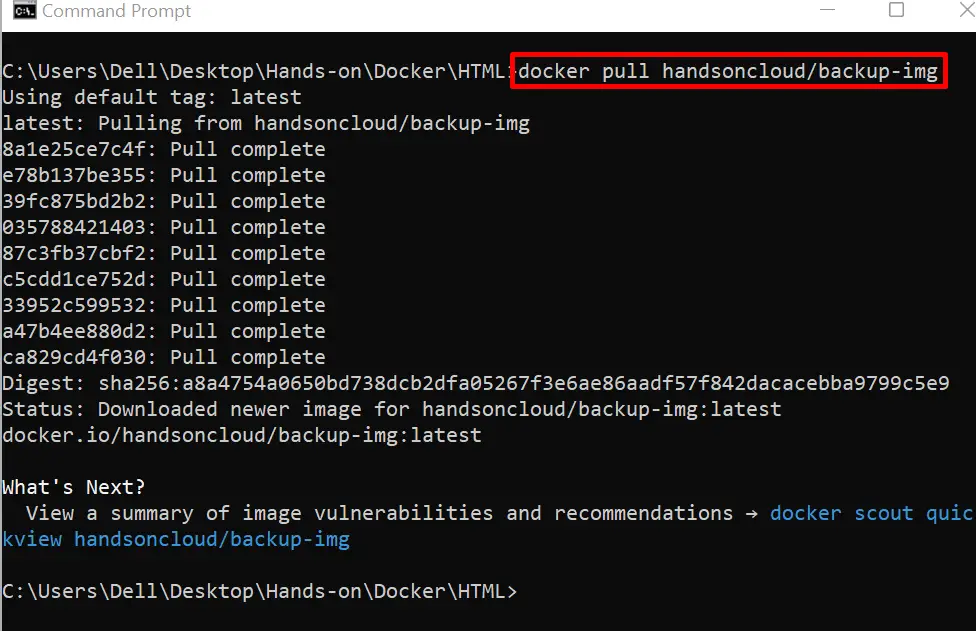
Step 2: Restore the Container
Now, restore the Docker container by executing the pulled image. To do so, use the below-mentioned command:
docker run -d -p 80:80 --name demo1-cont handsoncloud/backup-img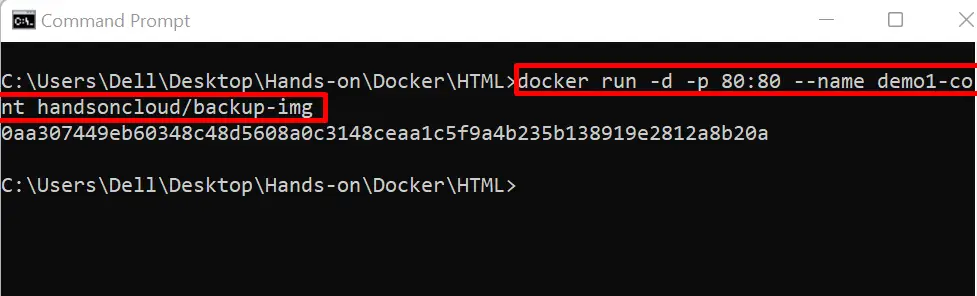
For verification, navigate to the exposing port of the container and verify if the container is executing or not:

How to Backup and Restore Docker Volume Through Docker Desktop Extension?
To backup and restore the Docker volume through the Docker Desktop application, the “Volume Backup & Share” extension can be used. For this purpose, look at the listed steps.
Step 1: Launch Add Extension Menu
First, open the Docker Desktop application through the “Startup” menu of Windows. Next, click on the below pointed “Add Extension” option to install the new Docker extension in the Docker Desktop application:

Step 2: Install Volume Backup & Share Extension
Make a search for “Volume” in the search bar and install the “Volume Backup & Share” extension by hitting below highlighted “Install” button:

Now, open the newly installed extension. This will show all the available volumes of Docker Desktop. Using the below-highlighted volume arrows, the user can import and export Docker volume easily:
That is all about backing up and restoring Docker Desktop.
Conclusion
To back up and restore the Docker Desktop application, users are required to create a backup of Docker containers and Docker volume. To create the backup of the Docker volume, run the new instance of the Docker container and access the volume from the container using the “–volumes-from” option. To create the backup of the Docker container, use the “docker commit <container-name> <image-name>” command. Then, publish the image on the Docker Hub repository. We have provided the method to backup and restore Docker Desktop data.
