To create a Docker image, you first need to generate the instruction file named Dockerfile. This file will be used by Docker Daemon to read the build context and generate the image through the “docker build -t <image-name> .” command. Let’s first understand the Dockerfile and how to create an image through Docker file instructions.
What is Docker Image
The Docker image is the building block of the Docker environment that is utilized to instruct the container on how to build, deploy, and manage the application inside the container. It is referred to as a template or snapshot of a Docker container. A docker image is nothing but just a text file that contains some commands to dockerize the application inside the container.
What is Dockerfile?
Docker images in Docker are generated through a simple textual file named Dockerfile. The Dockerfile contains commands and necessary instructions to guide the container on how to Dockerize the application. The user specifies the basic Dockerfile commands in the text file name “Dockerfile” without using the “.txt” extension. Then, this file will be used to read the build context and generate the image accordingly. The Dockerfile is reusable, and users can generate many images according to their need.
The basic commands of Dockerfile that are used to generate the Docker image are represented below in the table:
| Dockerfile Command | Description |
|---|---|
| FROM | It is utilized to define the parent image that provides the basic structure to build the Docker container. |
| RUN | It is utilized to run the external commands inside the container such as the update command or command to install any dependency or package. |
| WORKDIR | It sets the container’s working directory. |
| ENV | It sets the environment variable in Docker containers. |
| VOLUME | Mounts the external file system with the container. |
| ENTRYPOINT | Specify the entry points from which the container will start execution. |
| CMD | The CMD command can be used to provide arguments to ENTRYPOINT. It sets the default runnable points of the container |
| EXPOSE | This will set the exposing port of the container on which the application will be executed. |
| COPY | It is utilized to copy the application file and dependencies file to the container path. |
| ADD | This command is similar to the COPY command, but this will copy the file from the provided URL such as GitHub. |
| ONBUILD | It reads instructions from the parent image but executes them by utilizing the downstream image. Mostly, it is used in multistage builds. |
These basic commands are utilized to generate the container snapshot (image). Follow the below section to containerize the application by creating a new image.
How to Create a Docker Image?
To create a new image in Docker, first, the user needs to create an instruction file named Dockerfile. Then, generate the snapshot (image) through the “docker build -t <image>” command. For demonstration, we will dockerize the simple HTML program by generating a simple Docker image and we will use a Linux system. However, processes and commands will be the same for Windows and Mac OS. Follow the below instructions to get started.
Step 1: Update Ubuntu
Launch the Ubuntu terminal through “CTRL+ALT+T”. Next, run the “apt update” command:
sudo apt update
Step 2: Navigate to the Docker Working Directory
Now, navigate to the directory where Docker projects are managed. For instance, we have created a new directory “docker”. To navigate to the working directory, use “cd”:
cd \docker
Now, create a new directory named “html” to save the HTML programs or applications. Then, open the “html” directory:
mkdir htmlcd \html
Step 3: Create Program File
Create a new program file to save the simple HTML program. For instance, we have created an “index.html” file using the “nano” editor:
sudo nano index.htmlNano editor creates and opens the “index.html” file. Now, add the simple HTML program to the file. For practice, you can use our program as well:
<!DOCTYPE html>
<html>
<head>
  <title>Sample Application</title>
  <style>
  body {
        background-color: #D2B48C;
        }
    .container {
        text-align: center;
        padding: 50px;
        }
  </style>
</head>
<body>
  <div class="container">
  <h1>Welcome to Hands-on Cloud Tutorial</h1>
  </div>
</body>
</html>
To save the file, press “CTRL+S” and press “CTRL+X” to exit the editor:

Step 4: Create Dockerfile
Now, create another file in the nano editor named “Dockerfile” through the below command:
sudo nano DockerfileAdd the following instructions to the file. The “COPY” command copies the “index.html” file to a provided path of the container:
FROM nginx:latest
COPY index.html /usr/share/nginx/html/index.html
ENTRYPOINT ["nginx", "-g", "daemon off;"]
Again, save the file and exit the editor:
![FROM nginx:latest
COPY index.html /usr/share/nginx/html/index.html
ENTRYPOINT ["nginx", "-g", "daemon off;"]](https://hands-on.cloud/wp-content/uploads/2024/03/image-144.png)
List down the file of the working directory for confirmation:
lsHere, we have effectively created the required files in “html” directory:

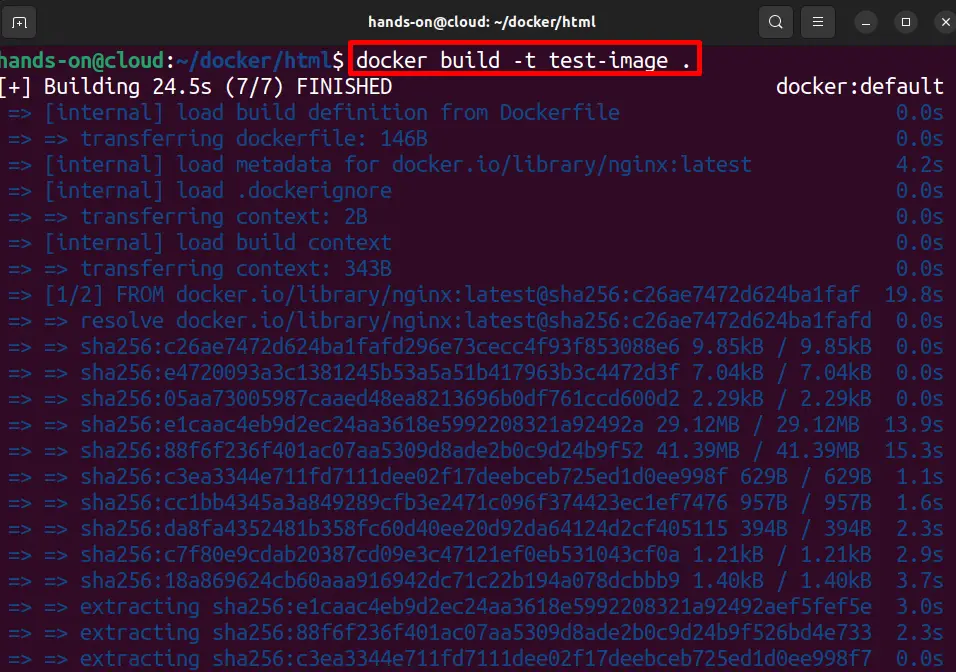
Step 5: Generate Image
Next, generate the container snapshot (image) through the mentioned command:
docker build -t test-image .Here, the “-t” option sets the name of the image. For instance, we have created “test-image”:
Step 6: Verification
For confirmation, list down the Docker images and check if “test-image” is created or not:
docker imagesThe output displays that we have created the images successfully:

This is how the user can create a new image in Docker. To execute the image to dockerize the application, follow the below section.
How to Use a Docker Image?
After creating the Docker image, it is the right time to use it to containerize the application. For this purpose, follow the given instructions:
Step 1: Execute Image
To dockerize the application, execute the container snapshot (image) through the given command:
docker run -d --name html-app test-imageIn the above command, the “-d” option runs the container generated by the image in detached mode, and “–name” sets the name. For instance, we have set the “html-app” container name:

Step 2: Access Application
The application will be exposed on the container’s “localhost” port “80” by default. To access the application from inside the container, first, access the container’s shell through the “docker exec -it <container-name/id> bash” command:
docker exec -it html-app bashAfter that, run the “curl http://localhost:80” command to access the executing application inside the container:
curl http://localhost:80
Bonus Tip: Publish the Container Port on the Host System
In order to access the running application outside the container, the user needs to publish the container port on the host system. For this purpose, simply use the “-p” or “–publish” option:
docker run -d -p 80:80 --name html-app1 test-imageHere, we have published the container port “80” on the host port “80”:

Now, list down the Docker containers:
docker psHere, you can see that container port 80 is executing on the system “0.0.0.0:80” through TCP:

For verification, open the Ubuntu default browser Firefox, navigate to the “http://localhost:80” URL, and check if the application is executing or not:
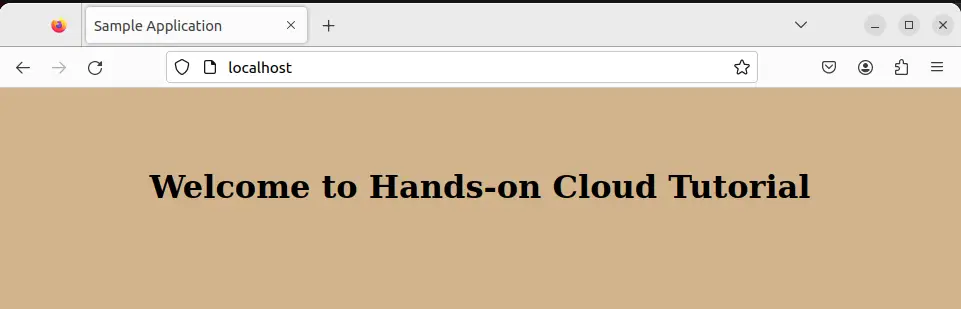
That is all about using a Docker image to dockerize the application. In order to publish or manage the newly created image on the registry, go through the below section.
Bonus Tip: How to Publish Docker Image on Docker Hub
Docker Hub is the official Docker repository or cloud storage that is utilized to publish and manage Docker images. Docker Hubs also provides hundreds of official images for different purposes such as MySQL, Postgres, Ubuntu, Alpine, Nodejs, and many more. To publish the newly generated image on Docker Hub, go through the demonstration below.
Step 1: Log in to Docker Hub
First, log in to the Docker Hub account using the “docker login” command:
docker loginThis will ask you to type the login credentials. Type in the credentials and press Enter:

Step 2: Tag the Newly Generated Image
Next, tag the newly created image with the Docker Hub repository name to publish the image on the correct path. Users can also assign the version to a newly generated image. For this purpose, execute the “docker tag <image> <registry-user-name>/<image-name>:<version>” command:
docker tag test-image dockeruser019/test-image:1.0
For verification, display the Docker images:
docker images
Step 3: Push the Image
After tagging the image in Docker, publish it on the Docker registry through the “docker push <tagged-image-name>” command:
docker push dockeruser019/test-image:1.0
For verification, log in to Docker Hub account from the browser and check if the image is published or not:

The output indicates that we have effectively published the newly generated image on Docker Hub:

That is how the user can generate the image and publish it on the Docker registry.
Conclusion
To create a new image in Docker, first, add the commands or instructions to generate the image in “Dockerfile”. After that, utilize the “docker build -t <new-image-name> .” command to create the snapshot or image of the container. To utilize the image to dockerize the application, execute the “docker run -it <generated-image>” command. To publish the new image on the official registry, first, tag the image, then publish the image through the “docker push <tagged-image-name>” command. We have illustrated the method to create, use, and publish the image in Docker.
