To inspect the containers in Docker, either utilize the “docker container inspect <cont-name or cont-id>” or the “docker inspect <container name>” command. To inspect the Docker image, utilize the “docker image inspect <image-name>” command. Additionally, view the content of the Docker image either by creating and executing the container, saving image content in a tar file, or by using the “docker image history <image name>” command.
How to Inspect Docker Containers?
Docker containers are small packages that encapsulate the application or program along with the source code, packages, and dependencies. These containers are used to deploy and ship the applications in an isolated environment. However, sometimes users may need to inspect the Docker container to access essential information such as container image, Ip address, and Mac address, to find entry points, and many more.
In order to find the detailed summary of the Docker container, the user needs to inspect the container. For this purpose, follow the given steps.
Step 1: Pull the Docker Image
Let’s first create the new container. For instance, we will execute the nginx container to run the nginx server.
To run the Nginx container, first, pull the “nginx” official Docker image from Docker Hub through the “docker pull” command:
docker pull nginx:latest
Step 2: Create and Execute the Container
Next, execute the new container from the “nginx” official image. For this purpose, utilize the given command:
docker run -p 80:80 --name nginx-cont nginx:latestHere, the “-p” option is used to expose the container port on the host machine. The default port of the Nginx server is “80” on Ubuntu. The “–name” flag will set the container name as “nginx-cont”:

For confirmation, list down the running containers through the “docker ps” command:
docker psThe output shows the “nginx-cont” is effectively executing on host port “80”:

Open the browser navigate to “http://localhost:80”, and check if the Nginx server is executing or not:
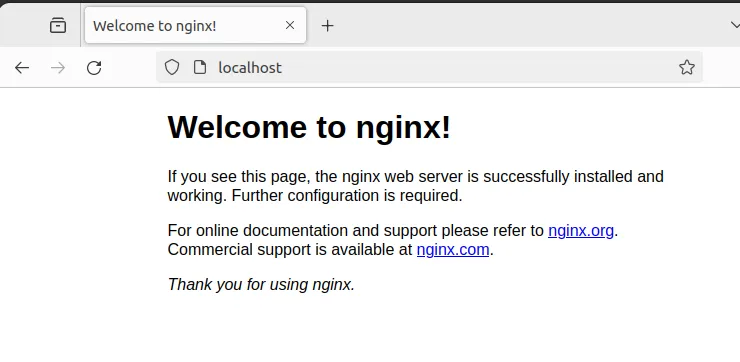
The Nginx server is effectively executing. Now, let’s inspect the container to view the detailed summary.
Step 3: Inspect the Docker Container
To inspect the Docker container and view the detailed information about container configurations, utilize the “docker container inspect <container-name or container-id>” command.
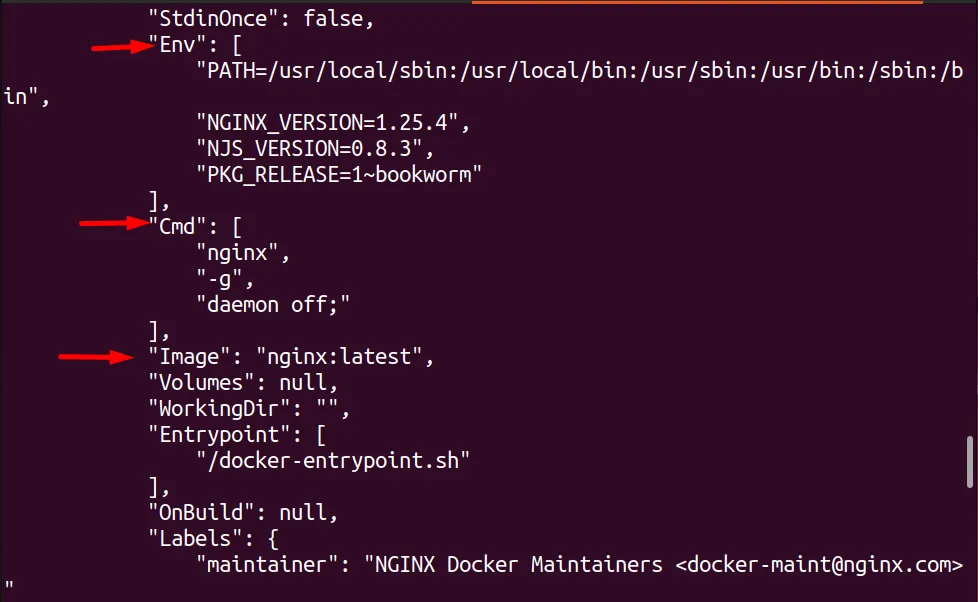
docker container inspect nginx-contHere, you can see the detailed summary of the Docker container such as entry points, arguments, and states of the container:

The summary also includes information about Network mode, port binding, container’s restart policy, and many more:

Users can also view the environment variables, executing points, and image of the container by inspecting the Docker container:
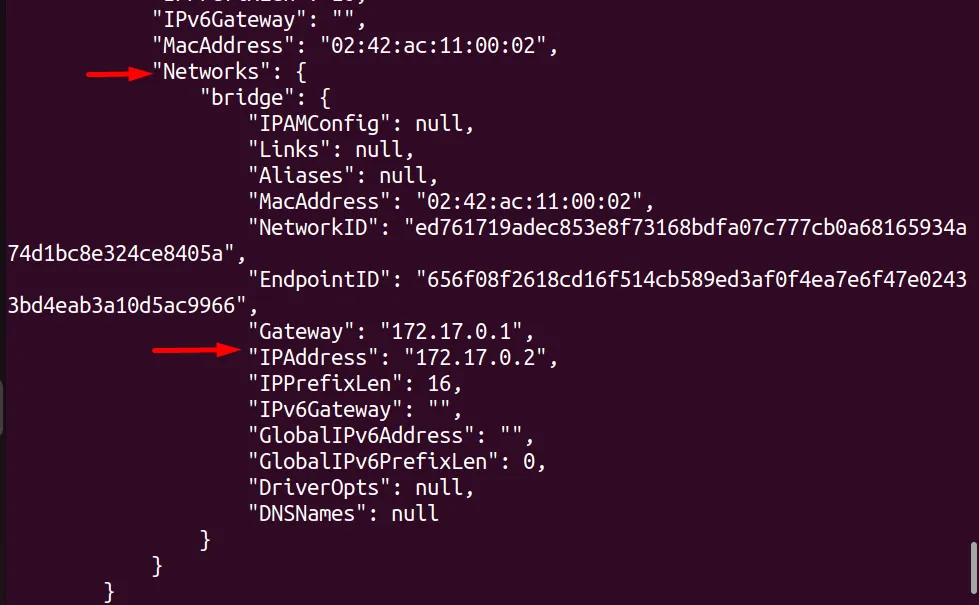
Mostly, developers inspect the containers to access the network information such as MacAddress, IP address, or DNS name:
The alias of the “docker container inspect” command is shown below:
docker inspect <cont-name>Inspect Container in Specific Format
The user can also inspect the container to extract the specific information by specifying the “–format” option. In the below command, we are defining the format to extract only the IP address of the container:
docker inspect --format='{{range .NetworkSettings.Networks}}{{.IPAddress}}{{end}}' nginx-cont
Let’s take another example and access the container blueprint (image) by inspecting the container:
docker inspect --format='{{.Config.Image}}' nginx-contIn the above command, we have defined the format to access the container image only:

That is how the Docker containers can be inspected.
How to Inspect Docker Image
A Docker image is a blueprint of a container that guides how to deploy applications inside an isolated environment. It is simple textual instructions and is also known as a container template. To inspect the Docker image to view the information about container files and applications that will be executed inside the container, simply use the “docker image inspect <image name>” command.
For practical demonstration, go through the given procedure.
Step 1: Create Dockerfile
First, create a working directory to generate a new image to run a simple Python program. For this purpose, we have created and opened the “python” directory:
mkdir pythonHere, the “mkdir” command is used to generate a new directory in our Linux system:
cd pythonThe “cd” is used to open the working directory:

Next, create a new file in the nano editor named “Dockerfile”:
sudo nano Dockerfile
Copy the following snippet in “Dockerfile”. After that, save the file through “CTRL+S” and exit the editor through “CTRL+X”:
FROM ubuntu:latest
RUN apt-get update && apt-get install -y --no-install-recommends \
  && apt-get install -y python3 \
  && rm -rf /var/lib/apt/lists/*
CMD python3 -c "print('Welcome to Hands-on.Cloud tutorial')"
In the given code block, the “FROM” command will define the parent image for the container, the “RUN” command is utilized to execute the commands in the container. Here, we have updated the “Ubuntu” container and installed the “python3” inside the container. The “CMD” command defines the executables of containers. Here, we have specified a simple Python program to print a string on a console or terminal.
Step 2: Create the Docker Image
Now, generate the new image from the above-created Dockerfile. For this purpose, execute the given command:
docker built -t python-img .
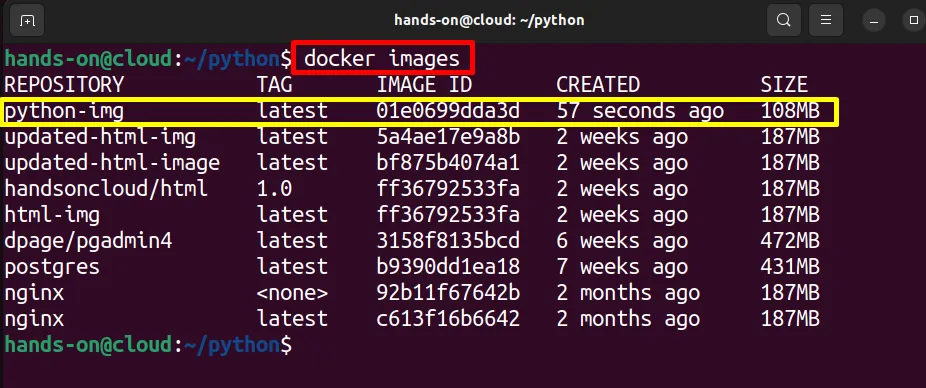
For confirmation, list down the Docker images and check if the image is created or not:
docker imagesThe below result indicates that we have generated the “python-img”:
Step 3: Execute the Image
Now, execute the container from the image to check the working of the container image:
docker run --name py-cont python-img
Here, the container successfully executed the Python program that is specified inside the image.
Step 4: Inspect the Docker Image
Now, inspect the container to view the detailed summary of the Docker image:
docker image inspect python-imgThis information will include the image ID, maintainer, author of the image, hostname, and many more:
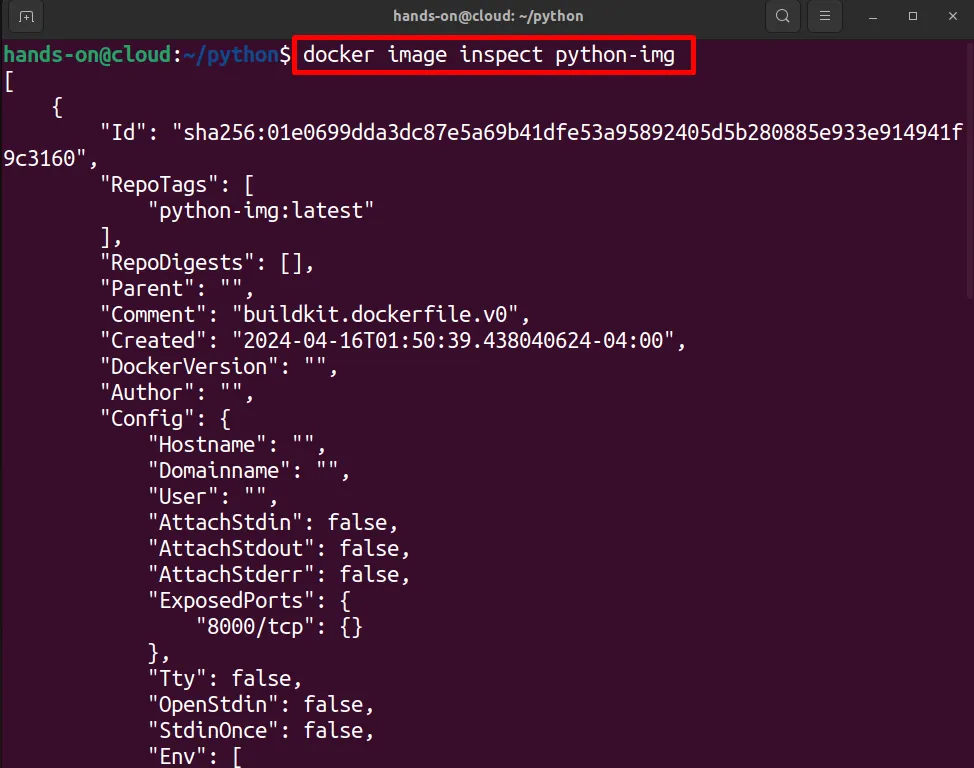
The “Cmd” key will show the executables of the image and program that will execute inside the container:

Users can also inspect the image in a specific format by using the “–format” option as done in the above section.
Bonus Tip: How to View the Content of Docker Image
The image is simply a blueprint or template of a container that guides how to containerize the application inside the container. To view the image content, the user can either create the container and save the container structure in a text file, user can use the “docker image save” command to save the image content in a “tar” file, or view the detailed history of the image through “docker image history” command.
View Image Content by Exporting the Container Data in Text File
To view the content of the container, you need to create the container from the image as done in the above section. After that, expose the container data in a text file through the following command:
docker export py-cont | tar t > py-cont-files.txtThe above command will save the complete container data (file system) in the “py-cont-files.txt” file:

To view the content of the image or container, simply read the file in a nano text editor:
sudo nano py-cont-files.txt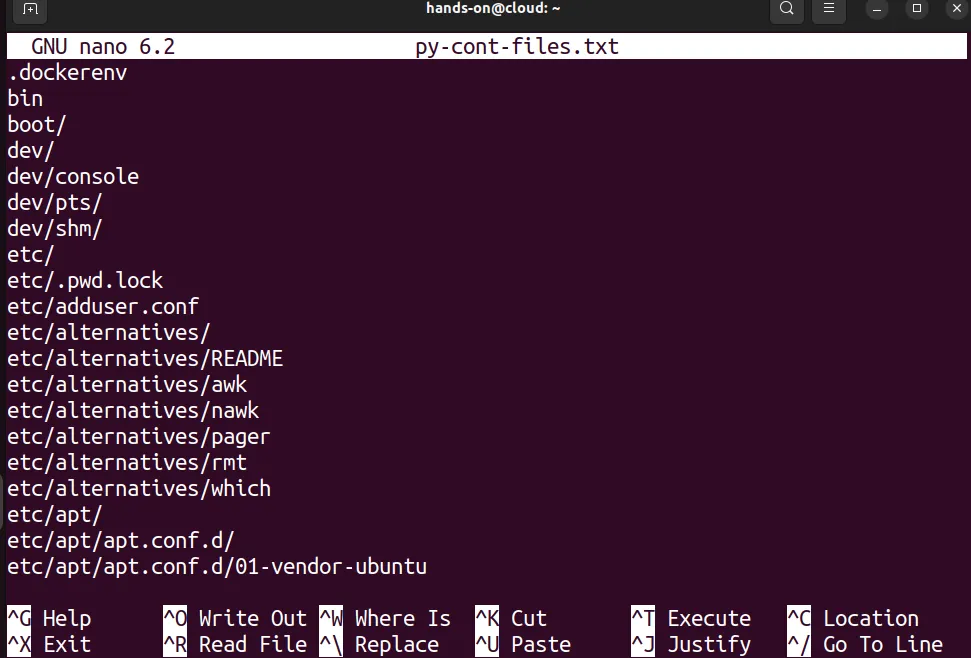
View Image Content by Saving the Image in a “Tar” File
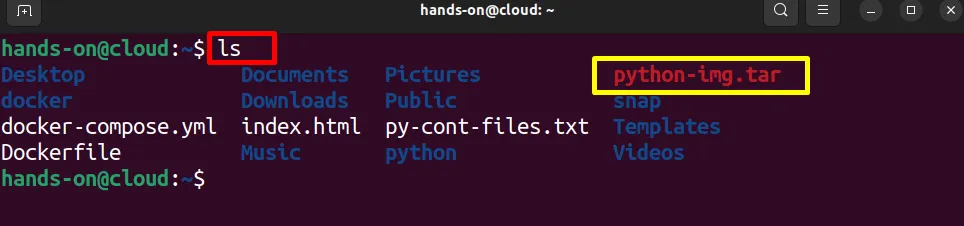
Another possible way to view the image content is to save the container blueprint (image) in the Tar file. To do so, simply execute the “docker image save <image-name> <filename.tar>” command:
docker image save python-img> python-img.tar
For verification, list down the files and directories of the working directory:
lsHere, you can see that the image content is successfully saved in the “python-img.tar” file. Now, simply extract the file and view the image content:
View Image Content by Viewing Image History
Users can also view the image content by viewing the image logs or history. For this purpose, simply utilize the “docker image history <image name>” command:
docker image history python-img
That is all about inspecting Docker containers and images. We have also covered how to view the image content in Docker.
Conclusion
To inspect the Docker container, simply utilize the “docker container inspect <container name>” command. Users can extract specific information from the container through the “–format” option. In order to inspect the image in Docker, utilize the “docker image inspect <image name>” command. Additionally, you can view the image content by creating and exporting the container, saving the image content in the “.tar” file, or viewing the image history through the “docker image history” command. This write-up has discussed the ways to inspect the container and image in Docker and also covered the methods to view the content of the image in Docker.
