To install the Docker Desktop application, the user must enable the WSL and update its version to the latest version which is WSL2 on Windows to execute the Linux containers. The installation procedure of Docker on Mac is straightforward but needs a system-compatible installer. On Linux, the user must have KVM virtualization support for Docker Desktop installation.
What is Docker Desktop Application
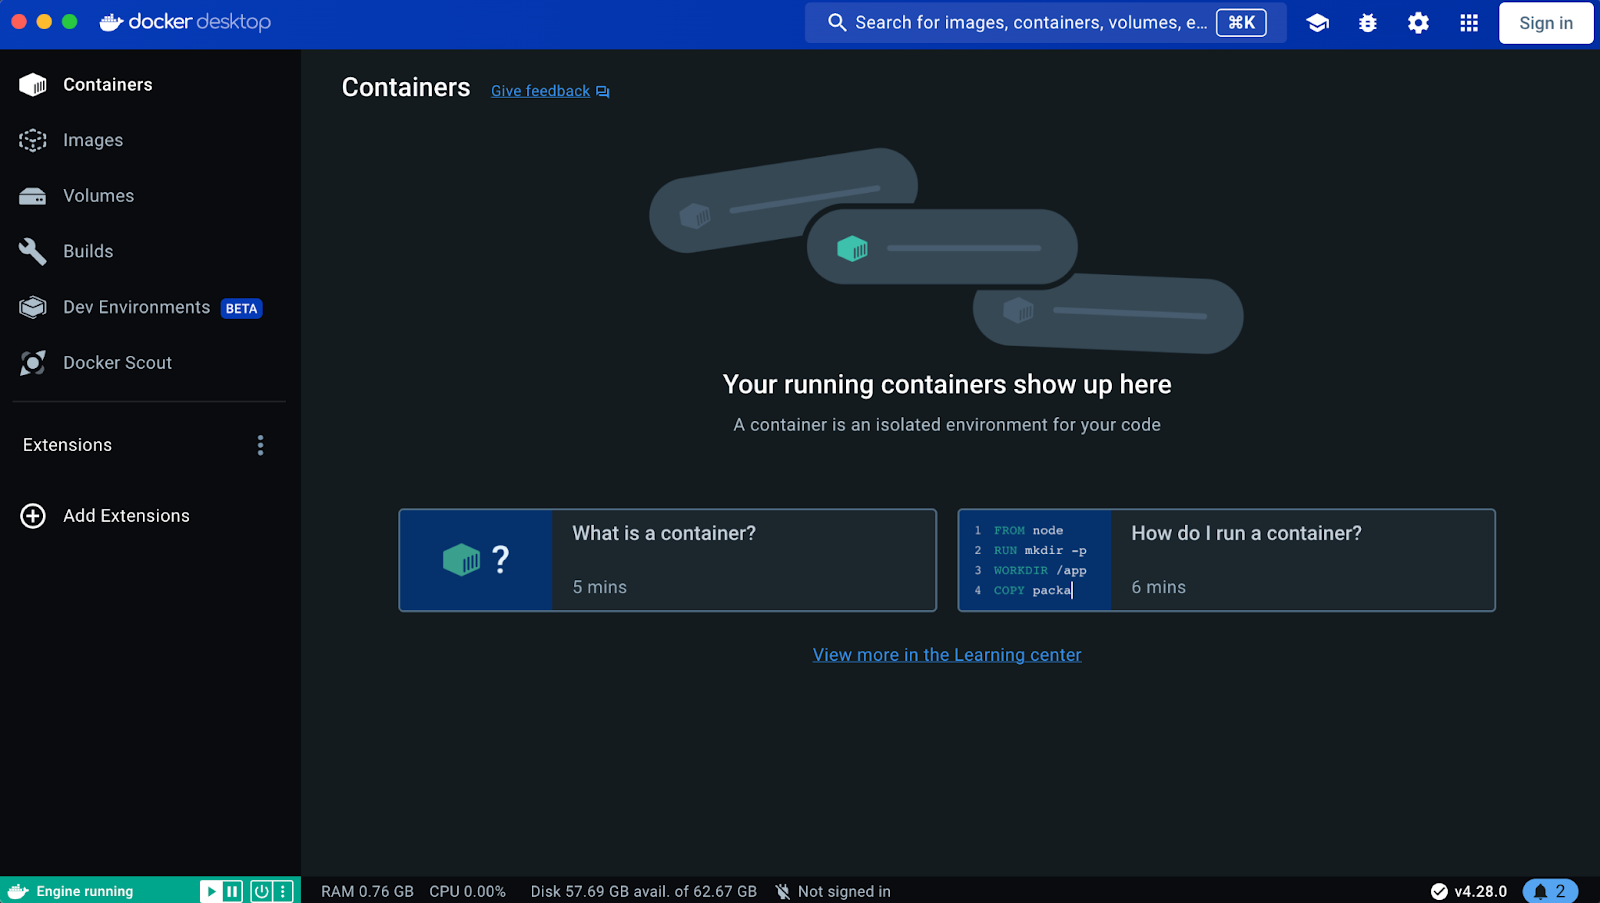
The Docker Desktop app is a GUI version derived from the Docker community edition. It is almost supported by all major platforms and operating systems. It is used to manage the container, images, Docker volume, and many other Docker elements in a user-friendly way. Users can monitor the image builds, Docker containers, and external volumes through desktop applications.
However, Docker CLI is mostly used to manage, create, and execute applications inside containers. Therefore, Docker desktop installation contains different packages such as Docker CLI, Docker Compose, and Docker Buildx plugins. Unlike Docker on Linux, by installing the Docker Desktop app only, the user will get all essential Docker plugins and tools automatically.
Let’s understand the procedure to install the Docker Desktop application on Windows, macOS, and Linux in the sections below.
How to Install Docker Desktop Application on Windows
Windows is a GUI-based operating system. So, users can use the Docker Desktop application to directly interact with Docker components to deploy the application inside the containers. To install the Docker Desktop application on Windows, go through the following instructions:
- Prerequisites
- Enable WSL2 on Windows
- Install Docker Desktop on Windows
Prerequisites
To install the Docker Desktop application on Windows, the user must fulfill the following prerequisites:
- Install and Enable WSL2
- Windows 11 64-bit and on Windows 10 at least the minimum requirement is Pro or Home 21H2 (build 19044) or higher.
Install and Enable WSL2 on Windows
The latest version of WSL must be enabled on the system to run the Docker Desktop application. By default, Docker Desktop executes the Linux container. Therefore, to execute the Linux container on Windows, “Windows Subsystem For Linux (WSL)” must be required. However, users can switch to Windows containers as well in the Docker Desktop app.
However, Windows 11 already has the latest version of WSL. However, Windows 10 users may be required to upgrade the WSL. To enable and upgrade the WSL to the latest version, follow the below demonstration:
Step 1: Run PowerShell
Open the Windows Powershell with administrator rights via the “Startup” menu:

Step 2: Enable WSL on Windows
Next, enable the WSL windows feature through the given command. This will allow us to run Linux containers on Windows:
dism.exe /online /enable-feature /featurename:Microsoft-Windows-Subsystem-Linux /all /norestart
Step 3: Turn on Virtual Machine Platform Feature
In the next step, enable the virtual machine platform Windows feature using the mentioned command:
dism.exe /online /enable-feature /featurename:VirtualMachinePlatform /all /norestart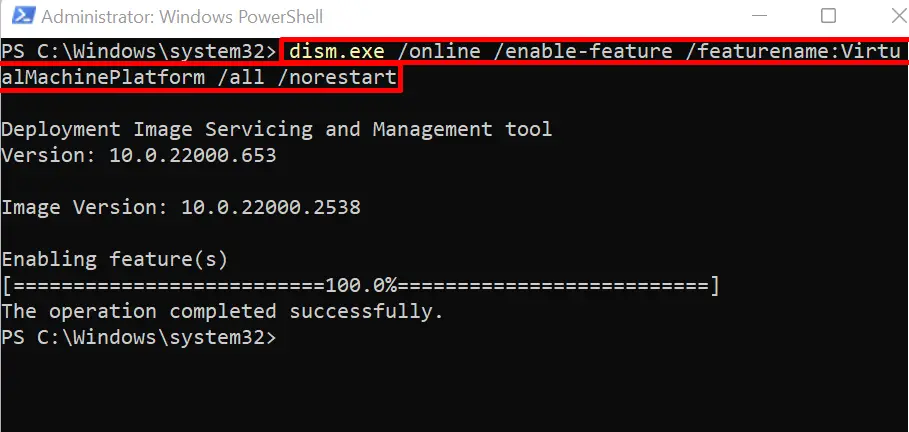
Step 4: Upgrade WSL to Latest Version
Now, download the WSL update “.msi” file that will be used to update the installed WSL version. For this purpose, hit the provided link. This file will be automatically saved into the Downloads folder.
Open the Downloads folder and double-click on the file to execute it:

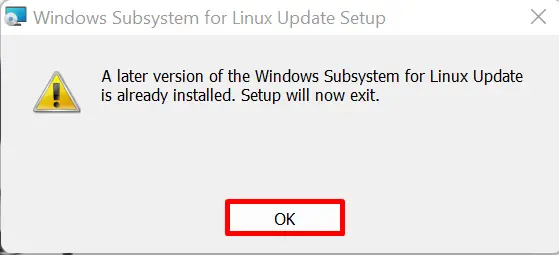
This will start upgrading the WSL to the latest version. After upgrading the WSL, hit the “OK” button:
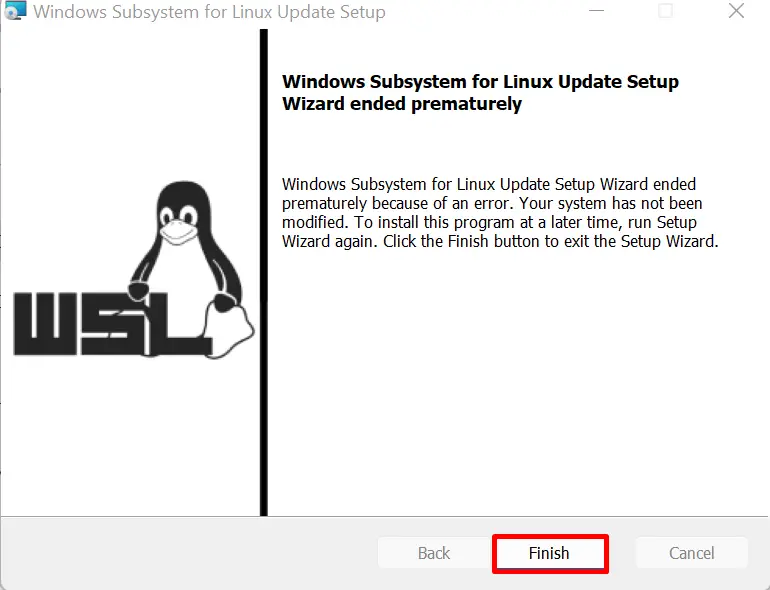
To exit the WSL Update setup, press the “Finish” button:
Step 5: Set Default Version
To set the default version of WSL as “WSL2”, execute the mentioned command in the terminal:
wsl --set-default-version 2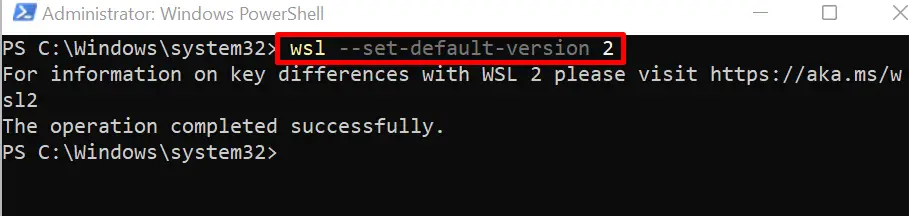
After setting up WSL 2 on Windows, now you proceed to the Docker Desktop installation process.
Install Docker Desktop on Windows
To install the Docker Desktop application on Windows after fulfilling the prerequisite, go through the given steps.
Step 1: Download Docker Desktop Installer
First, open the Docker official site and click on the “Docker Desktop of Windows” button to download the Docker Desktop installer:

Step 2: Install Docker
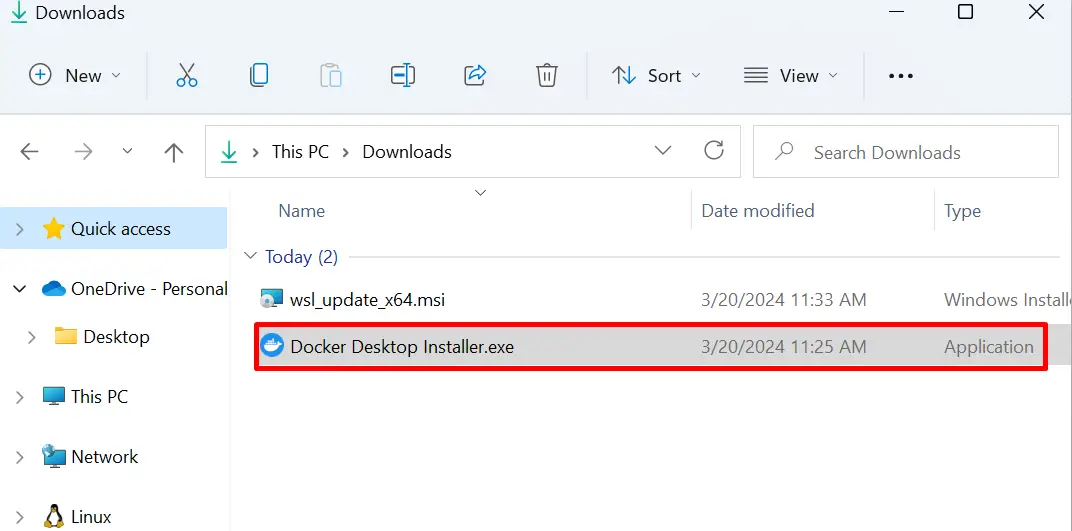
Next, open the Downloads folder, or the directory where the installer is downloaded. Double-click on the installer to start installing the Docker Desktop application:
Step 3: Install Docker Desktop Application
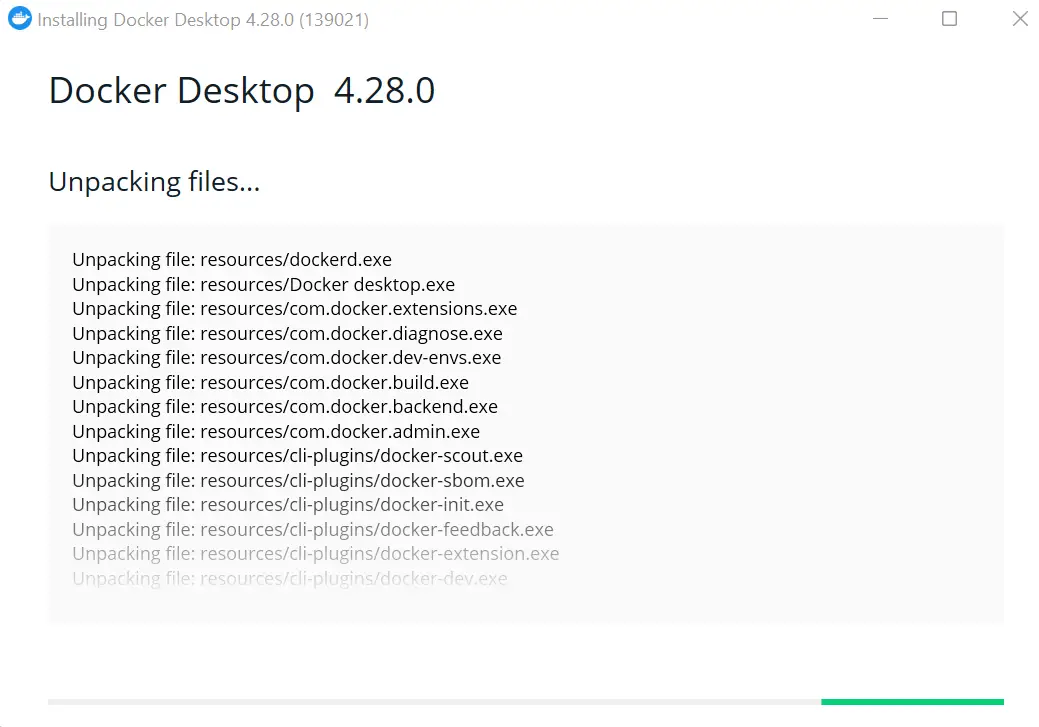
From the “Installing Docker Desktop” wizard, mark the “Use WSL 2 instead of Hyper-V” checkbox to use WSL2 and press the “Ok” button. Here, we do not want to create the Docker Desktop shortcut on the desktop:

This will start installing the Docker Desktop Application on Windows:
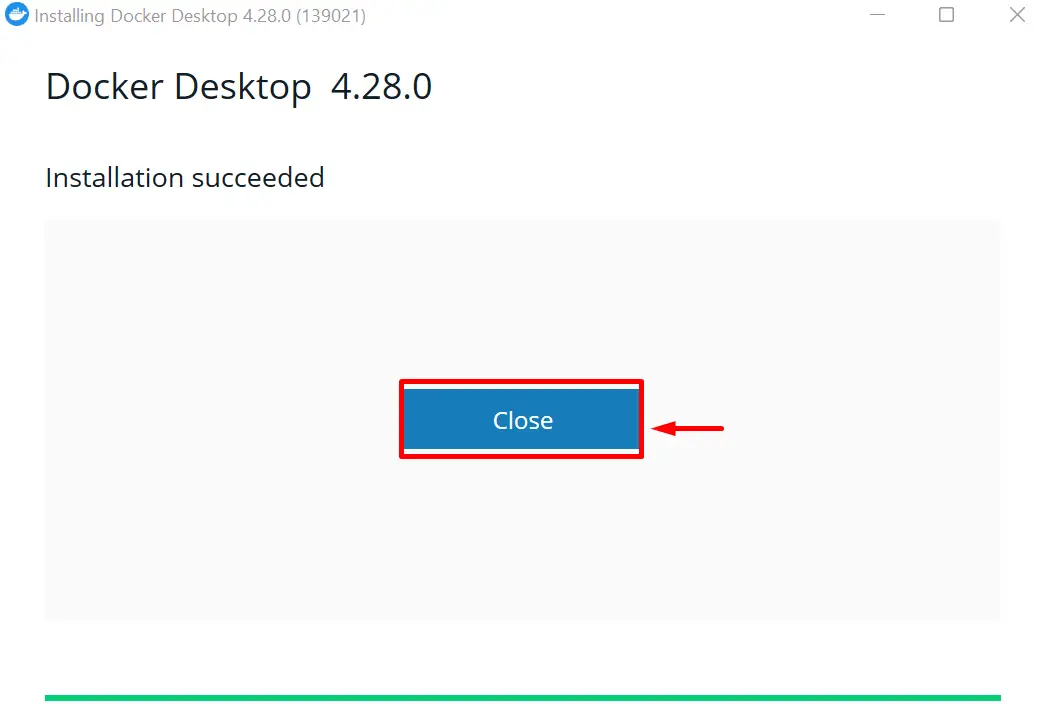
Now, close the installer wizard by pressing the “Close” button:
Step 4: Launch Docker Desktop Application
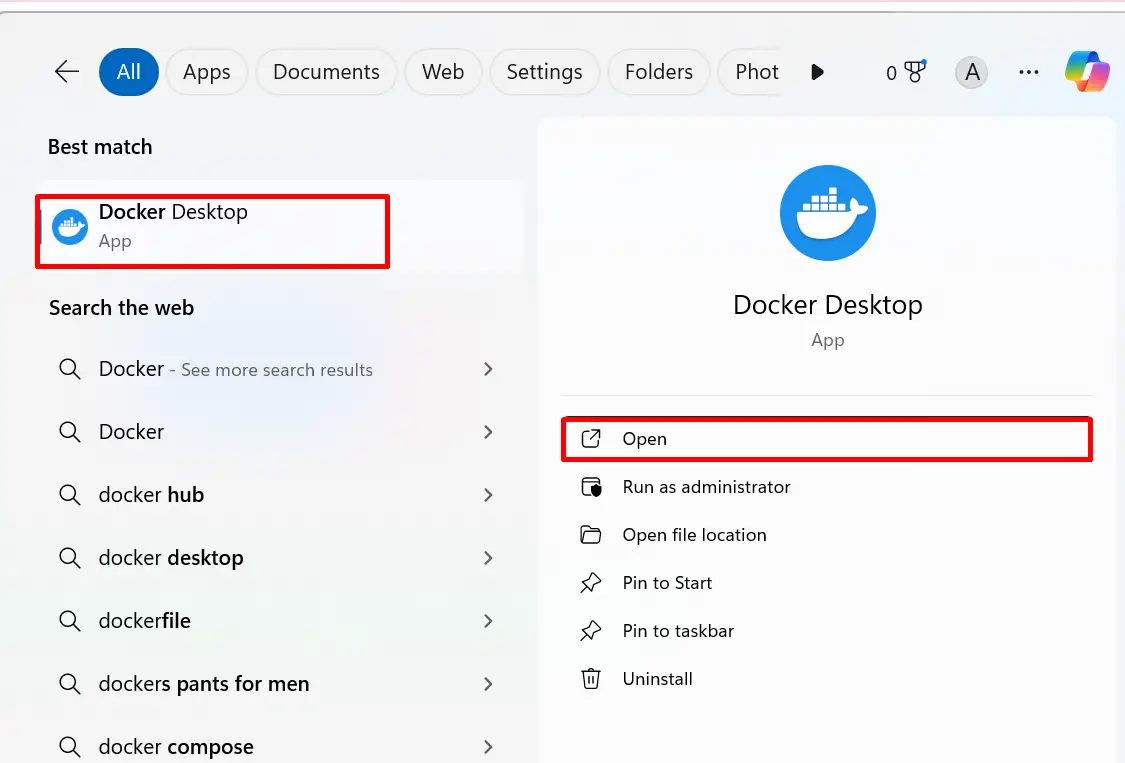
After installing the Docker Desktop application, launch it via the Windows “Startup” menu:
Step 4: Accept Docker Terms and Agreements
To continue using the Docker application, accept the legal terms and agreements by hitting the “Accept” button:

Now, skip the survey by hitting the “Skip survey” button:

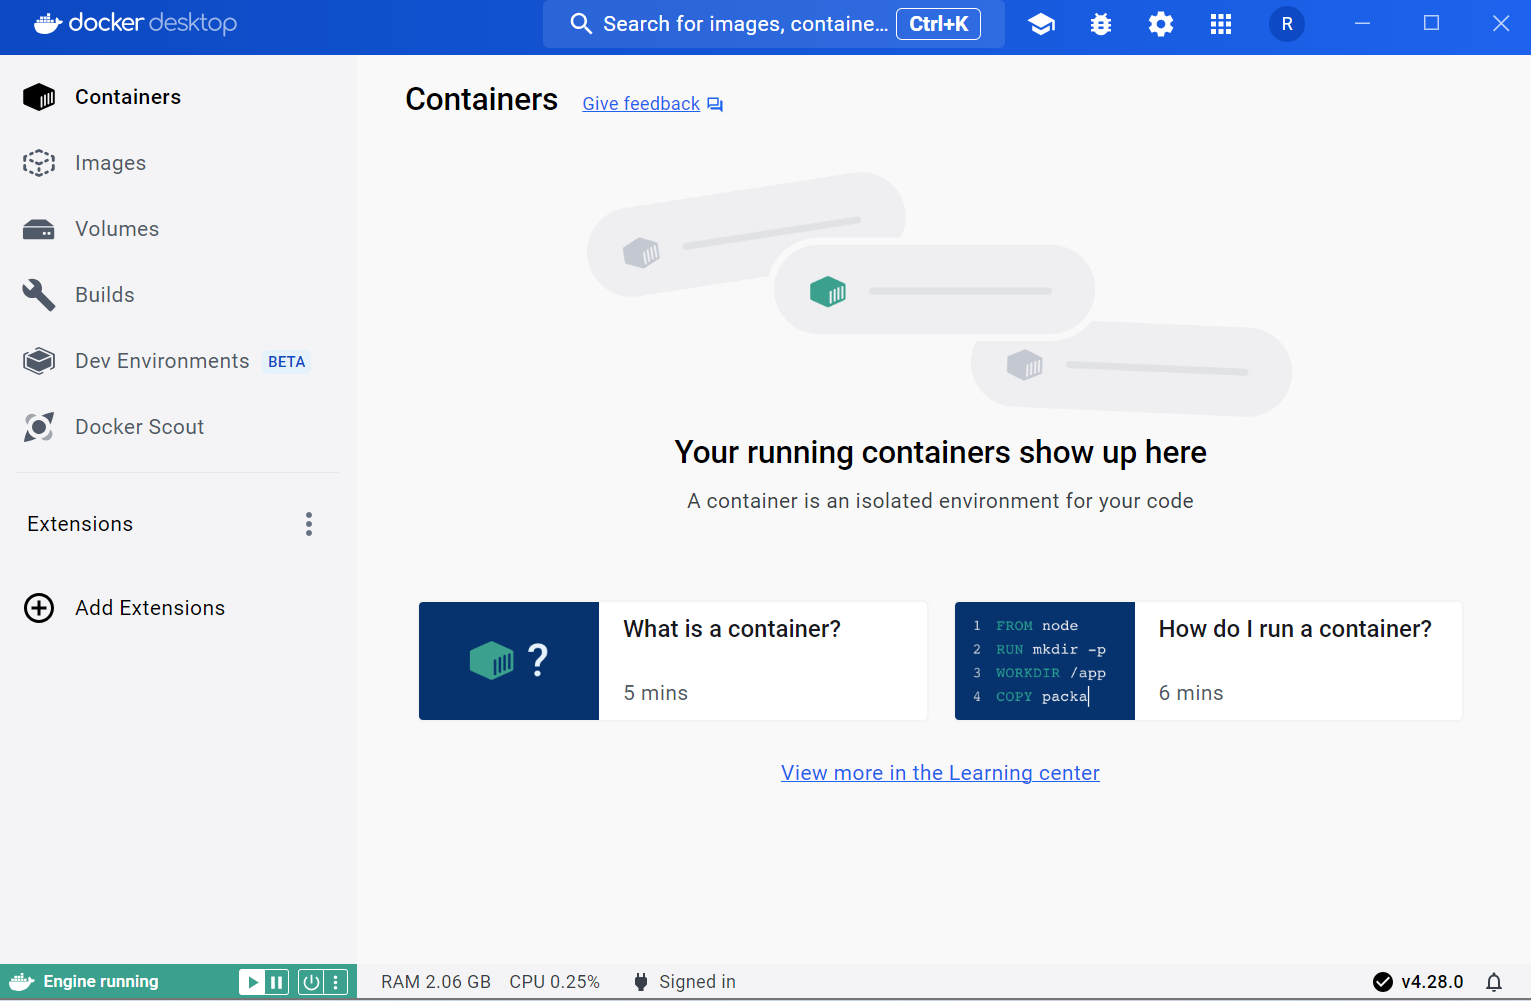
The below output indicates that we have effectively installed the Docker Desktop application on Windows:
Step 6: Verification
Docker Desktop application contains essential packages along with applications such as Docker CLI, Docker compose, and Docker Buildx plugin. To check the Docker version from the command line, run the “docker version” command:
docker versionThe below output indicates that we have installed the Docker Desktop version “4.28.0” and Docker Engine version “25.0.3”:

Let’s move ahead toward the next section to install the Docker desktop app on Mac.
How to Install Docker Desktop Application on MacOS
The Docker desktop application is supported by the only recent version of macOS. To use the Docker Desktop on an older version of Mac, you need to install Docker Desktop version “4.9.1”.
To install Docker Desktop on the latest MacOS, go through the following steps:
Step 1: Download “Docker.dmg” File
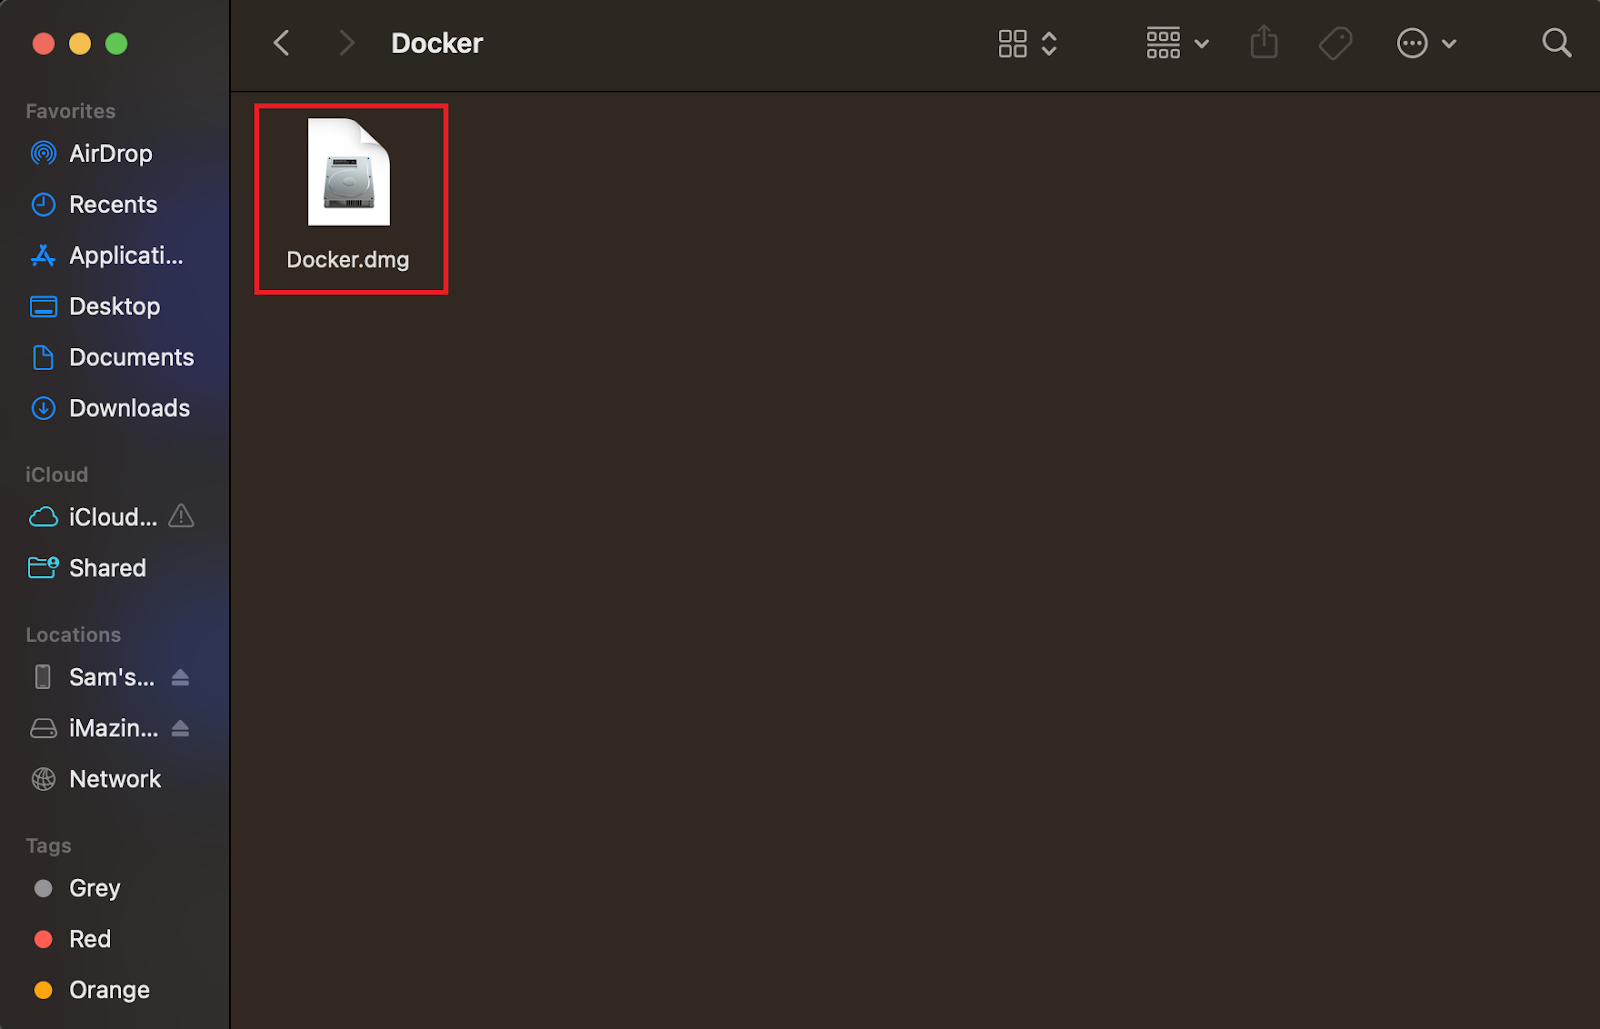
First, download the Docker “.dmg” file according to your system specification. Here, we have downloaded the “Docker.dmg” file for Mac (Apple silicon):

Here, you can see we have Downloaded the “Docker.dmg” file. Now, execute the file to start installing the Docker Desktop application:
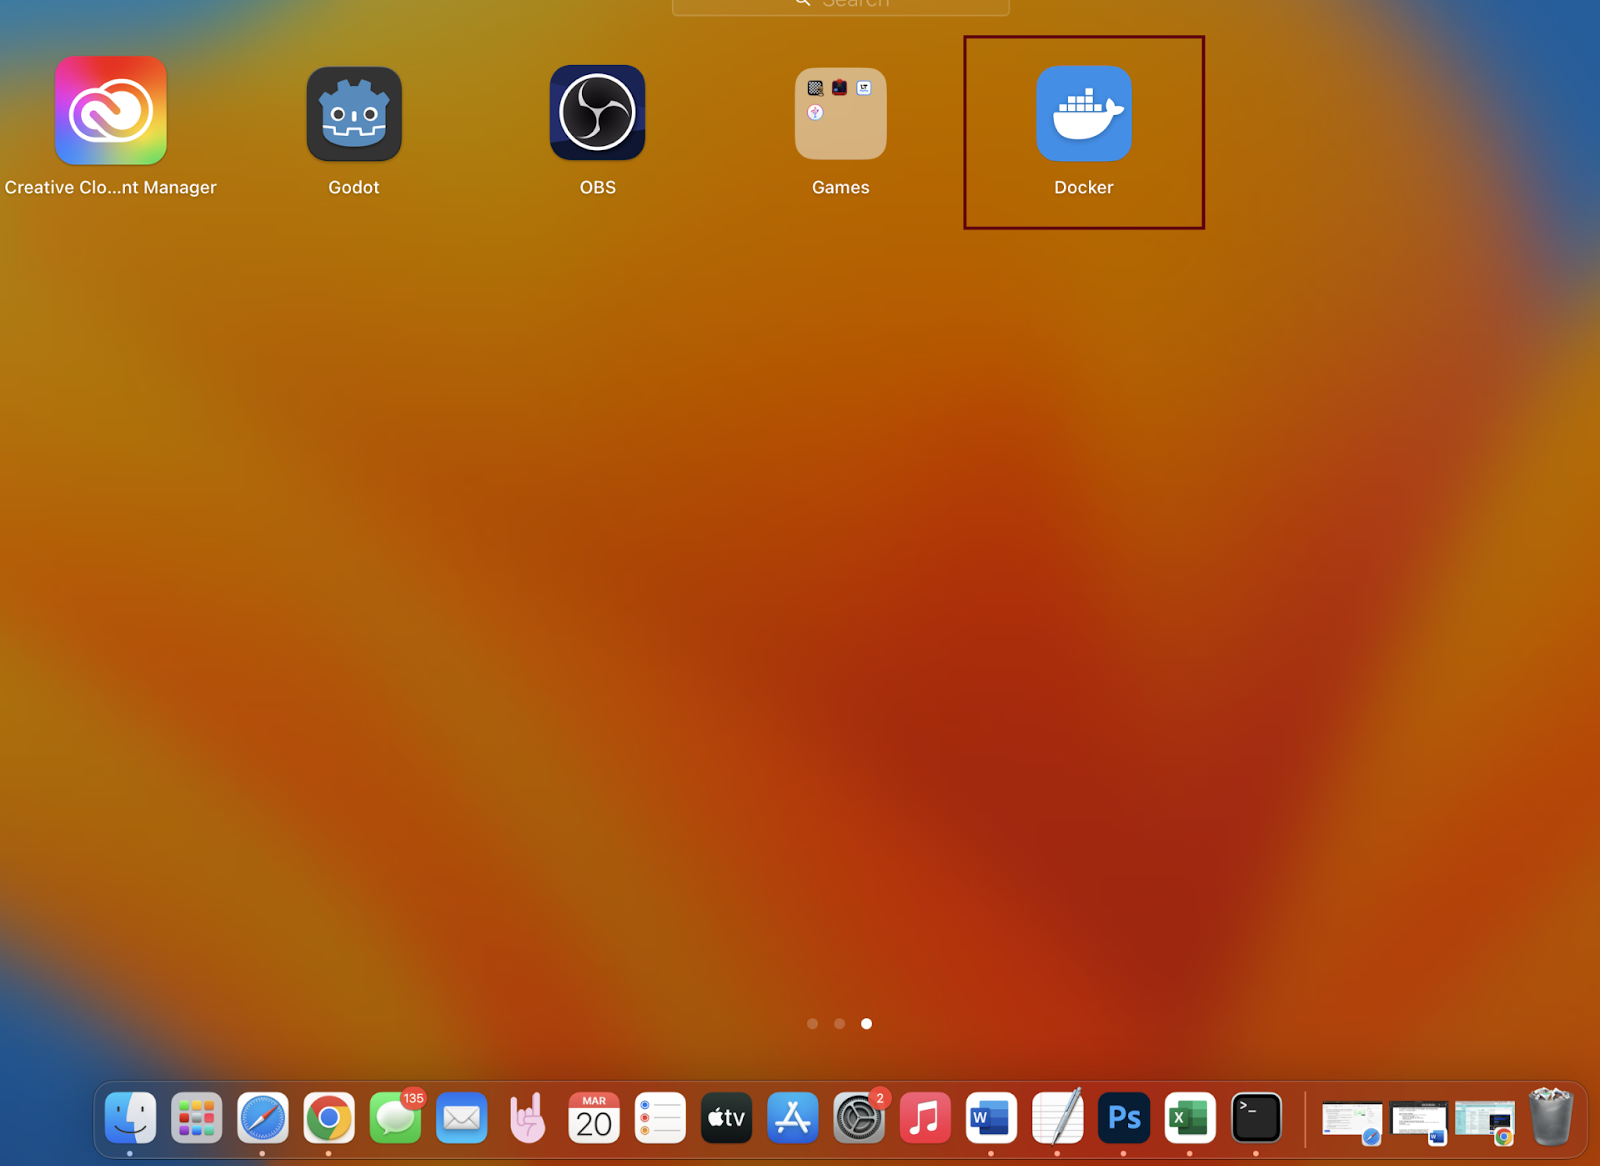
Step 2: Drag Docker to Applications
To install the Docker Desktop app on Mac, drag the Docker icon to the “Application” folder:

Now, wait for the Docker Desktop installation to be completed.
Step 3: Launch Docker
After that, launch the Docker Desktop either from the Desktop or from the Applications folder:
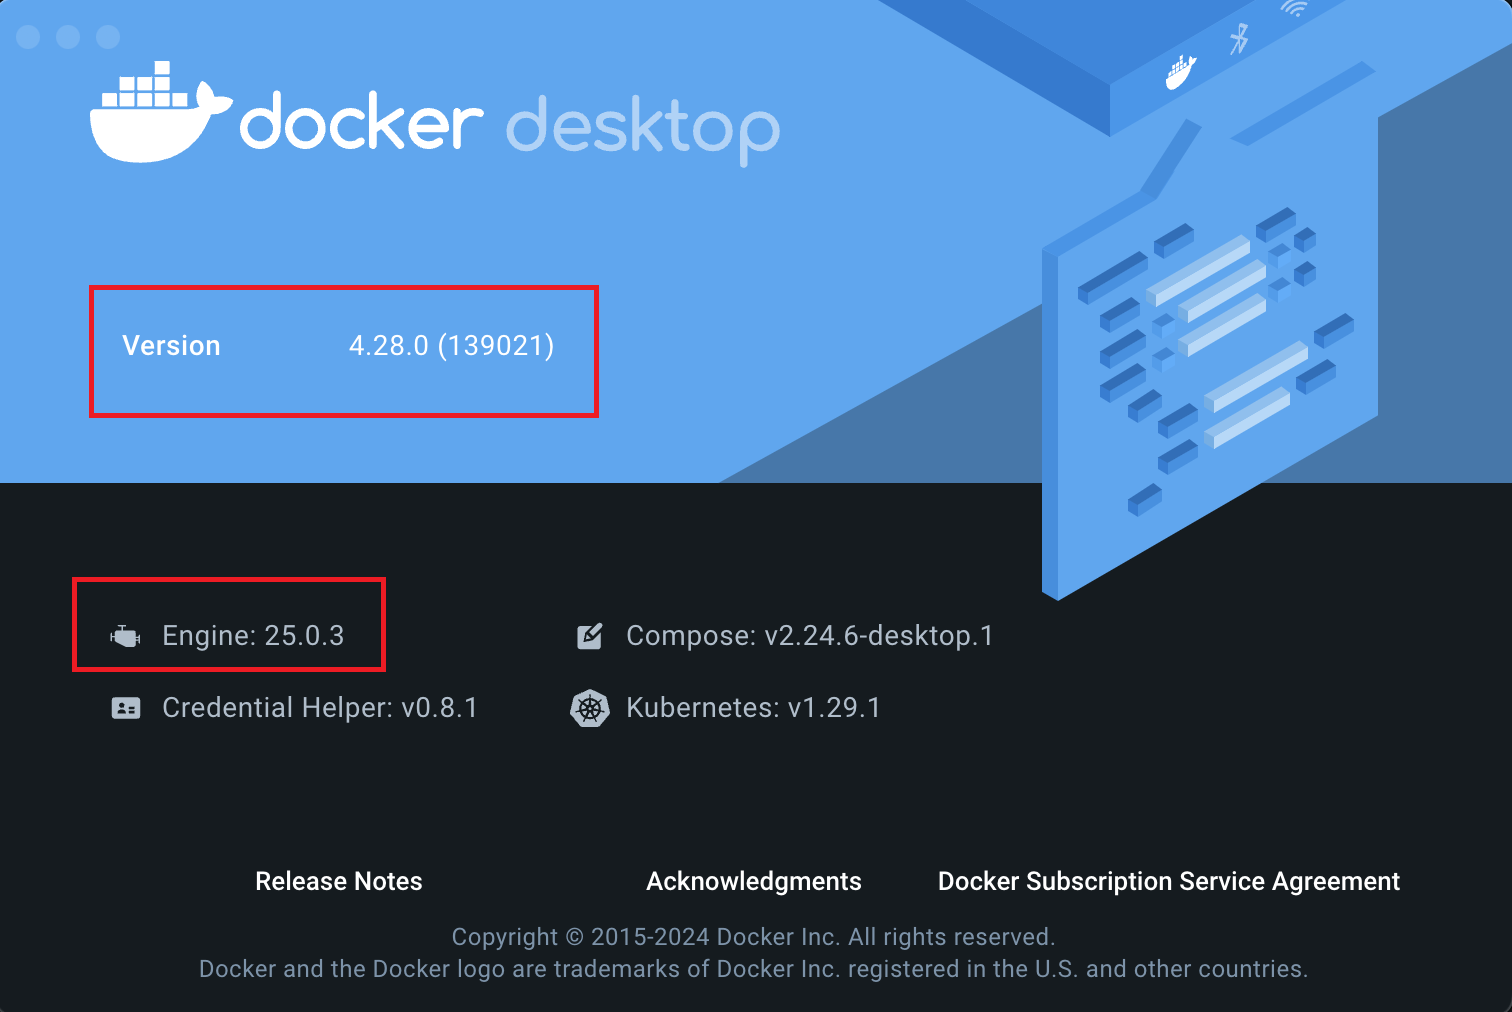
Now accept the Docker License terms and agreement by hitting the “I agree” button and start using the Docker Desktop app. The below output shows the Docker Desktop installed version and Docker Engine version:
Now, the user can start playing with different Docker Components such as Docker Containers, Images, and Volumes as shown in the left pane:
Let’s move forward toward the next section to install Docker Desktop applications on Linux.
How to Install Docker Desktop Application on Linux
On Linux, the Docker Desktop application can be executed by enabling virtualization (KVM). However, Docker Desktop does not support nested virtualization. So, it is recommended to use Docker Desktop natively on Linux distribution instead of Linux virtual machines.
Additionally, Docker Desktop on Linux runs on the virtual machine. So, the containers and images that are generated and executed through the Docker engine (Docker) can not be saved and accessible on the Docker Desktop application.
To install the Docker Desktop application on Linux, follow the listed instructions:
- System Requirements
- Enable Virtualization Support on Linux
- Install Docker Desktop Application on Linux
System Requirements
To install Docker Desktop natively on Linux distribution, the user must fulfill the following system requirements:
- 64-bit Linux Kernel
- Virtualization Supported CPU
- KVM Support
- QEMU Latest Version
- GNOME Desktop Environment
Enable Virtualization Support on Linux
On Linux, the KVM is merged with the Linux kernel. It is a virtualization module that enables the kernel to function as a hypervisor. It is used to execute virtual machines on Linux. On system start, the KVM module automatically loaded to support virtualization. However, to load the KVM module manually to enable virtual support on Linux, follow the below demonstration.
Step 1: Load Module Manually
To load the KVM modules on Linux, execute the “modprobe kvm” command:
sudo modprobe kvmTo manually load the selective or specific module according to system specifications, utilize the “modprobe kvm_<process>” command:
sudo modprobe kvm_intel sudo modprobe kvm_amdStep 2: List the KVM Modules
Next, verify that the KVM modules are loaded or not through the mentioned command. This will list down all modules that belong to kvm:
lsmod | grep kvmStep 3: Add User to KVM Group
Now, add the current Linux user to the KVM group through the below command to access the KVM device:
sudo usermod -aG kvm $USERNow, when the user directly tries to install the Docker Desktop application, the user can directly access the KVM device to run the Docker Desktop app in the VM.
Install Docker Desktop Application on Linux
To install the Docker Desktop application on Linux, the following procedure will be used:
Step 1: Install Gnome Terminal
First, install the “gnome-terminal” package on Linux through the given command:
sudo apt install gnome-terminal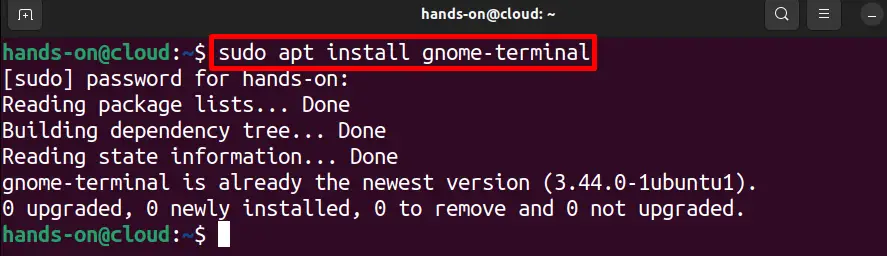
Step 2: Download Docker Desktop .deb File
Download the newest version of the Docker Desktop “.deb” file through the attached link. By default, the “.deb” file will be stored in the “Downloads” directory as shown below:
cd \Downloads
ls
Step 3: Update APT Repository
Update the APT repository of Ubuntu through the “apt update” command:
sudo apt update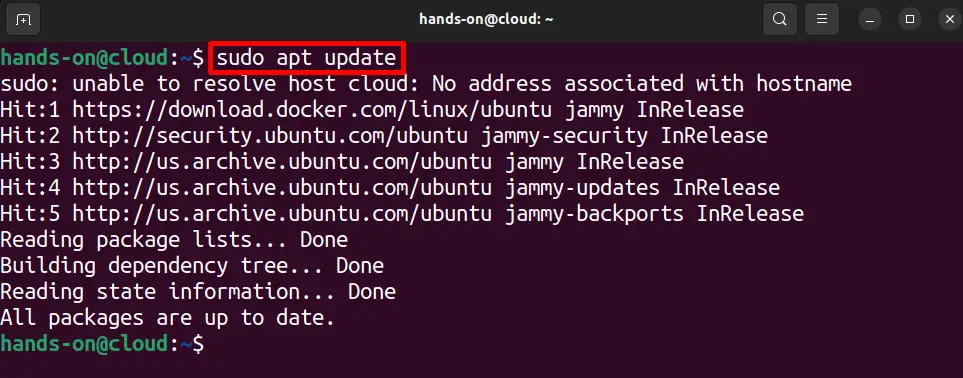
Step 4: Install Docker Desktop
Next, download the Docker desktop application by utilizing the “apt install ./<path-to-docker-desktop-<version>-<arch>.deb” file:
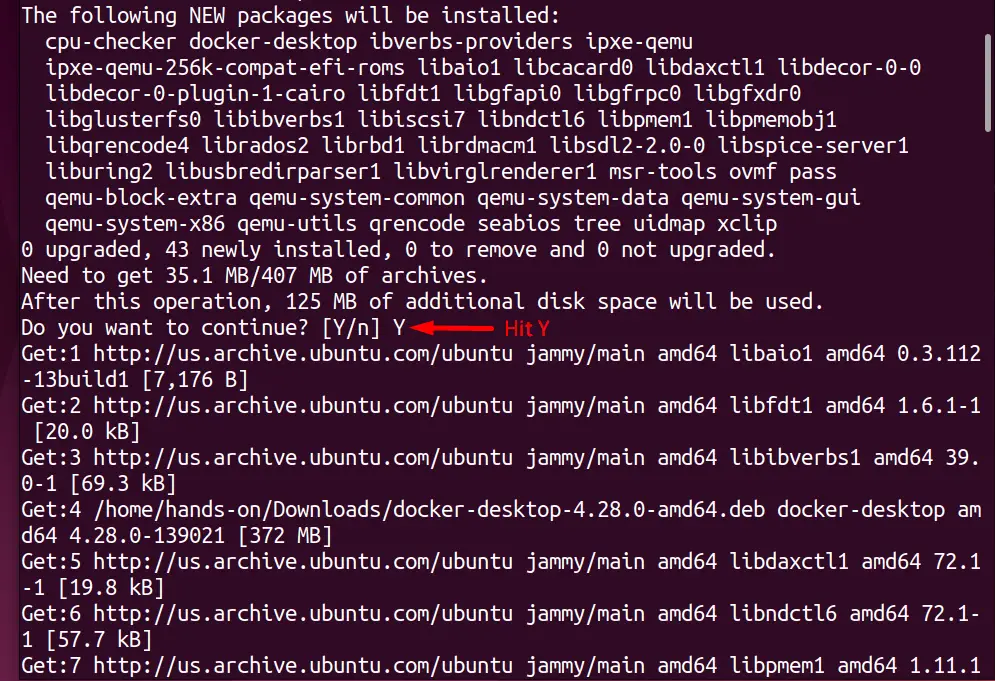
sudo apt install ./Downloads/docker-desktop-4.28.0-amd64.deb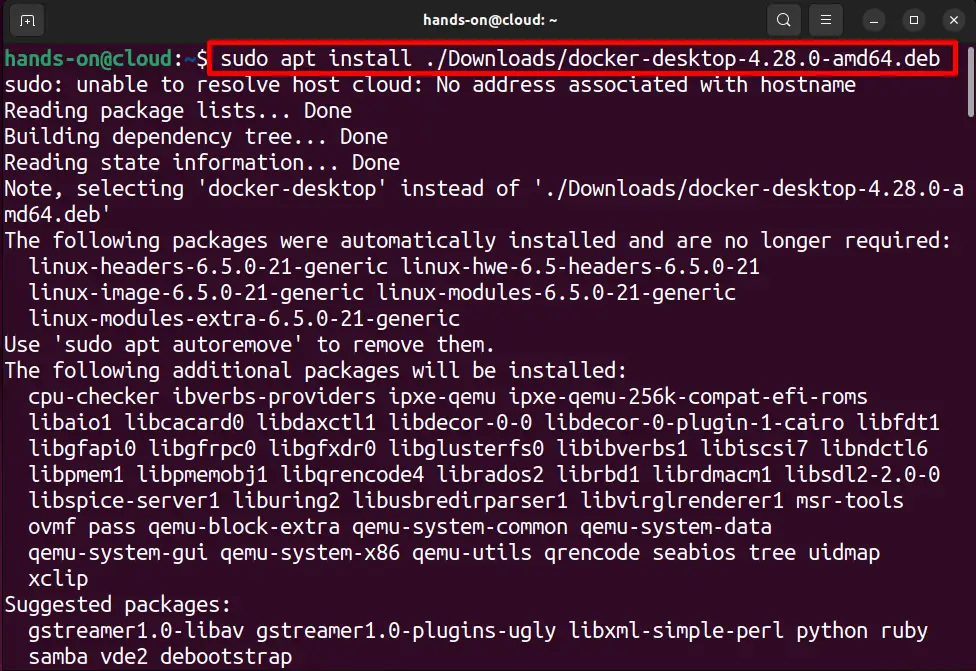
To permit the process to use extra disk space to install the Docker Desktop application, hit “Y”:
This will install the Docker Desktop application. Users can launch and use the Docker Desktop application from Ubuntu’s activity menu:

Note: We have installed the Docker Desktop application on the Ubuntu virtual machine. To run Docker Desktop on an Ubuntu virtual machine, you have to install and use the application on Linux natively.
We have covered the methods to install the Docker Desktop application on Windows, Mac, and Linux OS.
Conclusion
To install the Docker Desktop application on Windows, first, enable and upgrade the WSL Windows features. Then, download the installer of the application to install the Docker Desktop. On Mac, first, download the “Docker.dmg” file according to the system model. Then, execute the file and drag the Docker app icon to the “Applications” directory to install the Docker Desktop app. On Linux, first, you need to enable the KVM virtual support. After that, download the Docker Desktop “.deb” file and execute the “apt install ./<path-to-docker-desktop-<version>-<arch>.deb” command. This write-up has provided the techniques to install the Docker Desktop application on all major (Windows, Mac, Linux) operating systems.
