Docker is a well-liked containerization tool that effectively manages and runs applications in isolated packages. These light, small executable packages are known as Containers. Containers replace virtual machines that use OS-level virtualization. Docker containers are more portable, easy to manage, and secure than VMs.
Using Docker, users can build, deploy, and share applications inside the containers. Containers encapsulate the application, source code, and essential dependencies. This will also make the application more portable and easily installed on any system without depending on the installed OS.
APT Repository
Ubuntu APT repository is a Linux repository that contains Ubuntu packages and their index files. To install Docker through the APT repository in Ubuntu, follow the steps given.
Step 1: Update Ubuntu
First, launch the terminal through the “CTRL+ALT+T” key. Then, update the Ubuntu repository using the “apt update” command:
sudo apt update

Here, “8” packages are required to be upgraded. To upgrade the Ubuntu packages, run the “apt upgrade” command with the “sudo” keyword:
sudo apt upgrade
Step 2: Install Essential Dependencies
Now, install the essential packages and dependencies that are required to install and use Docker. To do so, follow the below command:
sudo apt install ca-certificates curl gnupg lsb-releaseIn the above command, the “lsb-release” utility will be used to access the OS details while adding Docker to the repository:

Step 3: Import Docker GPG Key
Now, import the Docker gpg key that verifies the authenticity of Docker. It will also integrate the Docker packages into the system. For this purpose, run the mentioned command:
curl -fsSL https://download.docker.com/linux/ubuntu/gpg | sudo gpg --dearmor -o /usr/share/keyrings/docker-archive-keyring.gpg
Step 4: Add Docker to the APT Repository
Next, add the Docker repository to the Ubuntu apt repository by executing the given snippet in the terminal. In the mentioned command, you can see “lsb_release” is used to fetch the information about installed Ubuntu:
echo "deb [arch=$(dpkg --print-architecture) signed-by=/usr/share/keyrings/docker-archive-keyring.gpg] https://download.docker.com/linux/ubuntu $(lsb_release -cs) stable" | sudo tee /etc/apt/sources.list.d/docker.list > /dev/null![echo "deb [arch=$(dpkg --print-architecture) signed-by=/usr/share/keyrings/docker-archive-keyring.gpg] https://download.docker.com/linux/ubuntu $(lsb_release -cs) stable" | sudo tee /etc/apt/sources.list.d/docker.list > /dev/null](https://hands-on.cloud/wp-content/uploads/2024/03/image-29.png)
Users can also add the OS information manually. Here are some commands that are used to add Docker to the APT repository in various Ubuntu releases.
For Ubuntu 22.04 (Jammy Release)
echo "deb [arch=amd64 signed-by=/etc/apt/keyrings/docker.gpg] https://download.docker.com/linux/ubuntu jammy stable" |sudo tee /etc/apt/sources.list.d/docker.list > /dev/nullFor Ubuntu 22.10 (Kinetic Release)
echo "deb [arch=amd64 signed-by=/etc/apt/keyrings/docker.gpg] https://download.docker.com/linux/ubuntu kinetic stable" | sudo tee /etc/apt/sources.list.d/docker.list > /dev/nullUbuntu 23.04 (Lunar Lobster)
echo "deb [arch=amd64 signed-by=/etc/apt/keyrings/docker.gpg] https://download.docker.com/linux/ubuntu lunar stable" | sudo tee /etc/apt/sources.list.d/docker.list > /dev/nullUbuntu 23.10 (Mantic Minotaur)
echo "deb [arch=amd64 signed-by=/etc/apt/keyrings/docker.gpg] https://download.docker.com/linux/ubuntu mantic stable" | sudo tee /etc/apt/sources.list.d/docker.list > /dev/nullThese above-mentioned commands are used to add the Docker to specified Ubuntu releases.
Step 5: Update Ubuntu
After adding the Docker repository to the system, update Ubuntu to save the changes:
sudo apt update
Step 6: Install Docker
Now, completely install the Docker on the system by installing the following packages:
- docker-ce: It is the community edition Docker engine
- docker-ce-cli: it is the community edition Docker engine command line
- containerd.io: Container runtime used by Docker
- docker-buildx-plugin: Docker plugin utilized to extend build capabilities
- docker-compose: Docker plugin that is used to run multiple container applications:
sudo apt install docker-ce docker-ce-cli containerd.io docker-buildx-plugin docker-compose-plugin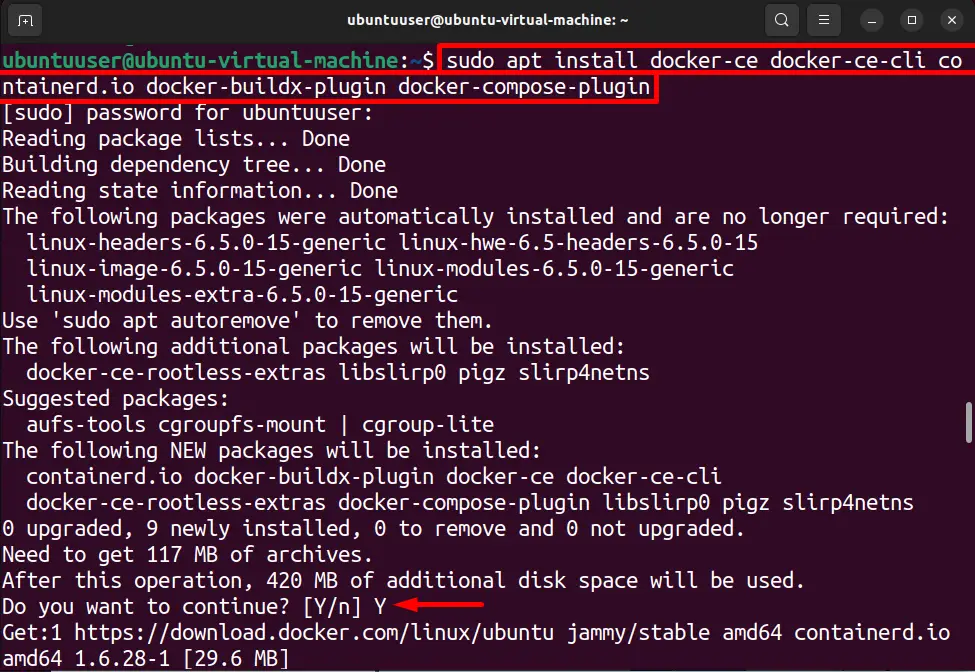
Step 7: Check Status
After installing the Docker engine, check if Docker is running on the system or not:
sudo systemctl status dockerHere, we have effectively installed and run Docker on Ubuntu 22.04:

Step 8: Run Container
Now, run the demo container to check if Docker is working well or not. To do so, run the Docker “hello-world” image:
sudo docker run hello-world
The above-given method will install the latest release of Docker. To install a Docker’s specific version, or to install Docker manually through the “.deb” file, follow the below section.
Manual Installation
To install Docker manually on Ubuntu using the “.deb” file, look at the below steps.
Step 1: Download Docker’s .deb Files
Open Docker’s official package repository using the attached link. After that, navigate to the “jammy” Ubuntu release option. User can select any other release according to their system specification:

Next, navigate to the “pool” directory:

Now, get the “.deb” package files for stable release by clicking on the “stable” option:

Now, download the “.deb” packages according to system architecture. Here, for Ubuntu 22.04, we will use “amd64/” files:

Now, download the “containerd.io”, “docker-ce”, “docker-ce-cli”, “docker-buildx-plugin”, and “docker-compose-plugin” from the provided list.
Here, to install the latest version of Docker, we have downloaded the latest container runtime package file “containerd.io_1.6.28-1_amd64.deb”:

Here, we have downloaded the latest “docker-ce_25.0.3-1~ubuntu.22.04~jammy_amd64.deb” version of community edition of the Docker engine. Similarly, we have downloaded the latest version of “docker-ce-cli”, “docker-buildx-plugin”, and “docker-compose-plugin”:

Here, we have effectively downloaded the “.deb” files of all essential packages that will be used to install Docker on Ubuntu. By default, all downloaded files will be saved in the Ubuntu “Downloads” directory:

Step 2: Navigate to Downloads
To install the Docker packages completely through “.deb” files, open the directory where “.deb” files are downloaded through the “cd” command. After that, utilize the “ls” command to list the files and folder of the opened directory:
cd \Downloads
ls
The given output shows that we have effectively downloaded the “.deb” files of Docker packages:

Step 3: Install Docker and Essential Plugins
Now, install the Docker engine and its essential plugins through the below command. Here, replace the “<version>” and “<arch>” according to the downloaded “.deb” files:
sudo dpkg -i ./containerd.io_<version>_<arch>.deb \
./docker-ce_<version>_<arch>.deb \
./docker-ce-cli_<version>_<arch>.deb \
./docker-buildx-plugin_<version>_<arch>.deb \
./docker-compose-plugin_<version>_<arch>.deb
Step 4: Start Docker Service
Now, start the Docker engine by starting the Docker service. For this purpose, run the “service docker start” command with sudo rights:
sudo service docker start
Step 5: Check Docker Info
Now, view the Docker info through the “docker info” command:
sudo docker infoThe output shows detailed information about Docker engines such as Docker engine version, buildx version, stats for Docker containers, images, and many more:

The above output shows that we have effectively installed Docker on Ubuntu 22.04. But you can notice that, to run the “docker” command, the user needs to have root privileges.
Add User To The Docker Group
After installing Docker, the user may want to use the “docker” command without “sudo” or root privileges. But, while running the “docker” command directly, the user may encounter a “permission denied” error as shown below:

To resolve the stated issue, the user needs to add the current Ubuntu user to the Docker group.
Step 1: Add Docker to the User
To use the Docker command without the “sudo” keyword, the user must add the current user to the Docker group. For this purpose, run the following command:
sudo usermod -aG docker ${USER}In the above command, the user can also specify the username in place of the “${USER}” variable:

Step 2: Run Docker Command
Now, run the “docker run” command without using “sudo” and check if the problem is fixed or not:
docker run hello-worldHere, we have effectively used the “docker” command and run the “hello-world” Docker image without using “sudo”:

How to Use and Manage Images in Docker
Images are one of the key components of Docker that are utilized to deploy the Docker containers. Basically, these are the simple instructions that guide the container on how to deploy the application. Images are also known as snapshots or templates of Docker containers. To manage and use the Docker images, check out the given sections.
Log in to the Docker Registry
Docker officially provides the Docker Hub registry to publish and manage the Docker image. Users can also create and use private registers as well. To log in to the Docker Hub registry to publish or manage images on it, run the “docker login” command:
docker loginThe command will ask you to enter the username and password credentials. Provide the username and password of the Docker Hub registry and hit Enter. Here, you can see we have effectively signed into Docker Hub from the command line:

Note: To create a Docker Hub account, the user can create it from the official Docker Hub page.
Search Image
In order to search any image from Docker Hub official registry, utilize the “docker search <image-name>” command:
docker search alpineHere, we have searched the “alpine” Linux image:

Pull Docker Image
To download the image from Docker Hub, utilize the “docker pull <image-name>” command:
docker pull alpineFor demonstration, we have pulled the “alpine” image:

List Docker Images
In order to display the images, execute the “docker images”. Here, the “-a” option is utilized to view all downloaded images:
docker images -aThe below result shows that currently, we have “alpine” and “hello-world” images:
Run Image to Execute Container
To run the pulled image or any Docker image, utilize the “docker run -it –name <container-name> <image-name>” command:
docker run -it --name alpine-cont alpineHere, “–name” key is utilized to set the container’s name and “-it” key will execute the TTY pseudo shell interactively:

Tag Image
To set the version of your Docker image, or to publish the image on Docker registry, users need to tag the image to push the image to the correct repository. For this purpose, utilize the “docker tag <image> <repository-name>/<image-name>:<image-version>” command:
docker tag alpine dockeruser019/alpine:1.0In the above command, we have tagged the “alpine” image as “dockeruser019/alpine:1.0”. Here, we have set the image version “1.0”:

For confirmation, check if the image is tagged or not by listing the Docker images:
docker images -a
Push Image
In order to publish the image on the Docker Hub registry, utilize the “docker push <tagged-image-name>” command:
docker push dockeruser019/alpine:1.0
Here, you can see we have effectively pushed the image to Docker Hub registry:

Remove Image
In order to remove any image in Docker, run the “docker rmi -f <image-name/image-id>” command. Here, the “-f” option is utilized to remove the image forcefully:
docker rmi -f alpine
That is all about Docker images.
How to Use and Manage Docker Containers?
Docker containers are small, isolated packages that are utilized to create, deploy, and ship the application. To get started with containers in Docker, go through the following demonstration.
Create the Container
Create a new container to deploy the application or OS using the “docker container create <image-name>” command:
docker container create -it --name demo-cont alpineIn the above command, we have deployed Alpine Linux inside the Docker container:

List the Docker Container
To list down or view the container in Docker, user can use “docker ps” command:
docker ps -aHere, “ps” stands for process state and it is used to show the container state:

Start the Container
To start the containerized application, execute the “docker start <container-name / container-id>” command:
docker start demo-cont
Stop the Container
In order to completely stop the executing Docker container, run the “docker stop <container-name / container-id>” command:
docker stop demo-contHere, we have utilized the name to stop the running container:

Remove the Container
If user do not need the containerized application or container anymore, remove the container through “docker rm <container-name / container-id>” command:
docker rm demo-cont
That is all about Docker on Ubuntu.
Conclusion
To install Docker on Ubuntu 22.04, the user can either use the Docker APT repository or manually install it through “.deb” files. To install Docker from APT, first, import the Docker gpg key, then provide the Docker repository to the Ubuntu repository. After that, install the “containerd.io”, “docker-ce”, “docker-ce-cli”, “docker-buildx-plugin”, and “docker-compose-plugin” packages through “sudo apt install” command. This post has also explained how to execute and manage images and containers in Docker.
