To mount a volume in Docker, the user can either use the “–mount” or “-v” option in the “docker run” or “docker container create” command. Users can also create and mount volume in Dockerfile through the “VOLUME” command. In Docker compose, the “volumes” key is utilized to mount a volume with multi-container applications. Let’s dive into the methods to mount a volume with containers in Docker.
What is Docker Volume?
Docker volume is an external storage medium or file system that persists the data generated or used by containers. When the user removes the containers, the saved data will also be removed and cannot be used by any other container. To overcome this problem, the external file system (volume) is mounted with containers. These volumes are independent of container lifecycles and are also used for data backup. To manage and use volume in Docker, follow our detailed guide on “Manage Docker Volume”.
How to Create and Mount Volume in Dockerfile?
To create and mount volume in the Dockerfile, the “VOLUME” command is used. For demonstration, follow the below steps.
Step 1: Create Dockerfile
First, create a file in the nano editor named “Dockerfile”:
sudo nano DockerfileNext, copy the below Dockerfile commands into the file:
FROM nginx:latest
COPY index.html /usr/share/nginx/html/index.html
VOLUME /usr/share/nginx/html/test-vol
EXPOSE 80
ENTRYPOINT ["nginx", "-g", "daemon off;"]
In the above snippet, the “VOLUME” command will generate and mount the “test-vol” when the container is created from the Docker image.
Step 2: Generate Image
In the next step, generate the container blueprint from Dockerfile commands through the “docker build -t <image name>” command:
docker build -t test-img .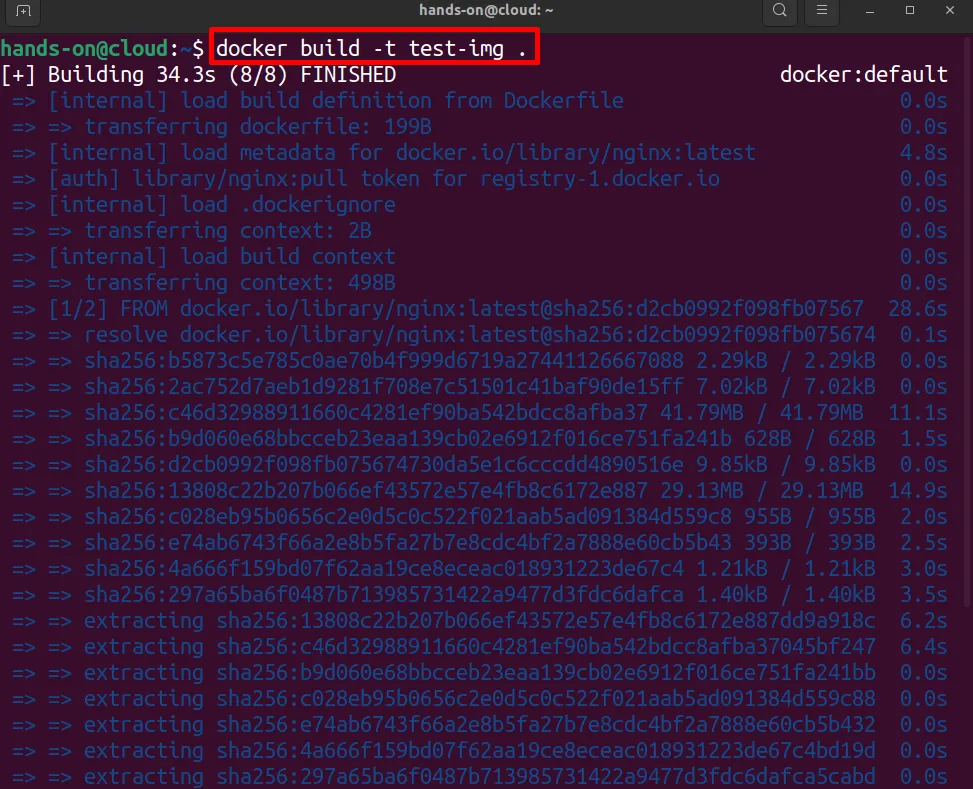
Step 3: Run the Container
After creating the image, create and fire up the container through the mentioned command:
docker run -p 80:80 --name test-cont -d test-imgIn the above command, “-p” will publish the container exposed port on the host system. The “–name” flag will name the container and “-d” executes the container in the background:

Step 4: Open Container Shell
To verify if the “test-vol” is generated and mounted in the Docker container, access the container shell to run the commands inside the container. For this purpose, utilize the “docker exec -it <container name or container id> sh” command:
docker exec -it test-cont sh
Step 5: Verification
To check if the “test-vol” is mounted or not, open the directory where the volume is mounted through the “cd” command:
cd /usr/share/nginx/htmlTo view the files and folder of the opened directory, utilize the “ls” command:
lsThe below result indicates that we have effectively mounted the “test-vol” with the Docker container:

Bonus Tip: Shared the Mounted Volume with Another Container
Let’s use the mounted volume and save some data. Then, we will populate the “test-vol” in another Docker container and check if this volume can be shared with other containers or not.
For this purpose, first, create a file in the “test-vol” volume and then create another container and share the volume of the above-created “test-cont” container with the new container. For illustration, go through the procedure below.
Step 1: Save a File in Volume
Navigate to the mounted volume through the “cd <volume name>” command:
cd test-volCreate a file and save some content or text in it through the “echo” command:
echo "Hands-on Tutorial on Docker Volume">>test.txt
Step 2: Exit Container Shell
Now, exit the “test-cont” container shell using the “exit” command:
exit
Step 3: Create a New Container and Populate the Volume
Now, create another container through the Docker image. For demonstration, we have created a “test-cont2” container through our “html-img” image:
docker run -p 80 --name test-cont2 --volumes-from test-cont -d html-imgIn the above command, the volume is populated in the new container through the “–volumes-from” option. The “volumes-from” option accesses the mounted volume from the existing container and populates it into a new container. In our case, we have accessed the volume from the “test-cont” container and shared it in the “test-cont2” container:

Step 4: Access New Container Shell
To check if the volume is shared in a new container or not, access the container shell of the second container through the “docker exec” command:
docker exec -it test-cont2 shStep 5: Verification
Read the file that is created in the “test-vol” in the above section and check if it is accessible or not. To do so, we have utilized the “cat <path to file.txt>” command:
cat /usr/share/nginx/html/test-vol/test.txtThe given result shows that we have successfully accessed the file that is saved in the first container’s “test-vol” volume which means we have effectively shared the volume of the first container with the new container:

That is how the volume is mounted with the container through the Dockerfile.
How to Mount Volume Using “–mount” in Docker?
Another way to create and mount the volume with the container in Docker is through the “–mount” option. For this purpose, the user first needs to create the volume through the “docker volume create” command. After that, mount the volume with the container using the “–mount” option either in the “docker container create” or “docker run” command.
For the practical demonstration, go through the mentioned steps.
Step 1: Create Docker Volume
Create a new Docker volume through the “docker volume create <vol-name>” command. This volume will be completely managed and operated by Docker:
docker volume create demo-vol
Step 2: List Volume
To check if the volume is created or not, list the volume through the “docker volume ls” command:
docker volume lsThe output displays that we have created the “demo-vol” volume successfully:

Step 3: Run Container and Mount Volume
Now, mount the volume with the container through the given command:
docker run -d -p 80:80 --name html-cont --mount source=demo-vol,target=/usr/share/nginx/html html-imgIn the above command, the “–mount” option is used to mount the volume. This option contains two variables “source” and “target”. The “source” variable defines the source volume which is “demo-vol” and the “target” variable specifies the container point where the volume will be mounted which is “/usr/share/nginx/html”:

Step 4: Verification
To check if the volume is mounted with the Docker container or not, inspect the container by utilizing the “docker inspect <container name>” command:
docker inspect html-cont
From the below pointed “Mounts” key, you can see we have effectively mounted the “demo-vol” volume in the “html-cont” container:

How to Mount Volume Using “-v” in Docker?
In Docker, a developer can mount the external file system with the container through the “-v” option in the “docker run” or “docker container create” command. For demonstration, we will use “demo-vol” which is created in the above section:
Step 1: Create Container and Mount Volume
Create and start the container and mount the volume with the container through the “docker run -v <source volume name>:<path to container> <image name>” command:
docker run -d -p 81:80 --name html-cont1 -v demo-vol:/usr/share/nginx/html html-imgHere, the “-v” option is utilized to mount the Docker volume in the container. In this case, the source volume and target path are specified directly without using any variables:

Step 2: Inspect the Container
For verification, inspect the container and check if the volume is mounted or not:
docker inspect html-cont1
The output below shows that the “demo-vol” has been successfully mounted, and its default type is “volume”:

To save container data on the system directory directly, follow the below section.
Bonus Tip: How to Mount System Directory as Docker Volume in Docker
To share files and directories between the host system and container, or to save container data on the host machine, the user can also mount the system directory as a volume in the container.
Step 1: Mount the System Directory in the Container
First, create and start the container using the “docker run -v <system directory path>:<path to container directory> <image name>” command:
docker run -d -p 80 --name html-cont2 -v .:/usr/share/nginx/html html-imgHere, we have mounted the current working directory as a volume at the container’s path “/usr/share/nginx/html”:

Step 2: Inspect the Container
For confirmation, inspect the container:
docker inspect html-cont2
The below output shows that we have effectively mounted the current working directory of the system at container specified path:

Step 3: Create a File in the System Directory
Let’s check if the data is shared between the system directory or container. For this purpose, create a simple text file in the system’s working directory:
echo "Hands-on Docker Volume">>demo.txt
List the files and folder through the “ls” command:
lsHere, the file is created in the system working directory that is also mounted with the “html-cont2” container:

Step 4: Access the Container Shell
Now, access the container shell to run the commands inside the container. Here, we have opened the “bash” container shell:
docker exec -it html-cont2 bashStep 5: Check if the File is Shared or Not
After that, read the file that is created in the system directory from inside the container through the “cat <path where volume is mounted>” command:
cat /usr/share/nginx/html/demo.txtHere, we have successfully read the from inside the container which means we have effectively shared and mounted the system directory as a volume in the container:

That is how volume can be mounted in Docker.
How to Mount Volume Using Docker Compose?
The Docker compose is a plugin that is utilized to deploy and manage multiple container services or apps. To mount a volume in Docker Compose, the “volumes” key is used to specify the source volume and targeted path where the volume will be mounted. For illustration, check out the following procedure.
Step 1: Create “docker-compose.yml” File
Make a yaml file in any text editor named “docker-compose.yml” file. For this purpose, we have used the “nano” editor:
sudo nano docker-compose.ymlNext, add the below-mentioned code block to the file:
version: "3"
services:
  web-page:
    image: html-img
    volumes:
      - demo-vol:/usr/share/nginx/html
    ports:
      - 80
volumes:
  demo-vol:
    external: true
In the given code block, the “volumes” key is utilized to mount the Docker volume. Here, the source value will be mentioned on the left and the target container path will be on the right of the “:”. For instance, we have mounted “demo-vol” as the source volume and the targeted container path is “/usr/share/nginx/html”.
Step 2: Fire Up the Container
Next, deploy the container through the “docker-compose up” command:
docker-compose up -d
For confirmation, check if the container is running or not through the “docker-compose ps -a” command:
docker-compose ps -a
Step 3: Inspect the Container
Lastly, inspect the docker-compose container through the “docker inspect <container name>” command:
docker inspect hands-on_web-page_1
The given results indicate that we have effectively mounted the “demo-vol” volume with the compose container:

Bonus Tip: How to Mount System Directory as Docker Volume in Docker Compose?
To mount the system directory as a volume in a container to share the data between the host system and the container in docker-compose, go through the following steps:
Step 1: Create “docker-compose.yaml” File
First, create or update a “docker-compose.yml” file. Here, we will update the file that is created in the above section:
version: "3"
services:
  webpage:
    image: html-img
    ports:
      - 80
    volumes:
    - type: bind
      source: .
      target: /usr/share/nginx/html
In the given snippet, the “volumes” key is used to mount the system directory as volume. Here, the “type” will be “bind”, the “source” key will specify the system directory path that you want to bind, and the “target” key will specify the container path where the system directory will be mounted in the container.
Step 2: Run the Compose Container
Now, execute the compose container:
docker-compose up -d
Step 3: Inspect Container for Verification
For confirmation, again inspect the container and check if the system directory is mounted with the compose container or not:
docker inspect hands-on_webpage_1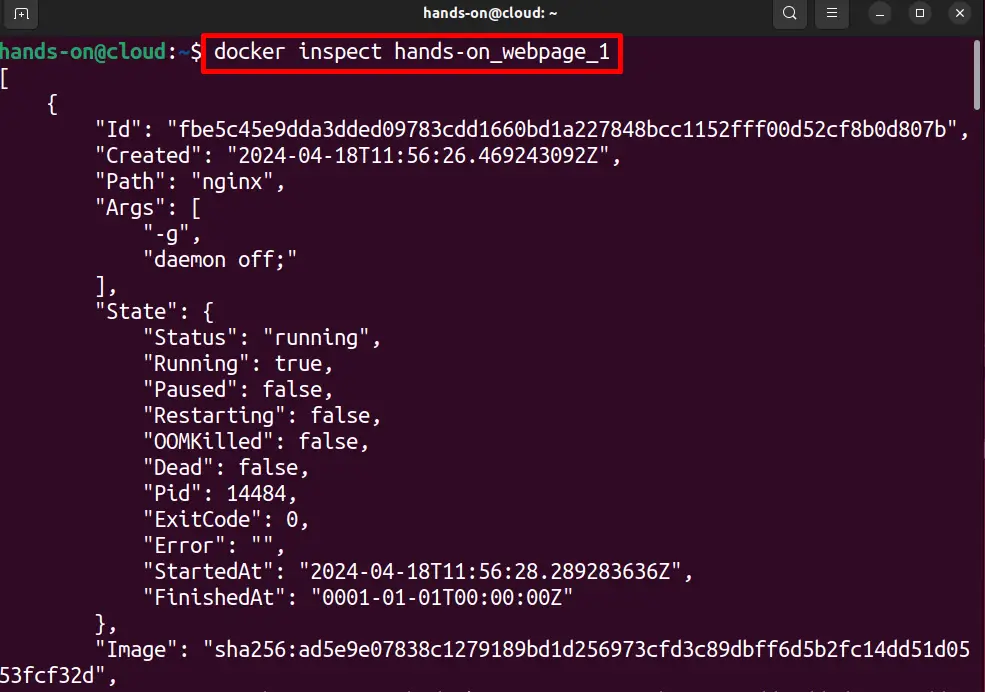
The given output indicates that our system directory is effectively mounted with a compose container on the specified path:

We have covered all the possible ways to mount the volume with the container in Docker.
Conclusion
To mount a volume with a Docker container, different methods are used. In the Dockerfile, the “VOLUME” key is used to mount the volume. In the “docker run” or “docker create” command, the user can either use the “–mount” or “-v” options to mount the volume. In Docker compose, the “volumes” key is used to mount the volume with the multi-container applications. Additionally, the user can also mount the system directory as a volume with the container in Docker. This write-up has demonstrated all the possible ways to mount the volume with the container in Docker.
