Nginx Jupyter Behind A Proxy Setup
This article describes how to configure Jupyter behind Nginx reverse proxy, as such configuration is not very obvious for many people. There are many issues and gists on GitHub, and it is tough to choose the right solution for this problem. Also, you may find many different articles describing how to do it, but most of them are outdated and do not cover CORS configuration well.
As the topic is still trendy, I decided to renew the article and simplify the configuration using my personal experience.
Table of contents
Docker configuration
In this section of the article, we’ll cover the case when you might need to run Jupyter or JupyterHub in a regular Docker environment.
JupyterHub configuration
First, let’s create a folder where we’ll put all our configuration files.
Here’s our final structure:
mkdir docker
tree docker
docker
├── docker-compose.yaml
├── jupyter_notebook_config.py
└── nginx.conf
Docker Compose
To simplify everything, I created docker-compose.yaml, which describes our services:
version: "3.7"
services:
  nginx:
    image: nginx:alpine
    volumes:
      - "./nginx.conf:/etc/nginx/nginx.conf:ro"
    ports:
      - 8080:8080
    links:
      - "jupyterhub"
  jupyterhub:
    image: jupyterhub/jupyterhub
    container_name: jupyterhub
    volumes:
      - "./jupyter_notebook_config.py:/root/.jupyter/jupyter_notebook_config.py:ro"
The Nginx config is straightforward – a simple small Nginx Docker container in front of Jupyterhub.
Both launched from their latest versions.
Nginx configuration
The Nginx service is sitting on port 8080 and listening on port 8080 as well.
VERY IMPORTANT: The config file nginx.conf contains the reverse proxy configuration.
If your Nginx is sitting on a port other than 80 or 443, you need to use the following configuration directive:
proxy_set_header Host $host:$server_port;
For Nginx, which is sitting at default ports, use default configuration:
proxy_set_header Host $host;
If you make a mistake here, you’ll start receiving Blocking Cross Origin API request for /api/contents error messages.
Again, the primary reason for these messages is not equal ports for service binding and export for Nginx containers.
Here’s my nginx.conf for listening on port 8080:
worker_processes 1;
events { worker_connections 1024; }
http {
    sendfile on;
    upstream ml {
        server jupyterhub:8000;
    }
    map $http_upgrade $connection_upgrade {
        default upgrade;
        ''      close;
    }
    server {
        listen 8080;
        location / {
            proxy_pass http://ml;
            proxy_redirect   off;
            proxy_set_header X-Real-IP $remote_addr;
            proxy_set_header Host $host:$server_port;
            proxy_set_header X-Forwarded-For $proxy_add_x_forwarded_for;
            proxy_set_header X-Forwarded-Proto $scheme;
            # websocket headers
            proxy_set_header Upgrade $http_upgrade;
            proxy_set_header Connection $connection_upgrade;
        }
    }
}
Jupyter configuration
For the JupyterHub configuration, we’ll use the following configuration placed to /root/.jupyter/jupyter_notebook_config.py:
# get the config object
c = get_config()
# JupyterHub listen address
c.JupyterHub.hub_ip = '0.0.0.0'
# JupyterHub connect hostname.
# In our case it's 'jupyterhub' by the name of the service from docker-compose.yaml
c.JupyterHub.hub_connect_ip = 'jupyterhub'
# Location for users notebooks
c.Spawner.notebook_dir = '~/'
Launching Nginx Jupyter setup
I had little time to build a new container and/or play with user authentication settings. The main purpose is to provide a solution for Blocking Cross-Origin API requests for /api/contents issues.
So, here’s how you may launch this configuration:
docker-compose up -dConnect to just launched containers and create a user and install the notebook package:
docker exec -it jupyterhub /bin/bash
adduser
pip install notebook
Now you may connect to JupterHub and use your created username and Jupyter notebook password as login credentials.
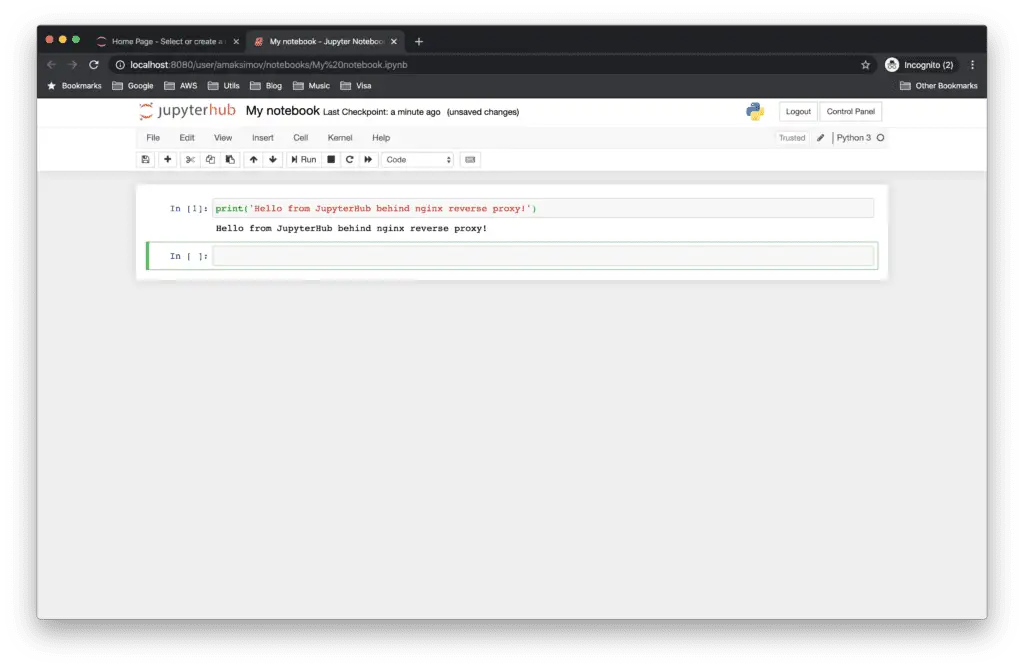
Docker Swarm configuration
In this article section, we’ll cover when you might need to launch Jupyter or the JupyterHub application in a Docker Swarm mode.
Let’s slightly modify our project folder in our local directory:
.
├── .env
├── docker-compose.yaml
├── jupyterhub
│   ├── Dockerfile
│   ├── jupyterhub_config.py
└── nginx
    └── nginx.conf
3 directories, 5 files
Docker Compose (Swarm)
Here’s how our docker-compose.yaml file will look like:
version: "3.7"
services:
  # Configuration for reverse proxy
  nginx:
    image: nginx:alpine
    volumes:
      - "./nginx/nginx.conf:/etc/nginx/nginx.conf:ro"
    ports:
      - 8080:8080
    networks:
      default:
      jupyterhub_network:
        aliases:
          - nginx
  # Configuration for Hub+Proxy
  jupyterhub:
    env_file: .env
    build: jupyterhub
    image: jupyterhub_customized
    hostname: jupyterhub
    volumes:
      - "./jupyterhub/jupyterhub_config.py:/srv/jupyterhub/jupyterhub_config.py:ro"
      - "/var/run/docker.sock:/var/run/docker.sock"
    ports:
      - 8000:8000
    networks:
      default:
      jupyterhub_network:
        aliases:
          - jupyterhub
    environment:
      # Name of the Docker image for the single-user servers
      DOCKER_JUPYTER_IMAGE: ${DOCKER_JUPYTER_IMAGE}
      # The name of the Docker network used by the services
      DOCKER_NETWORK_NAME: ${COMPOSE_PROJECT_NAME}_jupyterhub_network
      # The IP address of the Hub service within the docker network
    deploy:
      replicas: 1
      placement:
        constraints:
          - node.role == manager
  # Configuration for the single-user servers
  jupyterlab:
    image: ${DOCKER_JUPYTER_IMAGE}
    command: echo
networks:
  jupyterhub_network:
    driver: overlay
volumes:
  jupyterhub_data:
Docker-compose environment variables are defined at .env file:
# Name of our Docker Compose project
COMPOSE_PROJECT_NAME="jupyterhub"
DOCKER_JUPYTER_IMAGE="jupyterhub/singleuser:2.2"
JupyterHub configuration (swarm)
We need to build our own custom image of the whole JupyterHub application to automatically include dockerspawner, dummyauthenticator, and any other modules you might need (for example, to support different authentication methods).
# Do not forget to pin down the version
FROM jupyterhub/jupyterhub
# Install dependencies (for advanced authentication and spawning)
RUN pip install \
    dockerspawner \
    jupyterhub-dummyauthenticator
We also need to provide the correct configuration for JupyterHub:
import os
NETWORK_NAME = os.environ['DOCKER_NETWORK_NAME']
DOCKER_JUPYTER_IMAGE = os.environ['DOCKER_JUPYTER_IMAGE']
# get the config object
c = get_config()
c.ConfigurableHTTPProxy.should_start = True
c.JupyterHub.authenticator_class = 'dummyauthenticator.DummyAuthenticator'
c.JupyterHub.hub_ip = '0.0.0.0'
c.JupyterHub.hub_connect_ip = 'jupyterhub'
c.JupyterHub.spawner_class = 'dockerspawner.SwarmSpawner'
c.JupyterHub.tornado_settings = {'slow_spawn_timeout': 30}
c.SwarmSpawner.image = DOCKER_JUPYTER_IMAGE
c.SwarmSpawner.network_name = NETWORK_NAME
c.SwarmSpawner.remove_containers = True
c.Spawner.cmd = ["jupyter", "labhub"]
c.Spawner.args = ['--allow-root']
c.Spawner.notebook_dir = '~/'
c.Spawner.debug = True
c.SwarmSpawner.debug = True
c.SwarmSpawner.host_ip = '0.0.0.0'
c.SwarmSpawner.http_timeout = 300
c.SwarmSpawner.start_timeout = 300
#c.JupyterHub.log_level = 00
#c.ConfigurableHTTPProxy.debug = True
For more information, I strongly recommend you to check out the following links:
- Using SwarmSpawner (official example)
- Official SwarmSpawner documentation (JupyterHub)
- Deploying a containerized JupyterHub server with Docker (article)
- How to run JupyterHub in docker swarm environment using swarmSpawner (article)
Nginx configuration (swarm)
Nginx configuration will remain unchanged, but let’s put it here for completeness of the example:
worker_processes 1;
events { worker_connections 1024; }
http {
    sendfile on;
    upstream ml {
        server jupyterhub:8000;
    }
    map $http_upgrade $connection_upgrade {
        default upgrade;
        ''      close;
    }
    server {
        listen 8080;
        location / {
            proxy_pass http://ml;
            proxy_redirect   off;
            proxy_set_header X-Real-IP $remote_addr;
            proxy_set_header Host $host:$server_port;
            proxy_set_header X-Forwarded-For $proxy_add_x_forwarded_for;
            proxy_set_header X-Forwarded-Proto $scheme;
            # websocket headers
            proxy_set_header Upgrade $http_upgrade;
            proxy_set_header Connection $connection_upgrade;
        }
    }
}
Demo example
To launch provided demo, execute the following lines:
docker-compose build
docker-compose up
As soon as the Jupyter instance starts, connect to the external IP address of your Jupyter server to port 8080 to facilitate remote access:
You should see the following console output:
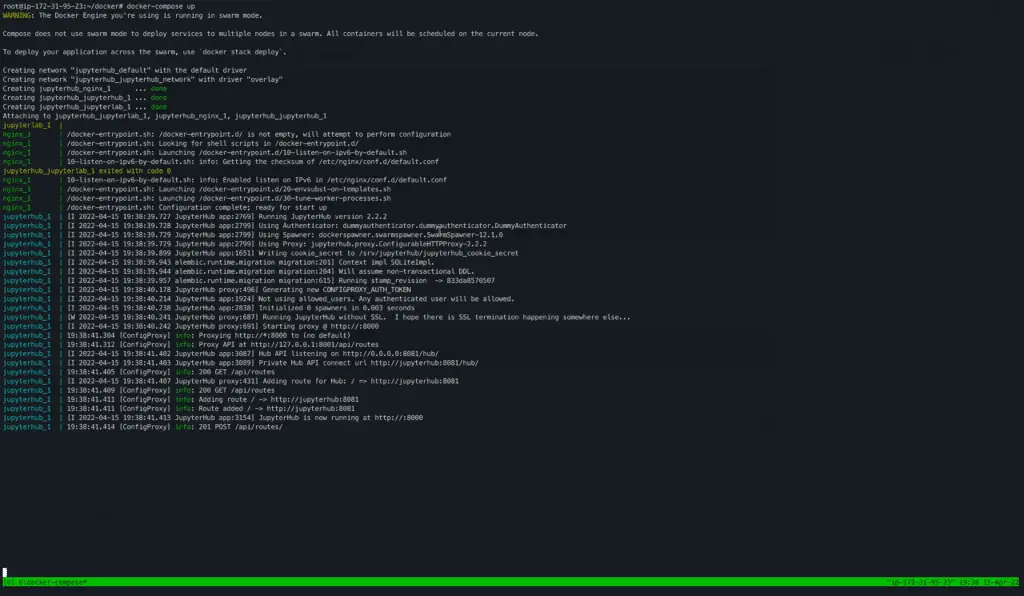
In the browser you should see the existing website on the following page:
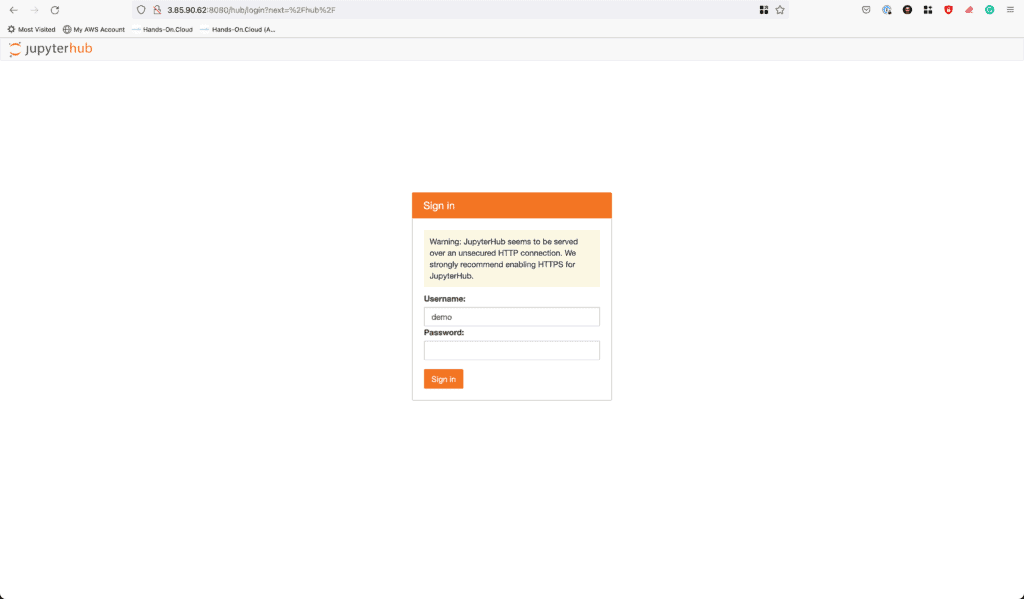
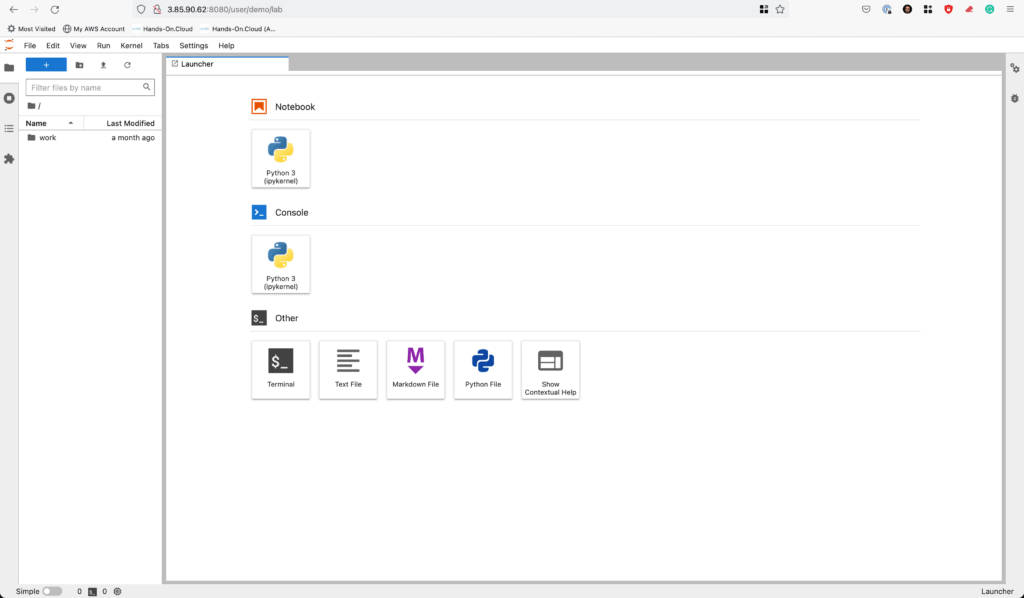
Use any username to log in as a new user, and do not provide any password. Click the Sign In button and you’ll be redirected to the user lab environment:
Summary
This small note will help you save time setting up Jupyter Nginx Proxy in your Jupyter notebooks. If you found it useful, please, help spread it to the world!
Stay tuned!
