Terraform API Gateway Management Guide
Amazon API Gateway is a fully managed serverless offering from AWS that makes it easy for developers to develop and maintain APIs. It acts as an entry point to your application API and abstracts all the complex tasks and protocols such as authentication/authorization, load balancing, rate limiting, CORS, etc., and allows you to focus more on the business logic. You can use API Gateway to build REST APIs and WebSocket APIs.
The API Gateway scales on-demand automatically and follows a pay-as-you-go model, making it a viable solution to build and deploy applications quickly without worrying about all the technical overheads.
This article covers managing Amazon API Gateway using Terraform API Gateway resources. We will provide examples of creating and managing REST APIs, integrating the API with a Lambda Function, securing the API with an authorizer, enabling CORS, and configuring a custom domain name using Terraform and Infrastructure as Code approach.
Table of contents
Initial Setup
To install and configure Terraform on your device, follow this guide. You should also have an AWS IAM user configured with the necessary IAM permissions to access API Gateway and Lambda resources in your AWS Account. This IAM user would be used to authenticate the Terraform to manage AWS services. When setting up a Terraform project, it’s essential to structure the code in a way that will be easy to maintain and understand. Start by creating a file containing all the provider and resource configurations. Next, create separate files for each API gateway resources, openapi specification, and cloudwatch logs. It helps to keep the code organized and makes it easy to find the information needed.
Terraform API Gateway Project
Create a new project directory. Let’s call it terraform-api-gateway, for example. Inside the project directory, we’ll need to create the providers.tf file which will house the code to initialize the terraform provider for AWS with appropriate parameters such as AWS region.
terraform{
    required_providers {
        aws = {
            source  = "hashicorp/aws"
            version = "~> 4.0.0"
        }
    }
}
provider "aws" {
    region = var.region
}
Next, we need to create the variables.tf file which stores the variables necessary for the provider to function. In my case region is set to a default value of ap-south-1, however, you may change it according to your need.
variable "region" {
type = string
description = "The region in which to create/manage resources"
default = "ap-south-1"
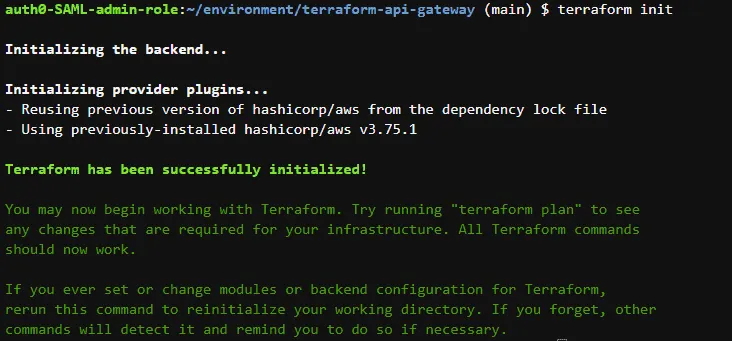
}Once these files are created, open a terminal in the root of the project directory and execute the following command:
terraform initYou will see similar output on successful initialization:
Creating a REST API using Terraform
API Gateway supports four types of APIs:
- HTTP API
- WebSocket API
- REST API
- REST API (private)
This article will cover the most common use case, i.e., REST APIs. Let’s start developing the api-gateway module for Terraform project.
Setting up the API Gateway Module
At the root level of the project directory, create a folder called modules. This folder shall house all the Terraform modules that we shall build in our Terraform application. Inside the modules folder, create another folder called api_gateway – the folder for the aws API Gateway module. Create a file called rest_api.tf inside the api_gteway folder and add the following code:
resource "aws_api_gateway_rest_api" "rest_api"{
    name = var.rest_api_name
}
The above code will define a Terraform resource of name rest_api and type aws_api_gateway_rest_api for managing a simple API Gateway REST API with the name that we pass to the name variable. To manage the API Gateway, you must setup API keys, configure API methods, and create or import an API key.
Create a file called variables.tf inside the api_gateway folder to house all the variables and other resources that we would use throughout the api_gateway module of our application. Add the following code:
variable "rest_api_name"{
    type = string
    description = "Name of the API Gateway created"
    default = "terraform-api-gateway-example"
}
Replace the default value as per your requirements. If you do not pass default values, Terraform will ask you to enter these values at runtime.
Now return to the root of the project directory and create a main.tf file. This file would be the entry point to our Terraform application, and all the modules we develop would be called from here. Add the following code:
module "api_gateway" {
  source = "./modules/api_gateway"
}
This imports the api_gateway module.
Now we need to install the module we just declared in the main.tf file. To do so, we open a terminal at the root level of the project and run the following command:
terraform initNext, we validate the Terraform configurations using the following command:
terraform validateThis checks for any errors in the code and reports them. If everything is fine, we will get an output like this:

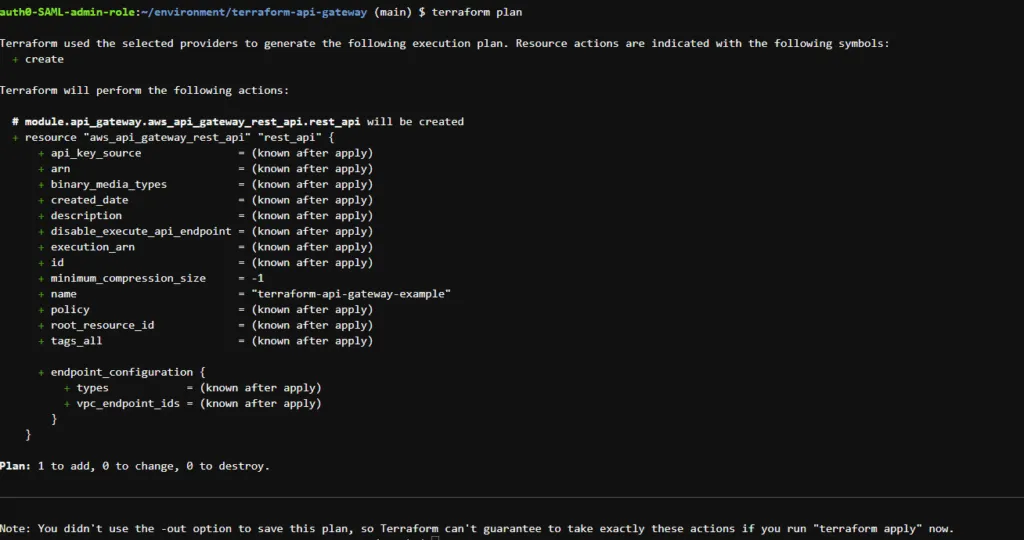
terraform validate outputNext, we check the resources that would be created/modified by our Terraform scripts. To do that, we run the following command:
terraform planThe output is something like this:
At this stage, we are ready to apply our configuration and provision the AWS resources we intended. To do that, we run the following command:
terraform apply --auto-approveThis takes a while and on success, we get an output like this:
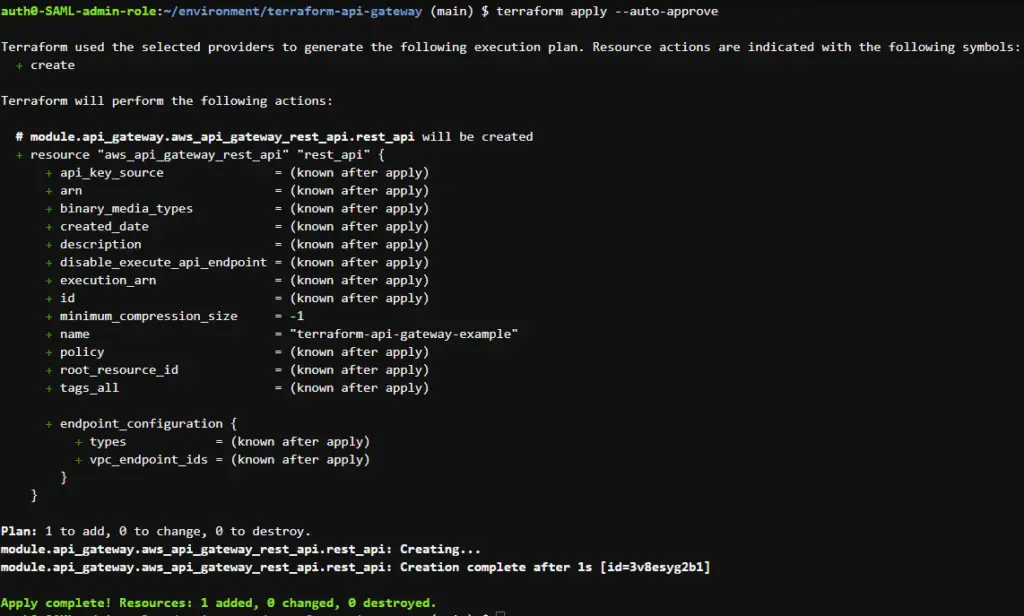
That’s it! We’ve finally created a basic API Gateway of type REST API on AWS. Note that if you don’t provide --auto-approve flag, you would have to manually approve the configuration to be applied, after running the command.
To check if the desired AWS Resource was created, navigate to the AWS API Gateway dashboard. Click on APIs from the left menu and you can see you indeed have an API Gateway created!

We will be following the same pattern throughout our tutorial:
- writing terraform configuration files
- validating the configuration :
terraform validate(at root level) - checking what changes shall be made : terraform plan (at root level)
- applying the configuration :
terraform apply --auto-approve(at root level)
In order to destroy the resource managed by Terraform at any point in time, execute:
terraform destroy --auto-approveCreating Resources using Terraform
Now that we have an API Gateway REST API ready let’s manage a resource using the API. A Resource is anything that the API caters to. For example, in the case of a movie API, movie would be a resource. The resource’s name indicates the path in the API endpoint (e.g., https://api.example.com/movie). We define HTTP methods such as GET, POST, PUT, DELETE, etc., to perform CRUD operations on the API resource. Let us create a resource for our API using Terraform!
Add the following code to the rest_api.tf file inside the modules/api_gateway folder, below the rest_api resource block :
resource "aws_api_gateway_resource" "rest_api_resource" {
  rest_api_id = aws_api_gateway_rest_api.rest_api.id
  parent_id = aws_api_gateway_rest_api.rest_api.root_resource_id
  path_part = "movies"
}
The above code creates a Terraform resource of type aws_api_gateway_resource named rest_api_resource. The important attribute here to note is path_part. This attribute sets the resource’s name (as part of the endpoint path). Here, we have created a resource named movies.
Follow the same set of steps as discussed earlier. Go to the root of the project and then execute these commands:
terraform validate
terraform plan
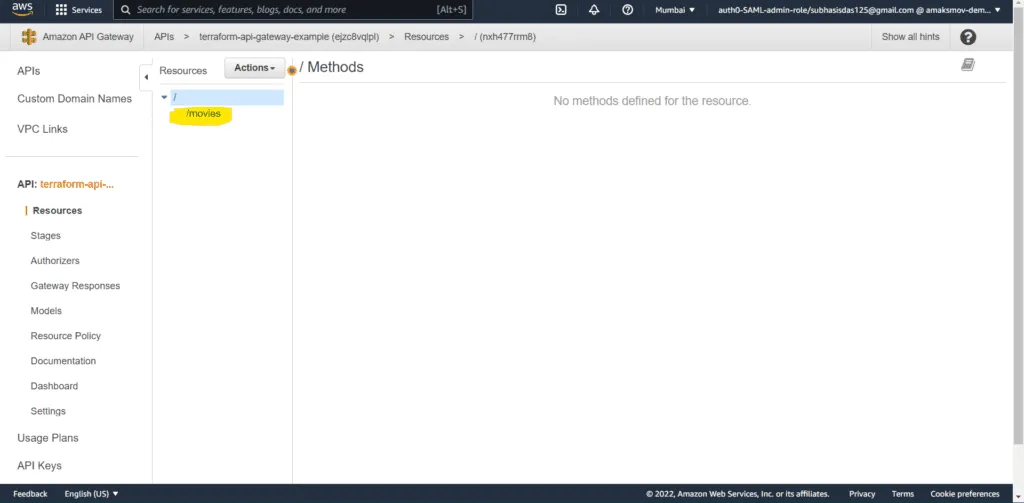
terraform apply --auto-approveOnce the configuration gets successfully applied, navigate to the API Gateway dashboard and click on the REST API created. Inside the API, you would see that a resource named movies has been created:
Now that we have successfully created a resource, we can create HTTP methods to perform some operations on the resource.
Adding a Method with a Mock Response Integration Using Terraform
Let’s define a simple HTTP method, GET method for our movies resource. When we make an API call to GET /movies, we expect to see a JSON object as a response. To achieve this, follow the given steps:
In the rest_api.tf file, create a aws_api_gateway_method type of resource:
resource "aws_api_gateway_method" "rest_api_get_method"{
  rest_api_id = aws_api_gateway_rest_api.rest_api.id
  resource_id = aws_api_gateway_resource.rest_api_resource.id
  http_method = "GET"
  authorization = "NONE"
}
This Terraform resource creates a GET method for our previously created movies resource. Let’s set the authorization parameter to NONE for now, we’ll revisit it later in this article. Now that we’ve created a method, we need to create an integration type for our method so that it can return an appropriate response.
Create a aws_api_gateway_integration type of resource by adding the following code below the rest_api_get_method resource:
resource "aws_api_gateway_integration" "rest_api_get_method_integration" {
  rest_api_id = aws_api_gateway_rest_api.rest_api.id
  resource_id = aws_api_gateway_resource.rest_api_resource.id
  http_method = aws_api_gateway_method.rest_api_get_method.http_method
  type = "MOCK"
  //request_tempates is required to explicitly set the statusCode to an integer value of 200
   request_templates = {
    "application/json" = jsonencode({
      statusCode = 200
    })
  }
}
The above code creates an integration type of MOCK, that instructs API Gateway to create a mock backend for GET /movies that responds with a status code of 200.
Now we need to create a aws_api_gateway_method_response type of resource to create method response of status code 200:
resource "aws_api_gateway_method_response" "rest_api_get_method_response_200"{
  rest_api_id = aws_api_gateway_rest_api.rest_api.id
  resource_id = aws_api_gateway_resource.rest_api_resource.id
  http_method = aws_api_gateway_method.rest_api_get_method.http_method
  status_code = "200"
}
Finally, we need to create an integration response for the API by defining a aws_api_gateway_integration_response type of resource (as we’ve created a non-proxy integration earlier):
resource "aws_api_gateway_integration_response" "rest_api_get_method_integration_response_200" {
  rest_api_id = aws_api_gateway_rest_api.rest_api.id
  resource_id = aws_api_gateway_resource.rest_api_resource.id
  http_method = aws_api_gateway_integration.rest_api_get_method_integration.http_method
  status_code = aws_api_gateway_method_response.rest_api_get_method_response_200.status_code
  response_templates = {
    "application/json" = jsonencode({
      body = "Hello from the movies API!"
    })
  }
}
The above Terraform resource updates the backend’s mock response and sets its body to the string “Hello from the movies API!”.
Finally, we apply our configuration by following the same old steps:
terraform validate
terraform plan
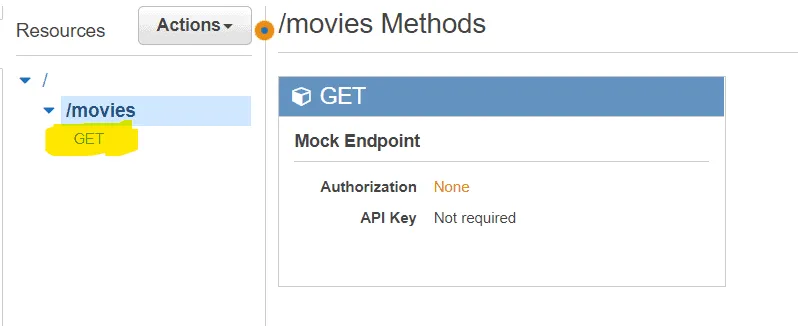
terraform apply --auto-approveNavigate to the API gateway dashboard when the configuration gets applied successfully, and check the movies resource. You will see a GET method created under it.
Click on the GET method (highlighted in yellow in the picture):
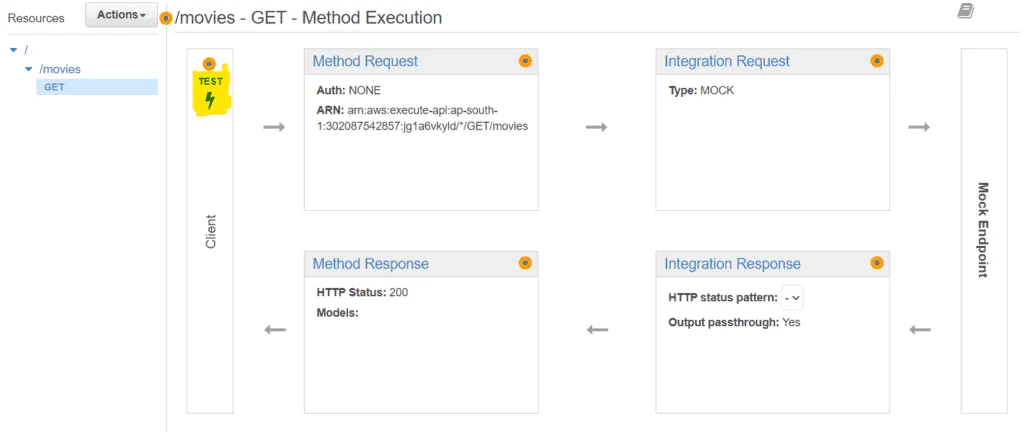
You will see the entire request-response workflow here. Click on the Test button as highlighted in yellow in the picture below:
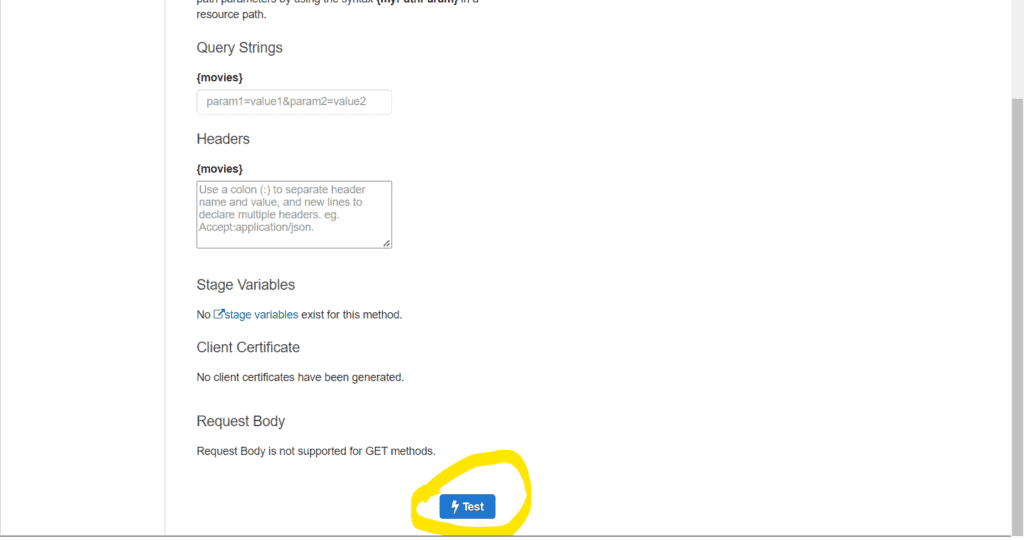
You would see a form to enter request parameters, headers, etc. Ignore those parameters now. Scroll down and click on the Test button circled in yellow in the picture below:
On the right side of the page, you will get the response along with the execution details of the request:

The response’s body should be a string, and the status code should be 200. At this point, we have a complete REST API endpoint that responds with some JSON data on being called. Your rest_api.tf file should look like this at the end of this section:
resource "aws_api_gateway_rest_api" "rest_api" {
  name = var.rest_api_name
}
resource "aws_api_gateway_resource" "rest_api_resource" {
  rest_api_id = aws_api_gateway_rest_api.rest_api.id
  parent_id   = aws_api_gateway_rest_api.rest_api.root_resource_id
  path_part   = "movies"
}
resource "aws_api_gateway_method" "rest_api_get_method" {
  rest_api_id   = aws_api_gateway_rest_api.rest_api.id
  resource_id   = aws_api_gateway_resource.rest_api_resource.id
  http_method   = "GET"
  authorization = "NONE"
}
resource "aws_api_gateway_integration" "rest_api_get_method_integration" {
  rest_api_id = aws_api_gateway_rest_api.rest_api.id
  resource_id = aws_api_gateway_resource.rest_api_resource.id
  http_method = aws_api_gateway_method.rest_api_get_method.http_method
  type        = "MOCK"
  //request_tempates is required to explicitly set the statusCode to an integer value of 200
  request_templates = {
    "application/json" = jsonencode({
      statusCode = 200
    })
  }
}
resource "aws_api_gateway_method_response" "rest_api_get_method_response_200" {
  rest_api_id = aws_api_gateway_rest_api.rest_api.id
  resource_id = aws_api_gateway_resource.rest_api_resource.id
  http_method = aws_api_gateway_method.rest_api_get_method.http_method
  status_code = "200"
}
resource "aws_api_gateway_integration_response" "rest_api_get_method_integration_response_200" {
  rest_api_id = aws_api_gateway_rest_api.rest_api.id
  resource_id = aws_api_gateway_resource.rest_api_resource.id
  http_method = aws_api_gateway_integration.rest_api_get_method_integration.http_method
  status_code = aws_api_gateway_method_response.rest_api_get_method_response_200.status_code
  response_templates = {
    "application/json" = jsonencode({
      body = "Hello from the movies API!"
    })
  }
}
API Gateway – Lambda Integration using Terraform
This section will integrate a Lambda function as the backend for the endpoint to return a list containing some dummy movie data. We will develop the Lambda module of our application and integrate it with the API Gateway module. Inside the modules folder, create a folder called lambda_function.
Writing the Lambda Function Code
Inside the lambda_function folder, create a folder called function_code. This folder shall house our Node.js lambda function, handling the request and sending an appropriate response. Create a file called index.js inside the function_code folder and paste the following code inside the file:
const movies = [
	"Schindlers List",
	"Shawshank Redemption",
	"Batman The Dark Knight",
	"Spider-Man : No Way Home",
	"Avengers",
];
exports.handler = async (event) => {
	return {
		statusCode: 200,
		headers: {
			"Content-Type": "application/json",
		},
		body: JSON.stringify({ movies }), //sending the array of movies as stringified JSON in the response
	};
};
The above code simply sends a hardcoded array of movies in response to GET /movies.
Terraform Configuration for Lambda
To create/manage a lambda function using Terraform (and most other IaC tools), we need to take the following approach:
- Zip the Lambda function code along with all of its dependencies
- Create an S3 bucket and upload the zip created above to the bucket
- Reference the zip file in the S3 bucket inside the IaC configuration file using the appropriate parameters.
Let’s implement the above approach using Terraform!
First, add a provider called archive to our Terraform project. The archive provider will give us a Terraform data source for zipping Lambda function code.
Go to the providers.tf file and the following provider block below the hashicorp/aws provider block, inside the required_providers block:
terraform {
  required_providers {
    aws = {
      source  = "hashicorp/aws"
      version = "~> 4.0.0"
    }
    archive = {
      source  = "hashicorp/archive"
      version = "~> 2.0.0"
    }
  }
}
provider "aws" {
  region = var.region
}
Next, create a lambda.tf file inside the lambda_function module. This file will contain our Terraform configuration for the Lambda function. Also, create a variables.tf file inside the lambda_function module and add the following code:
variable "s3_bucket_name" {
  type        = string
  description = "The name of the S3 bucket to store the Lambda function code"
  default     = "terraform-api-gateway-lambda-demo" // must be unique - change this to something unique
}
variable "lambda_function_name" {
  type        = string
  description = "The name of the Lambda function"
  default     = "MovieLambda"
}
We shall reference these variables in our configuration file later.
Create a data source to zip the code inside the function_code folder, that we wrote earlier. Add the following code to lambda.tf :
//using archive_file data source to zip the lambda code:
data "archive_file" "lambda_code" {
  type        = "zip"
  source_dir  = "${path.module}/function_code"
  output_path = "${path.module}/function_code.zip"
}
The above code would generate a function_code.zip file inside the lambda_function module. Next, we’ll create an S3 bucket and upload the zip file generated to the bucket. Add the following code below the above data source:
resource "aws_s3_bucket" "lambda_bucket" {
  bucket = var.s3_bucket_name
}
//making the s3 bucket private as it houses the lambda code:
resource "aws_s3_bucket_acl" "lambda_bucket_acl" {
  bucket = aws_s3_bucket.lambda_bucket.id
  acl    = "private"
}
resource "aws_s3_object" "lambda_code" {
  bucket = aws_s3_bucket.lambda_bucket.id
  key    = "function_code.zip"
  source = data.archive_file.lambda_code.output_path
  etag   = filemd5(data.archive_file.lambda_code.output_path)
}
Notice the etag parameter set on the aws_s3_object resource. This property ensures that the object gets updated whenever we change the Lambda source code. We would have an S3 bucket containing the source code for our Lambda function at this stage.
Next, we’ll add the configuration code to create the lambda function and all related resources to our lambda.tf file:
resource "aws_lambda_function" "lambda_function" {
  function_name    = var.lambda_function_name
  s3_bucket        = aws_s3_bucket.lambda_bucket.id
  s3_key           = aws_s3_object.lambda_code.key
  runtime          = "nodejs12.x"
  handler          = "index.handler"
  source_code_hash = data.archive_file.lambda_code.output_base64sha256
  role             = aws_iam_role.lambda_execution_role.arn
}
resource "aws_cloudwatch_log_group" "lambda_log_group" {
  name              = "/aws/lambda/${aws_lambda_function.lambda_function.function_name}"
  retention_in_days = 30
}
resource "aws_iam_role" "lambda_execution_role" {
  name = "lambda_execution_role_${var.lambda_function_name}"
  assume_role_policy = jsonencode({
    Version = "2012-10-17"
    Statement = [{
      Action = "sts:AssumeRole"
      Effect = "Allow"
      Sid    = ""
      Principal = {
        Service = "lambda.amazonaws.com"
      }
      }
    ]
  })
}
resource "aws_iam_role_policy_attachment" "lambda_policy" {
  role       = aws_iam_role.lambda_execution_role.name
  policy_arn = "arn:aws:iam::aws:policy/service-role/AWSLambdaBasicExecutionRole"
}
In the above code, we create a Lambda function, assign it a suitable IAM role (AWSLambdaBasicExecutionRole), and create a CloudWatch log group for the Lambda function. In the aws_lambda_function resource, we’ve referenced the zip file we uploaded to S3 a while back. Now we’ve got our Lambda configuration defined.
For more information about managing AWS IAM using Terraform, check out the “Managing AWS IAM using Terraform” article.
At this stage, your lambda.tf should look like this:
//using archive_file data source to zip the lambda code:
data "archive_file" "lambda_code" {
  type        = "zip"
  source_dir  = "${path.module}/function_code"
  output_path = "${path.module}/function_code.zip"
}

resource "aws_s3_bucket" "lambda_bucket" {
  bucket = var.s3_bucket_name
}
//making the s3 bucket private as it houses the lambda code:
resource "aws_s3_bucket_acl" "lambda_bucket_acl" {
  bucket = aws_s3_bucket.lambda_bucket.id
  acl    = "private"
}
resource "aws_s3_object" "lambda_code" {
  bucket = aws_s3_bucket.lambda_bucket.id
  key    = "function_code.zip"
  source = data.archive_file.lambda_code.output_path
  etag   = filemd5(data.archive_file.lambda_code.output_path)
}

resource "aws_lambda_function" "lambda_function" {
  function_name    = var.lambda_function_name
  s3_bucket        = aws_s3_bucket.lambda_bucket.id
  s3_key           = aws_s3_object.lambda_code.key
  runtime          = "nodejs12.x"
  handler          = "index.handler"
  source_code_hash = data.archive_file.lambda_code.output_base64sha256
  role             = aws_iam_role.lambda_execution_role.arn
}
resource "aws_cloudwatch_log_group" "lambda_log_group" {
  name              = "/aws/lambda/${aws_lambda_function.lambda_function.function_name}"
  retention_in_days = 30
}
resource "aws_iam_role" "lambda_execution_role" {
  name = "lambda_execution_role_${var.lambda_function_name}"
  assume_role_policy = jsonencode({
    Version = "2012-10-17"
    Statement = [{
      Action = "sts:AssumeRole"
      Effect = "Allow"
      Sid    = ""
      Principal = {
        Service = "lambda.amazonaws.com"
      }
      }
    ]
  })
}
resource "aws_iam_role_policy_attachment" "lambda_policy" {
  role       = aws_iam_role.lambda_execution_role.name
  policy_arn = "arn:aws:iam::aws:policy/service-role/AWSLambdaBasicExecutionRole"
}
Finally, we shall create an outputs.tf file inside the lambda_function module to export some values from our lambda function configuration, as they would be required later by the api_gateway module we had created earlier, and add the following code:
output "lambda_function_arn" {
  value = aws_lambda_function.lambda_function.invoke_arn
}
output "lambda_function_name" {
  value = aws_lambda_function.lambda_function.function_name
}
Now we need to import our lambda_function module to the main.tf file (at the project root):
module "lambda_function" {
  source = "./modules/lambda_function"
}
module "api_gateway" {
  source = "./modules/api_gateway"
}
We’re in a good place to apply these configurations to our terraform application. Remember, we would need to run terraform init first, because we have added a new module. After that, we’ll follow the same old steps:
terraform validate
terraform plan
terraform apply --auto-approve
After applying the configuration successfully, we would have a Lambda function created in our AWS account with the name MovieLambda (or whatever name you’ve provided). We can verify this by invoking the lambda function using the AWS CLI:
aws lambda invoke --function-name MovieLambda response.json[remember to replace the function name as per the name you’ve set)
This command would write the output of our lambda function to a file called response.json. If you inspect the contents of the file, you will see :
{"statusCode":200,"headers":{"Content-Type":"application/json"},"body":"{\"movies\":[\"Schindlers List\",\"Shawshank Redemption\",\"Batman The Dark Knight\",\"Spider-Man : No Way Home\",\"Avengers\"]}"}The result ensures that our Lambda function has been created and is working as expected. So now that we’ve got our lambda function ready, we’ll work on integrating it with our API Gateway.
API Gateway Integration
We’ll start by defining some variables in the variables.tf file inside the api_gateway module. We will use these variables in our configuration files as we proceed through the article. The values of these variables shall be passed from the main.tf file at the root level of the project. To understand this pattern, look at how modules work in Terraform.
variable "rest_api_name" {
  type        = string
  description = "Name of the API Gateway created"
  default     = "terraform-api-gateway-example"
}
variable "api_gateway_region" {
  type        = string
  description = "The region in which to create/manage resources"
} //value comes from main.tf
variable "api_gateway_account_id" {
  type        = string
  description = "The account ID in which to create/manage resources"
} //value comes from main.tf
variable "lambda_function_name" {
  type        = string
  description = "The name of the Lambda function"
} //value comes from main.tf
variable "lambda_function_arn" {
  type        = string
  description = "The ARN of the Lambda function"
} //value comes from main.tf

variable "rest_api_stage_name" {
  type        = string
  description = "The name of the API Gateway stage"
  default     = "prod" //add a stage name as per your requirement
}
To integrate the API Gateway with the Lambda function, we must first create a Resource-Based Policy for our Lambda to allow the API Gateway to invoke it. Go to the rest_api.tf file inside the api_gateway module and add a aws_lambda_permission resource:
//  Creating a lambda resource based policy to allow API gateway to invoke the lambda function:
resource "aws_lambda_permission" "api_gateway_lambda" {
  statement_id  = "AllowExecutionFromAPIGateway"
  action        = "lambda:InvokeFunction"
  function_name = var.lambda_function_name
  principal     = "apigateway.amazonaws.com"
  source_arn = "arn:aws:execute-api:${var.api_gateway_region}:${var.api_gateway_account_id}:${aws_api_gateway_rest_api.rest_api.id}/*/${aws_api_gateway_method.rest_api_get_method.http_method}${aws_api_gateway_resource.rest_api_resource.path}"
}
Next, we need to make some changes to our previously created aws_api_gateway_integration resource:
resource "aws_api_gateway_integration" "rest_api_get_method_integration" {
  rest_api_id             = aws_api_gateway_rest_api.rest_api.id
  resource_id             = aws_api_gateway_resource.rest_api_resource.id
  http_method             = aws_api_gateway_method.rest_api_get_method.http_method
  integration_http_method = "POST"
  type                    = "AWS_PROXY"
  uri                     = var.lambda_function_arn
}
In the above code, we have changed the type to AWS_PROXY added an integration_http_method with a value of POST and a uri parameter, which references the variable lambda_function_arn. You can learn more about how API Gateway integrates with Lambda via a proxy request here.
You can also remove the aws_api_gateway_integration_response resource from the configuration as we are using a proxy integration now.
Finally, let’s create a stage and deployment for this API gateway to have a URL to invoke and test our integration. Add the following resource blocks to the rest_api.tf configuration file:
resource "aws_api_gateway_deployment" "rest_api_deployment" {
  rest_api_id = aws_api_gateway_rest_api.rest_api.id
  triggers = {
    redeployment = sha1(jsonencode([
      aws_api_gateway_resource.rest_api_resource.id,
      aws_api_gateway_method.rest_api_get_method.id,
      aws_api_gateway_integration.rest_api_get_method_integration.id
    ]))
  }
}
resource "aws_api_gateway_stage" "rest_api_stage" {
  deployment_id = aws_api_gateway_deployment.rest_api_deployment.id
  rest_api_id   = aws_api_gateway_rest_api.rest_api.id
  stage_name    = var.rest_api_stage_name
}
The triggers parameter in the aws_api_gateway_deployment resource ensures that the deployment is triggered every time the mentioned values change.
Now, we’re all done with our API Gateway configuration. Here’s the completed and updated code for the rest_api.tf file for your reference:
resource "aws_api_gateway_rest_api" "rest_api" {
  name = var.rest_api_name
}
resource "aws_api_gateway_resource" "rest_api_resource" {
  rest_api_id = aws_api_gateway_rest_api.rest_api.id
  parent_id   = aws_api_gateway_rest_api.rest_api.root_resource_id
  path_part   = "movies"
}
resource "aws_api_gateway_method" "rest_api_get_method" {
  rest_api_id   = aws_api_gateway_rest_api.rest_api.id
  resource_id   = aws_api_gateway_resource.rest_api_resource.id
  http_method   = "GET"
  authorization = "NONE"
}
resource "aws_api_gateway_integration" "rest_api_get_method_integration" {
  rest_api_id             = aws_api_gateway_rest_api.rest_api.id
  resource_id             = aws_api_gateway_resource.rest_api_resource.id
  http_method             = aws_api_gateway_method.rest_api_get_method.http_method
  integration_http_method = "POST"
  type                    = "AWS_PROXY"
  uri                     = var.lambda_function_arn
}
resource "aws_api_gateway_method_response" "rest_api_get_method_response_200" {
  rest_api_id = aws_api_gateway_rest_api.rest_api.id
  resource_id = aws_api_gateway_resource.rest_api_resource.id
  http_method = aws_api_gateway_method.rest_api_get_method.http_method
  status_code = "200"
}
//  Creating a lambda resource based policy to allow API gateway to invoke the lambda function:
resource "aws_lambda_permission" "api_gateway_lambda" {
  statement_id  = "AllowExecutionFromAPIGateway"
  action        = "lambda:InvokeFunction"
  function_name = var.lambda_function_name
  principal     = "apigateway.amazonaws.com"
  source_arn    = "arn:aws:execute-api:${var.api_gateway_region}:${var.api_gateway_account_id}:${aws_api_gateway_rest_api.rest_api.id}/*/${aws_api_gateway_method.rest_api_get_method.http_method}${aws_api_gateway_resource.rest_api_resource.path}"
}
resource "aws_api_gateway_deployment" "rest_api_deployment" {
  rest_api_id = aws_api_gateway_rest_api.rest_api.id
  triggers = {
    redeployment = sha1(jsonencode([
      aws_api_gateway_resource.rest_api_resource.id,
      aws_api_gateway_method.rest_api_get_method.id,
      aws_api_gateway_integration.rest_api_get_method_integration.id
    ]))
  }
}
resource "aws_api_gateway_stage" "rest_api_stage" {
  deployment_id = aws_api_gateway_deployment.rest_api_deployment.id
  rest_api_id   = aws_api_gateway_rest_api.rest_api.id
  stage_name    = var.rest_api_stage_name
}
We shall use an output block to get the invoke URL for our REST API. Create an outputs.tf file in the api_gateway module and add the following code:
output "rest_api_url" {
  value = "${aws_api_gateway_deployment.rest_api_deployment.invoke_url}${aws_api_gateway_stage.rest_api_stage.stage_name}${aws_api_gateway_resource.rest_api_resource.path}"
}
Finally, we need to pass the values for the variables declared in the variables.tf file from the main.tf file :
module "lambda_function" {
  source = "./modules/lambda_function"
}
module "api_gateway" {
  source = "./modules/api_gateway"
  api_gateway_region = var.region
  api_gateway_account_id = var.account_id
  lambda_function_name = module.lambda_function.lambda_function_name
  lambda_function_arn = module.lambda_function.lambda_function_arn
  depends_on = [
    module.lambda_function
  ]
}
Notice how we have mentioned an explicit depends_on parameter for the api_gateway module to ensure that the lambda resources are created before the API Gateway gets created. We will need to update the variables.tf at the root level to include the variables that we have used in main.tf:
variable "region" {
  type        = string
  description = "The region in which to create/manage resources"
  default     = "ap-south-1"
}
variable "account_id"{
  type        = string
  description = "The account ID in which to create/manage resources"
}
The value of account_id must be passed at runtime to the terraform apply command, or you may use environment variables or a terraform.tfvars file here. Now, we will bring the output of the api_gateway module to the root level by creating an outputs.tf file at the root:
output "rest_api_url" {
    value = module.api_gateway.rest_api_url
}
We can now apply the configuration:
terraform validate
terraform plan
terraform apply --auto-approve
On successfully applying the configuration, the URL of the API would appear in the terminal output (highlighted in yellow) :

You can visit the URL in the browser to get a response like this:
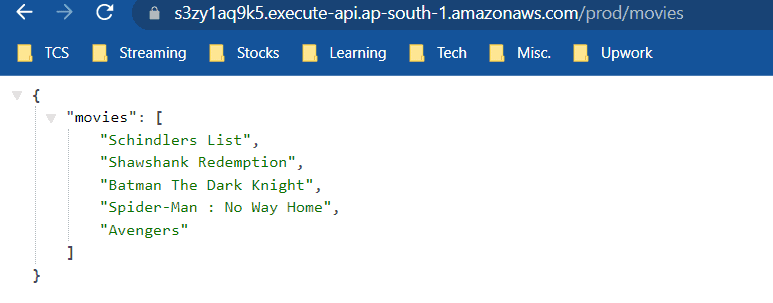
Thus we have successfully created a REST API using API Gateway that integrates with a lambda function backend and sends a JSON response to the client!
Cognito Authorizer using Terraform
So far, we have created a REST API that uses a Lambda function as a backend and responds with some JSON data. This section will cover how you can secure your API using a Cognito Authorizer.
The Cognito Module
Let us develop the cognito module of our Terraform application first. The Cognito module configures its attributes and resources: user pool, client, identity provider, and domain. Each resource has arguments that specify valid values. Inside the modules folder, create a new folder called cognito. Create a file called user_pool.tf to contain our configuration for the Cognito user pool we shall create. Add the following code:
resource "aws_cognito_user_pool" "user_pool" {
  name = var.user_pool_name
  username_configuration {
    case_sensitive = false
  }
}
resource "aws_cognito_user_pool_client" "user_pool_client" {
  name                = var.user_pool_client_name
  user_pool_id        = aws_cognito_user_pool.user_pool.id
  explicit_auth_flows = ["ALLOW_USER_PASSWORD_AUTH", "ALLOW_REFRESH_TOKEN_AUTH"]
}
In the above code, we have created an aws_cognito_user_pool and an aws_cognitio_user_pool_client resource. We have set the username to be case insensitive for convenience. Let us now define the user_pool_name and user_pool_client_name variables in the variables.tf file inside the cognito module:
variable "user_pool_name" {
  type        = string
  description = "The name of the user pool"
  default     = "terraform-api-gateway-demo-pool"
}
variable "user_pool_client_name" {
  type        = string
  description = "The name of the user pool client"
  default     = "terraform-api-gateway-demo-client"
}
Lastly, we shall output some parameters from our configuration to use in the api_gateway module later. Create an outputs.tf file inside the cognito module and add the following code:
output "cognito_user_pool_id" {
  value = aws_cognito_user_pool.user_pool.id
}
output "cognito_user_pool_arn" {
  value = aws_cognito_user_pool.user_pool.arn
}
output "user_pool_client_id" {
  value = aws_cognito_user_pool_client.user_pool_client.id
}
We’re also set with the cognito module now!
Updating the Lambda code
We need to configure our Lambda code to read some data from the authorization token sent by the API Gateway and return that data in the response. This will help us ensure that the Authorizer is indeed functioning. Inside the lambda_function module, go to the function_code directory and run the following command :
npm install jwt-decodeThis will install a node module to help us decode the authorization token sent in the header. Now go to the index.js file and update the code :
const jwtDecode = require("jwt-decode");
const movies = [
	"Schindlers List",
	"Shawshank Redemption",
	"Batman The Dark Knight",
	"Spider-Man : No Way Home",
	"Avengers",
];
exports.handler = async (event) => {
	const decodedToken = jwtDecode(event.headers.Authorization);
	return {
		statusCode: 200,
		headers: {
			"Content-Type": "application/json",
		},
		body: JSON.stringify({
			movies,
			username: decodedToken["cognito:username"],
		}),
	};
};
We have modified our lambda code to send the username of the user we will authorize as in the response body. Notice that the Authorization header is sent as a payload to the event object.
Modifying the API Gateway module to support the Authorizer
Let us now modify our api_gateway module to add the Cognito Authorizer. Cognito Authorizer allows you to define which users can execute API Gateway methods. Go to the rest_api.tf file inside the api_gateway module. The first change we need to make is changing the authorization parameter in the aws_api_gateway_method resource from NONE to COGNITO_USER_POOLS. We also need to add the authorizer_id and the request_parameters parameters. When you add the authorizer, you specify an access log as an optional argument. You can also specify an optional creation argument explaining how it will be created. These access logs contain information about users’ HTTP requests to the API Gateway.
resource "aws_api_gateway_method" "rest_api_get_method" {
  rest_api_id   = aws_api_gateway_rest_api.rest_api.id
  resource_id   = aws_api_gateway_resource.rest_api_resource.id
  http_method   = "GET"
  authorization = "COGNITO_USER_POOLS"
  authorizer_id = aws_api_gateway_authorizer.api_authorizer.id
  request_parameters = {
    "method.request.path.proxy" = true
  }
}
Next, we need to add an aws_api_gateway_authorizer resource :
resource "aws_api_gateway_authorizer" "api_authorizer" {
  name          = "CognitoUserPoolAuthorizer"
  type          = "COGNITO_USER_POOLS"
  rest_api_id   = aws_api_gateway_rest_api.rest_api.id
  provider_arns = [var.cognito_user_pool_arn]
}
This will create an authorizer of type COGNITO_USER_POOLS for our API Gateway. We need to define the cognito_user_pool_arn variable in the variables.tf file for the api_gateway module:
variable "cognito_user_pool_arn" {
  type        = string
  description = "The ARN of the user pool"
} //value comes from main.tf
Now we’re all done with our API Gateway configuration! Let us make some final changes in the main.tf file at the root of the project to include the cognito module and pass the required values to the api_gateway module :
module "lambda_function" {
  source = "./modules/lambda_function"
}
module "cognito" {
  source = "./modules/cognito"
}
module "api_gateway" {
  source                 = "./modules/api_gateway"
  api_gateway_region     = var.region
  api_gateway_account_id = var.account_id
  lambda_function_name   = module.lambda_function.lambda_function_name
  lambda_function_arn    = module.lambda_function.lambda_function_arn
  cognito_user_pool_arn  = module.cognito.cognito_user_pool_arn
  depends_on = [
    module.lambda_function
  ]
}
Lastly, we need to output some values after applying our configuration, as they shall be required while testing our application. Update the outputs.tf file at the root level of the project with the following code:
output "rest_api_url" {
  value = module.api_gateway.rest_api_url
}
output "cognito_user_pool_id" {
  value = module.cognito.cognito_user_pool_id
}
output "cognito_client_id" {
  value = module.cognito.user_pool_client_id
}
That’s it! We are all set to apply our configuration. We will first run the terraform init command because we have included a new module in the main.tf file. Next, we shall follow the same old steps :
terraform validate
terraform plan
terraform apply --auto-approve
On successfully applying the configuration, we shall get the following output on our terminal :
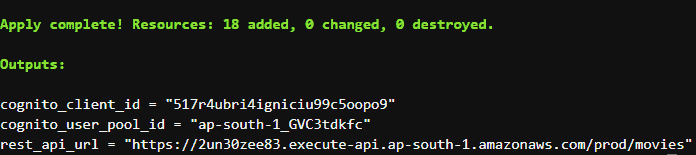
Copy and save these values somewhere as we shall use them in our tutorial.
So we are all done! Let us go ahead and test our setup!
Testing the Setup
To test our setup, we shall do the following things:
- Create a new user in our user pool
- Confirm the user
- Authenticate the user with username and password to get an authorization token
- Use the authorization token to make an API call to our REST API and get a JSON response
To perform all the operations above, we shall be executing several commands. To simplify things, we shall be writing a single bash script containing all the commands and executing the script. Create a file called authorizer_test.sh in any directory and add the following code:
#!/bin/bash
set -eux
#assign credentials to variables
CLIENT_ID=<put your client id here>
USER_POOL_ID=<put your user pool id here>
USERNAME=<put a username>
PASSWORD=<put a password>
URL=<put your REST API URL here>
#sign-up user:
aws cognito-idp sign-up \
 --client-id ${CLIENT_ID} \
 --username ${USERNAME} \
 --password ${PASSWORD}

#confirm user:
aws cognito-idp admin-confirm-sign-up  \
  --user-pool-id ${USER_POOL_ID} \
  --username ${USERNAME}

#authenticate and get token
TOKEN=$(
    aws cognito-idp initiate-auth \
 --client-id ${CLIENT_ID} \
 --auth-flow USER_PASSWORD_AUTH \
 --auth-parameters USERNAME=${USERNAME},PASSWORD=${PASSWORD} \
 --query 'AuthenticationResult.IdToken' \
 --output text
    )
#make API call:
curl -H "Authorization: ${TOKEN}" ${URL} | jq
Put the appropriate values for the variables in the above script using the values copied and saved in the previous section. Ensure the username is at least 8 characters long. Also, adhere to the password policy while setting a password.
Open a terminal in the directory where you have saved this script. First, we need to provide executable permission to the script :
chmod 700 authorizer_test.shNext, we can execute the script :
./authorizer_test.shWe should see the following output on successfully executing the script:
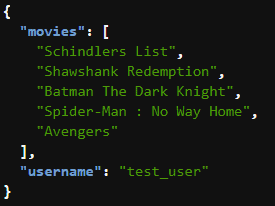
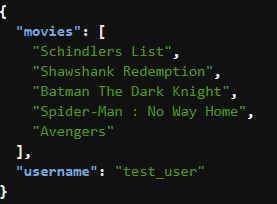
I provided the username value as test_user, which has been sent in the response JSON. So there is conclusive proof that we have a working API Gateway with an authorizer integrated with a Lambda function!
Enabling CORS on the API Using Terraform
A good production grade API must have Cross-Origin Resource Sharing (CORS) enabled from the server-side to enable clients (especially clients running on web browsers) to interact with it and request resources seamlessly. As API Gateway is a managed service by AWS, it is effortless to enable CORS on our APIs. Let’s explore how to set up CORS in our REST API using Terraform!
To check if CORS is enabled, the browser makes a preflight OPTIONS request to the server. The server is expected to respond with certain headers that tell the browser that CORS is enabled. After that, the browser goes on to make the actual request. To implement this using Terraform, we need to create a separate resource and make the integration response return the required CORS headers. We would also need to configure our Lambda function to return the required CORS headers as it would be serving as the backend for subsequent requests.
Updating Lambda Code
In the index.js file inside the function_code folder of the lambda module, make the following change:
const jwtDecode = require("jwt-decode");
const movies = [
	"Schindlers List",
	"Shawshank Redemption",
	"Batman The Dark Knight",
	"Spider-Man : No Way Home",
	"Avengers",
];
exports.handler = async (event) => {
	const decodedToken = jwtDecode(event.headers.Authorization);
	return {
		statusCode: 200,
		headers: {
			"Content-Type": "application/json",
			"Access-Control-Allow-Headers": "Content-Type",
			"Access-Control-Allow-Origin": "*",
			"Access-Control-Allow-Methods": "OPTIONS,GET",
		},
		body: JSON.stringify({
			movies,
			username: decodedToken["cognito:username"],
		}),
	};
};
Setting the header Access-Control-Allow-Origin : "*" indicates that the API is accessible to any domain, not just any specific domain(s).
Adding CORS Configurations in Terraform
Inside the api_gateway module, create a new file called cors_config.tf . We shall use this file to maintain our CORS configuration separately from our REST API configuration in the rest_api.tf file for better code maintainability. Add the following code to the cors_config.tf file :
resource "aws_api_gateway_resource" "cors_resource" {
  rest_api_id = aws_api_gateway_rest_api.rest_api.id
  parent_id   = aws_api_gateway_rest_api.rest_api.root_resource_id
  path_part   = "{cors+}"
}
resource "aws_api_gateway_method" "cors_method" {
  rest_api_id   = aws_api_gateway_rest_api.rest_api.id
  resource_id   = aws_api_gateway_resource.cors_resource.id
  http_method   = "OPTIONS"
  authorization = "NONE"
}
resource "aws_api_gateway_integration" "cors_integration" {
  rest_api_id = aws_api_gateway_rest_api.rest_api.id
  resource_id = aws_api_gateway_resource.cors_resource.id
  http_method = aws_api_gateway_method.cors_method.http_method
  type = "MOCK"
  request_templates = {
    "application/json" = jsonencode({
      statusCode=200
    })
  }
}
resource "aws_api_gateway_method_response" "cors_response" {
  depends_on = [aws_api_gateway_method.cors_method]
  rest_api_id = aws_api_gateway_rest_api.rest_api.id
  resource_id = aws_api_gateway_resource.cors_resource.id
  http_method = aws_api_gateway_method.cors_method.http_method
  status_code = 200
  response_parameters = {
    "method.response.header.Access-Control-Allow-Origin" = true,
    "method.response.header.Access-Control-Allow-Methods" = true,
    "method.response.header.Access-Control-Allow-Headers" = true
  }
  response_models = {
    "application/json" = "Empty"
  }
}
resource "aws_api_gateway_integration_response" "cors_integration_response" {
  depends_on = [aws_api_gateway_integration.cors_integration, aws_api_gateway_method_response.cors_response]
  rest_api_id = aws_api_gateway_rest_api.rest_api.id
  resource_id = aws_api_gateway_resource.cors_resource.id
  http_method = aws_api_gateway_method.cors_method.http_method
  status_code = 200
  response_parameters = {
    "method.response.header.Access-Control-Allow-Origin" = "'*'",
    "method.response.header.Access-Control-Allow-Headers" = "'Content-Type'",
    "method.response.header.Access-Control-Allow-Methods" = "'GET, OPTIONS'"
  }
}
The code above creates a {cors+} resource with an OPTIONS method that responds with the required headers when a preflight OPTIONS request is made. We can now apply the configuration:
terraform validate
terraform plan
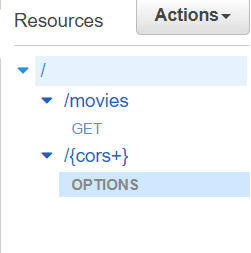
terraform apply --auto-approveAfter successfully applying changes, go to the API Gateway dashboard, and you’ll see a new {cors+} resource created with an OPTIONS method:
On testing the method, you would get a response like this:
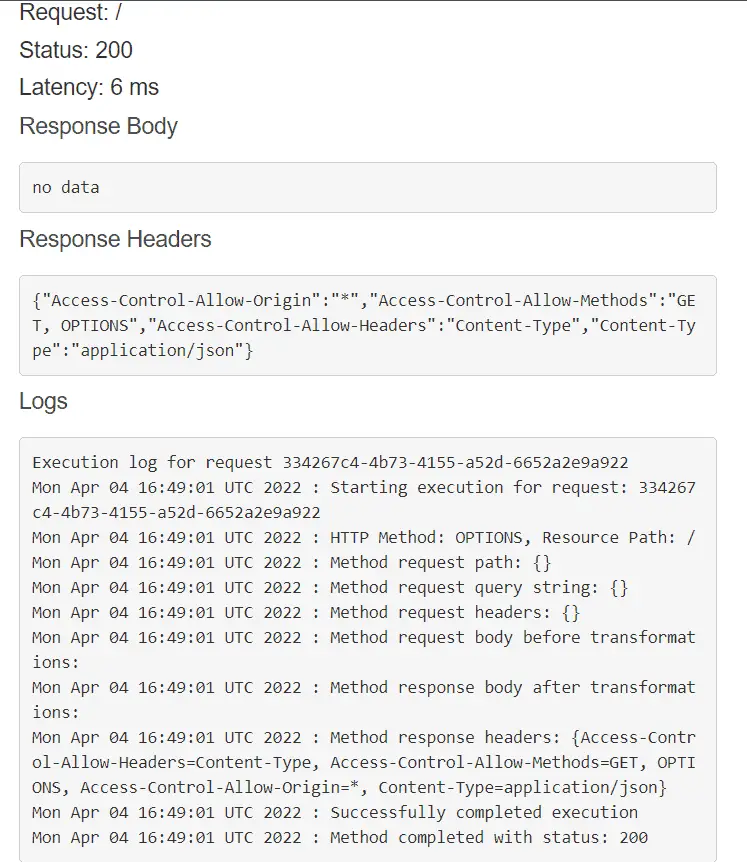
As you can see, the required CORS headers are present in the response. Thus we can conclude that CORS has been enabled!
Setting up a Domain Name for the API
A domain name adds credibility to your business. They are simple and easy to navigate URLs that represent the true essence of your website. In this section, we shall cover the process of setting up a domain name for our REST API hosted on API Gateway using Terraform. You would need to register a domain name with a domain registrar to proceed with this section. You may use Route53, a managed DNS service by AWS, to register your domain name.
Terraform Configuration for Domain Setup
In API Gateway, it is possible to configure two types of domain names – Edge Optimized or Regional. We shall configure a Regional custom domain in this article using Terraform.
At this stage, you must have a domain name configured and deployed with a hosted zone on Route53 to follow along. Typically, we’d have a root domain for our client-side application and a subdomain for our API. A root domain would be something like example.com and its corresponding subdomain would be api.example.com. We shall create a domain_config.tf file inside the api_gateway module to keep all our configurations pertaining to the domain setup isolated from the REST API configuration.
We shall begin by generating and validating an AWS Certificate Manager (ACM) certificate for our root domain. This shall help us set up secure (HTTPS) connections to our API. Add the following resources code to the domain_config.tf file :
data "aws_route53_zone" "root_domain" {
  name         = var.root_domain
  private_zone = false
}
#certificate generation and validation:
resource "aws_acm_certificate" "certificate" {
  domain_name       = var.subdomain
  validation_method = "DNS"
}

resource "aws_route53_record" "certificate_validation" {
  name    = tolist(aws_acm_certificate.certificate.domain_validation_options)[0].resource_record_name
  type    = tolist(aws_acm_certificate.certificate.domain_validation_options)[0].resource_record_type
  zone_id = data.aws_route53_zone.root_domain.zone_id
  records = [tolist(aws_acm_certificate.certificate.domain_validation_options)[0].resource_record_value]
  ttl     = 60
}
resource "aws_acm_certificate_validation" "certificate_validation" {
  certificate_arn         = aws_acm_certificate.certificate.arn
  validation_record_fqdns = [aws_route53_record.certificate_validation.fqdn]
}
Let’s understand what is happening in the above code. First, we use a terraform data source to get the hosted zone for our root domain. Then we generate an ACM certificate using the aws_acm_certificate resource block. Then, we perform a DNS validation on our generated certificate to establish ownership of the root domain. To do that, we create a route53 CNAME record using the aws_route53_record. Notice how we use the terraform tolist function to convert the outputs of the aws_acm_certificate resource from set to list and the aws_route53_zone data source to get the zone_id of our route53 hosted zone for the root domain. Finally, we use the aws_acm_certificate_validation resource block to validate the certificate generated.
Next, we add the configuration to map our subdomain to the API gateway. Add the following code below the above code in domain_config.tf :
resource "aws_api_gateway_domain_name" "domain_name" {
  domain_name = var.subdomain
  regional_certificate_arn = aws_acm_certificate_validation.certificate_validation.certificate_arn
  endpoint_configuration {
    types = [
      "REGIONAL",
    ]
  }
}

resource "aws_api_gateway_base_path_mapping" "path_mapping" {
  api_id      = aws_api_gateway_rest_api.rest_api.id
  stage_name  = aws_api_gateway_stage.rest_api_stage.stage_name
  domain_name = aws_api_gateway_domain_name.domain_name.domain_name
}

#creating route53 record for the domain to be used with REST API
resource "aws_route53_record" "sub_domain" {
  name    = var.subdomain
  type    = "A"
  zone_id = data.aws_route53_zone.root_domain.zone_id
  alias {
    name                   = aws_api_gateway_domain_name.domain_name.regional_domain_name
    zone_id                = aws_api_gateway_domain_name.domain_name.regional_zone_id
    evaluate_target_health = false
  }
}
In the above code, we first use the aws_api_gateway_domain_name resource block to create an API Gateway Domain of type ‘Regional.’ Notice how we have passed the subdomain as the domain name here as that is the domain we intend to link to our API Gateway. Next, we use the aws_api_gateway_base_path_mapping to set up a mapping from the base of the subdomain to the stage we want to point to. Next comes the most important step – we create a Route53 alias record for our subdomain to map it to the API Gateway using the aws_route53_record resource block.
We have completed our configuration for linking a domain name to our REST API. Here is the complete source code for the domain_config.tf file:
data "aws_route53_zone" "root_domain" {
  name         = var.root_domain
  private_zone = false
}
#certificate generation and validation:
resource "aws_acm_certificate" "certificate" {
  domain_name       = var.subdomain
  validation_method = "DNS"
}

resource "aws_route53_record" "certificate_validation" {
  name    = tolist(aws_acm_certificate.certificate.domain_validation_options)[0].resource_record_name
  type    = tolist(aws_acm_certificate.certificate.domain_validation_options)[0].resource_record_type
  zone_id = data.aws_route53_zone.root_domain.zone_id
  records = [tolist(aws_acm_certificate.certificate.domain_validation_options)[0].resource_record_value]
  ttl     = 60
}
resource "aws_acm_certificate_validation" "certificate_validation" {
  certificate_arn         = aws_acm_certificate.certificate.arn
  validation_record_fqdns = [aws_route53_record.certificate_validation.fqdn]
}

# The domain name to use with api-gateway
resource "aws_api_gateway_domain_name" "domain_name" {
  domain_name = var.subdomain
  regional_certificate_arn = aws_acm_certificate_validation.certificate_validation.certificate_arn
  endpoint_configuration {
    types = [
      "REGIONAL",
    ]
  }
}

resource "aws_api_gateway_base_path_mapping" "path_mapping" {
  api_id      = aws_api_gateway_rest_api.rest_api.id
  stage_name  = aws_api_gateway_stage.rest_api_stage.stage_name
  domain_name = aws_api_gateway_domain_name.domain_name.domain_name
}

#creating route53 record for the domain to be used with REST API
resource "aws_route53_record" "sub_domain" {
  name    = var.subdomain
  type    = "A"
  zone_id = data.aws_route53_zone.root_domain.zone_id
  alias {
    name                   = aws_api_gateway_domain_name.domain_name.regional_domain_name
    zone_id                = aws_api_gateway_domain_name.domain_name.regional_zone_id
    evaluate_target_health = false
  }
}
Before we apply these configurations, we would need to define the root_domain and subdomain variables in our variables.tf file of the api_gateway module :
variable "root_domain" {
  type        = string
  description = "The domain name to associate with the API"
  default     = "demo.hands-on-cloud.com" //replace your root domain name here
}
variable "subdomain"{
  type        = string
  description = "The subdomain for the API"
  default     = "api.demo.hands-on-cloud.com" //replace your subdomain name here
}
So we’re all set to apply these configurations! Go to the root of the project directory and run :
terraform validate
terraform plan
terraform apply --auto-approve
Testing our configuration
Once the configuration gets applied successfully, we can test it using the same old authorizer_test.sh script we wrote earlier. Copy the values of cognito_client_id and cognito_user_pool_id from the output of the terraform apply command. Put them in the CLIENT_ID and the USER_POOL_ID variables of the authorizer_test.sh script. For the value URL in the script, put your subdomain name followed by the resource name. In our case, the subdomain is api.demo-hands-on-cloud.com , and the resource is movies. So we would set URL="https://api.demo.hands-on-cloud.com/movies" in the script. Once these values are set, run the script :
./authorizer_test.shYou would see the following output :
Thus we have successfully obtained a JSON response from our API. So the domain is correctly configured with our API, and everything works fine!
Summary
In this article, we covered the following:
- Creating a basic REST API with a mock response using API Gateway and Terraform
- Integrating the API with a lambda using Terraform
- Securing the API using an Authorizer with Terraform
- Setting up CORS for our API using Terraform
- Setting up a domain name for our API using Terraform
