AWS Glue is a serverless and fully-managed Extract Transform and Load (ETL) service that makes it simple and cost-effective to categorize your data, clean it, enrich it, and move it reliably between various data stores and data streams. AWS Glue consists of a central metadata repository known as the AWS Glue Data Catalog, an ETL engine that automatically generates Python or Scala code, and a flexible scheduler that handles dependency resolution, job monitoring, and retries. This Boto3 Glue tutorial covers how to interact with AWS Glue, and automate ETL jobs, crawlers, and define the Metadata Catalogs using Python.
Table of contents
Prerequisites
To start working with AWS Glue using Boto3, you need to set up your Python environment on your laptop.
In summary, this is what you will need:
- Python 3
- Boto3
- AWS CLI tools
Alternatively, you can set up and launch a Cloud9 IDE.
Working with AWS Glue Data Crawlers
AWS Glue allows you to use crawlers to populate the AWS Glue Data Catalog tables. Upon completion, the crawler creates or updates one or more tables in your Data Catalog. Extract, transform, and load (ETL) jobs that you define in AWS Glue using these Data Catalog tables as sources and targets. The ETL job reads from and writes to the data stores specified in the source and target Data Catalog tables.
In this article section, we’ll explain how to manage AWS Glue crawlers using the Boto3 library.
Creating an AWS Glue Crawler
To start managing the AWS Glue service through the API, you need to instantiate the Boto3 client:
import boto3
client = boto3.client('glue', region_name="us-east-1")Tocreate an AWS Glue Data Crawler, you need to use the create_crawler() method of the Boto3 library. This method creates a crawler that can retrieve the metadata information from the data sources and store it in the AWS Glue Data Catalog. Crawlers can process multiple data sources at a time.
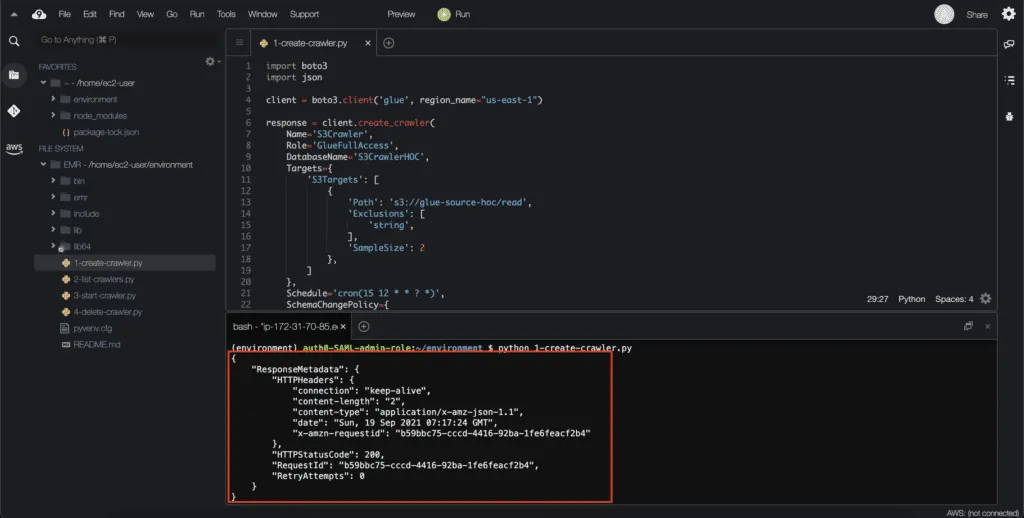
In the following example, the defined crawler can read from two locations in an Amazon S3 bucket. It also has a specific schedule, which defines the crawling intervals. Depending on your case, you can configure the crawler to update theAWS Glue Data Catalog structure or log the change if the schema of your data changes.
import boto3
import json
client = boto3.client('glue', region_name="us-east-1")
response = client.create_crawler(
    Name='S3Crawler',
    Role='GlueFullAccess',
    DatabaseName='S3CrawlerHOC',
    Targets={
        'S3Targets': [
            {
                'Path': 's3://glue-source-hoc/read',
                'Exclusions': [
                    'string',
                ],
                'SampleSize': 2
            },
            {
                'Path': 's3://glue-source-hoc/write',
                'Exclusions': [
                    'string',
                ],
                'SampleSize': 2
            },
        ]
    },
    Schedule='cron(15 12 * * ? *)',
    SchemaChangePolicy={
        'UpdateBehavior': 'UPDATE_IN_DATABASE',
        'DeleteBehavior': 'DEPRECATE_IN_DATABASE'
    },
    RecrawlPolicy={
        'RecrawlBehavior': 'CRAWL_EVERYTHING'
    },
    LineageConfiguration={
        'CrawlerLineageSettings': 'DISABLE'
    }
)
print(json.dumps(response, indent=4, sort_keys=True, default=str))
Here’s an execution output:
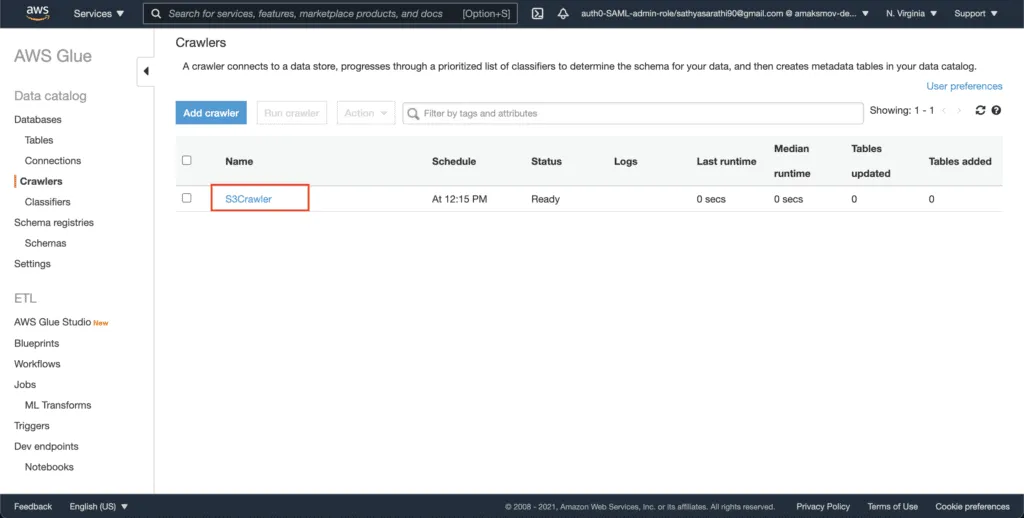
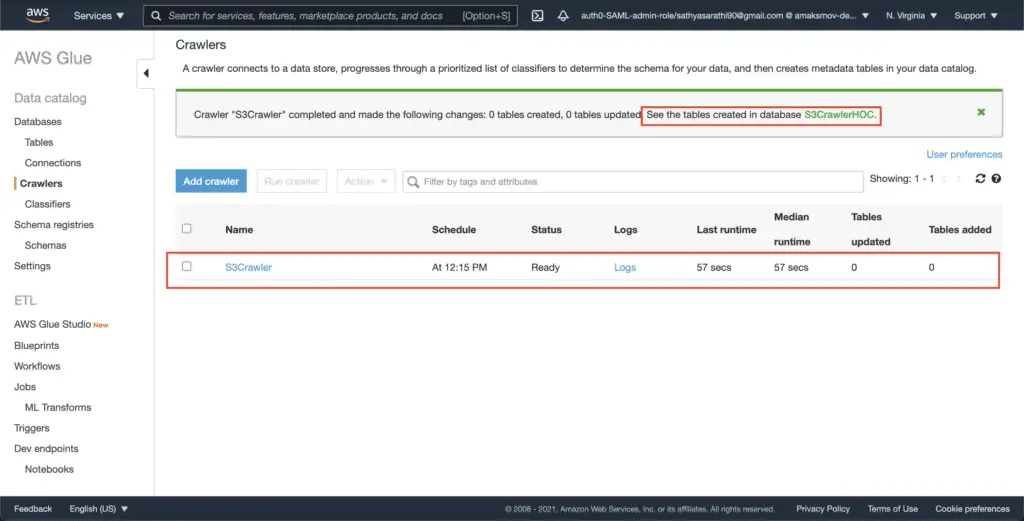
The created S3Crawler becomes visible in the AWS Glue console as well:
ListingAWS Glue Crawlers
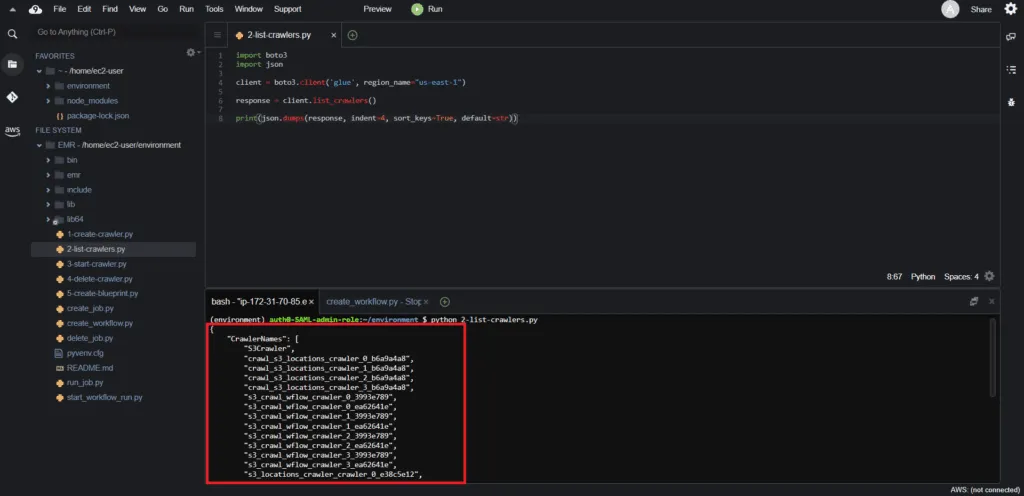
To listAWS Glue Crawlers, you need to use the list_crawlers() method of the Boto3 client:
import boto3
import json
client = boto3.client('glue', region_name="us-east-1")
response = client.list_crawlers()
print(json.dumps(response, indent=4, sort_keys=True, default=str))
The execution returns the listing of all the existing AWS Glue data crawlers in the particular AWS Region:
Starting an AWS Glue Data Crawler
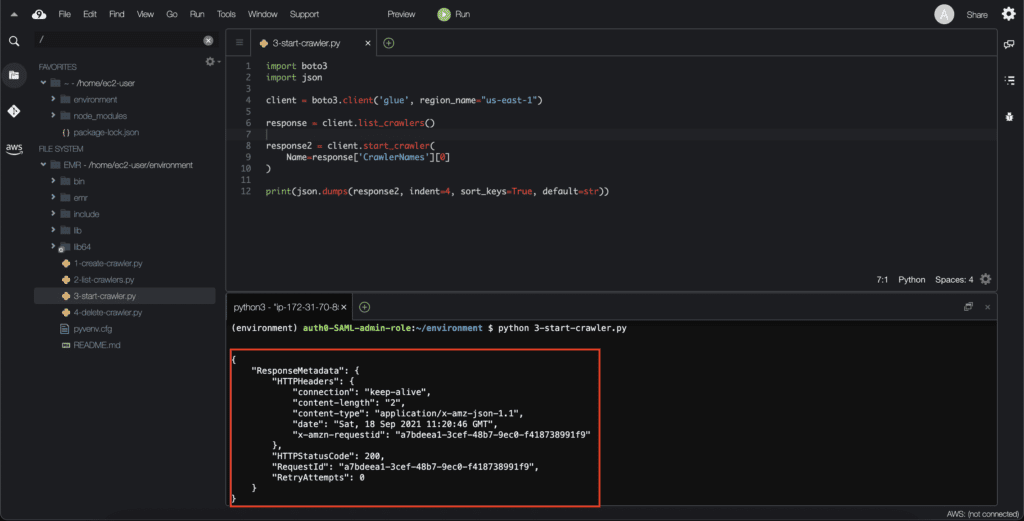
To start the AWS Glue Data Crawler execution, you need to use the start_crawler() method of the Boto3 client. This method requires the name argument, which defines the crawler to start.
In the following example, we’ll run the first crawler from the list of available crawlers:
import boto3
import json
client = boto3.client('glue', region_name="us-east-1")
response = client.list_crawlers()
response2 = client.start_crawler(
    Name=response['CrawlerNames'][0]
)
print(json.dumps(response2, indent=4, sort_keys=True, default=str))
Here’s an execution output:
After execution, the crawler generates the database:
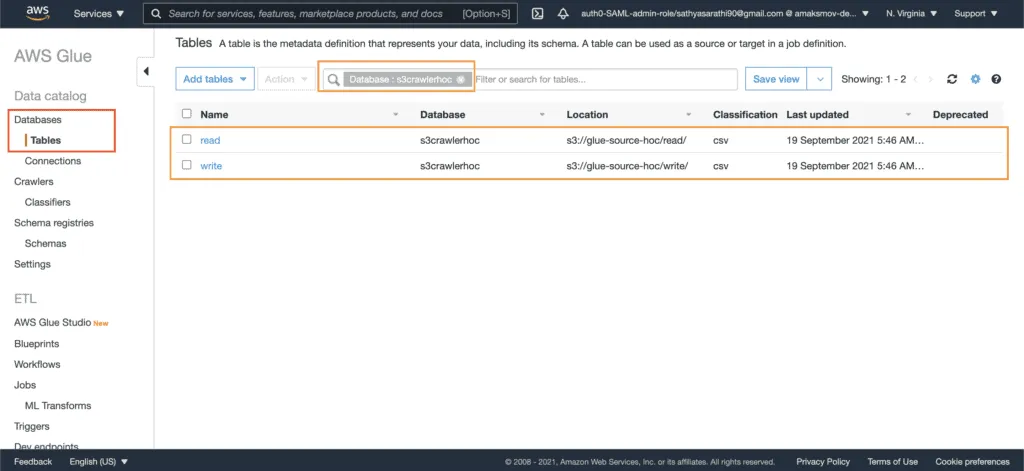
The created database will contain two tables, which structure describes the metadata stored in the S3 bucket:
Finally, you can explore every table to see the metadata information:
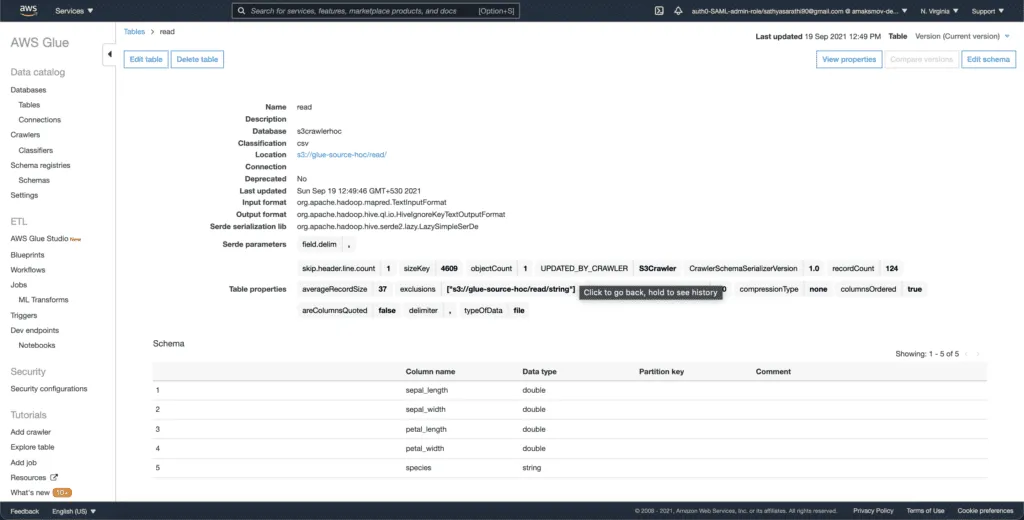
The AWS Glue crawler grubs the schema of the data from uploaded CSV files, detects CSV data types, and saves this information in regular tables for future usage.
Deleting an AWS Glue Data Crawler
To delete an AWS Glue Data Crawler, you need to use the delete_crawler() method of the Boto3 client. This method requires the name argument, which represents the current crawler name:
import boto3
import json
client = boto3.client('glue', region_name="us-east-1")
response = client.list_crawlers()
response2 = client.delete_crawler(
Name=response['CrawlerNames'][0]
)
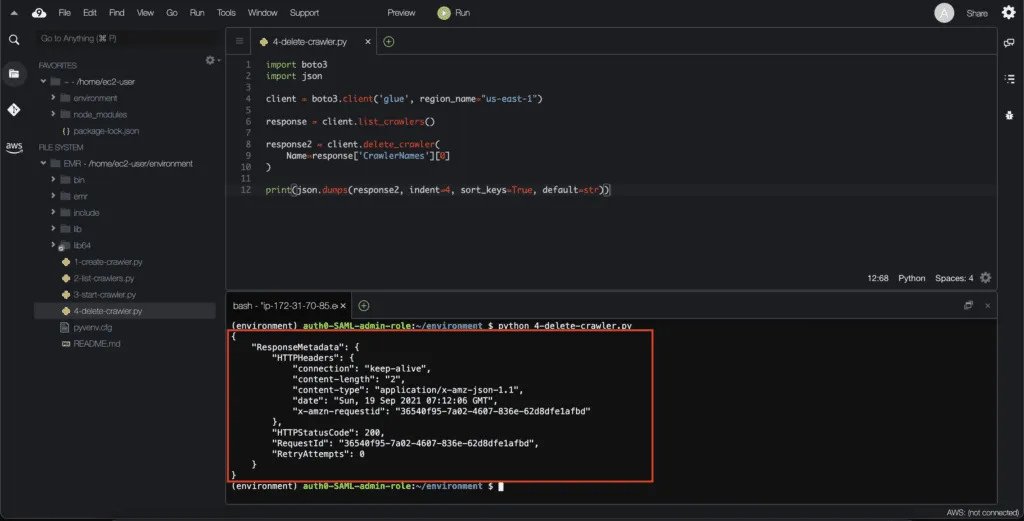
print(json.dumps(response2, indent=4, sort_keys=True, default=str))Here’s an execution output:
Working with AWS Glue Jobs
An AWS Glue job drives the ETL from source to target based on on-demand triggers or scheduled runs. The job runs will trigger the Python scripts stored at an S3 location. The Glue interface generates this code dynamically, just as a boilerplate to edit and include new logic.
An AWS Glue job can be either one of the following:
- Batch job – runs on Spark environment
- Streaming job – runs on Spark Structured Streaming environment
- Plain Python shell job – runs in a simple Python environment
For this exercise, let’s clone this repository by invoking the following command.
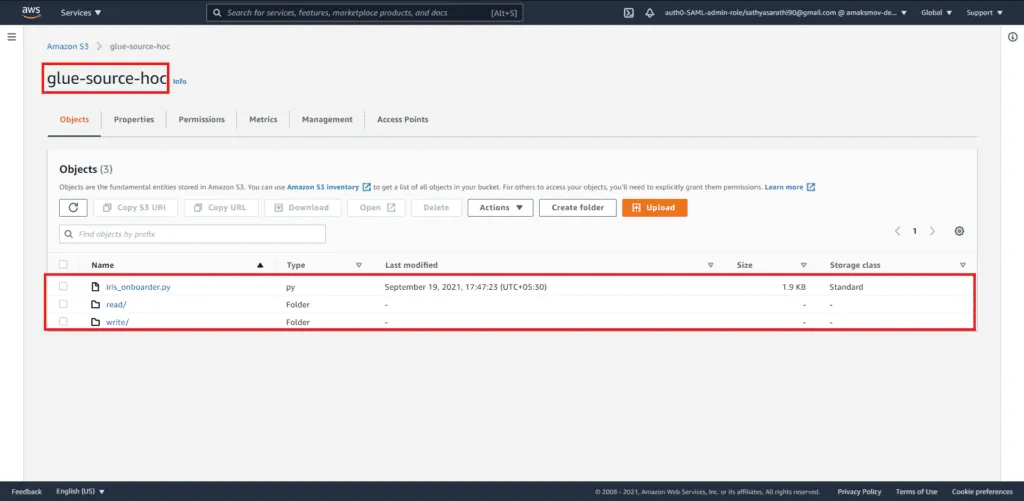
git clone https://github.com/datawrangl3r/hoc-glue-example.gitUpload the Python file to the root directory and the CSV data file to the read directory of your S3 bucket. The script reads the CSV file present inside the read directory.
Here’s an S3 bucket structure example:
Creating an AWS Glue Job
To create an AWS Glue job, you need to use the create_job() method of the Boto3 client. This method accepts several parameters, such as the Name of the job, the Role to be assumed during the job execution, a set of commands to run, arguments for those commands, and other parameters related to the job execution.
In the following example, we will upload a Glue job script to an S3 bucket and use a standard worker to execute the job script. You can adjust the number of workers if you need to process massive data.
import boto3
import json
client = boto3.client('glue', region_name="us-east-1")
response = client.create_job(
    Name='IrisJob',
    Role='AWSGlueServiceRole-Demo',
    Command={
        'Name': 'glueetl',
        'ScriptLocation': 's3://glue-source-hoc/iris_onboarder.py',
        'PythonVersion': '3'
    },
    DefaultArguments={
      '--TempDir': 's3://glue-source-hoc/temp_dir',
      '--job-bookmark-option': 'job-bookmark-disable'
    },
    MaxRetries=1,
    GlueVersion='3.0',
    NumberOfWorkers=2,
    WorkerType='Standard'
)
print(json.dumps(response, indent=4, sort_keys=True, default=str))
Here’s an execution output:
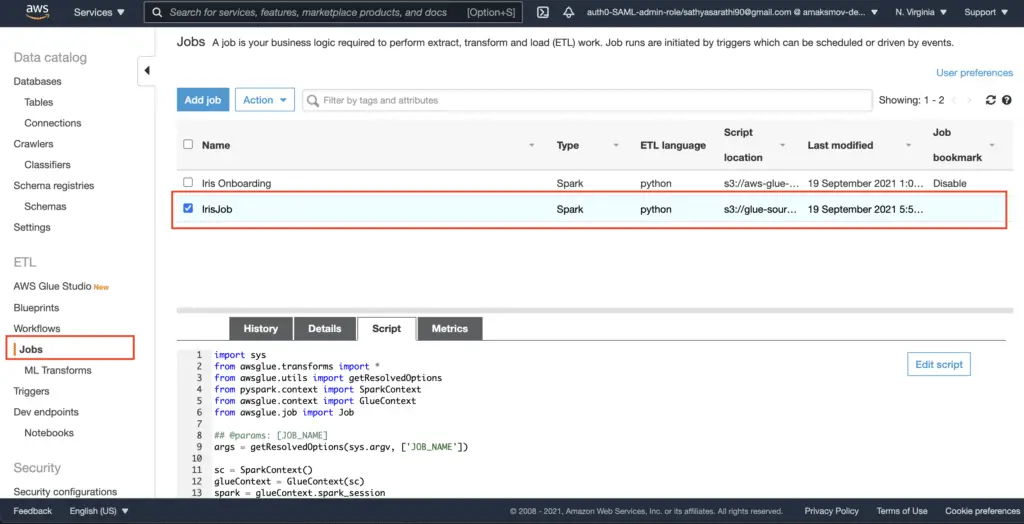
You can review the created job in the AWS console:
Note: The job creation process might take some time, so you have to wait a few minutes before running the job. At the time of the article writing, there are no waiters defined for the Glue service.
Listing AWS Glue Jobs
To list AWS Glue jobs, you need to use the list_jobs() method of the Boto3 Glue client.
import boto3
import json
client = boto3.client('glue', region_name="us-east-1")
response = client.list_jobs()
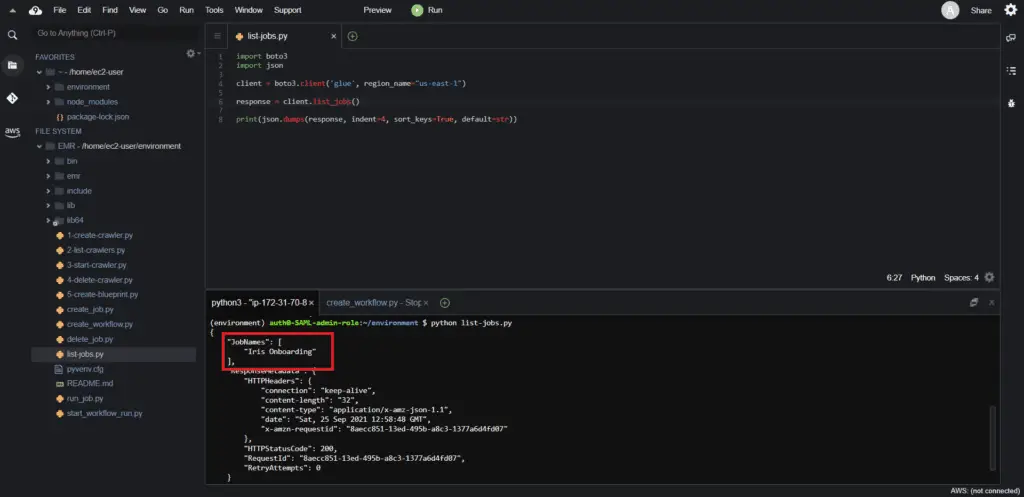
print(json.dumps(response, indent=4, sort_keys=True, default=str))The method execution returns all the existing AWS Glue jobs for the particular AWS Region:
Starting an AWS Glue Job
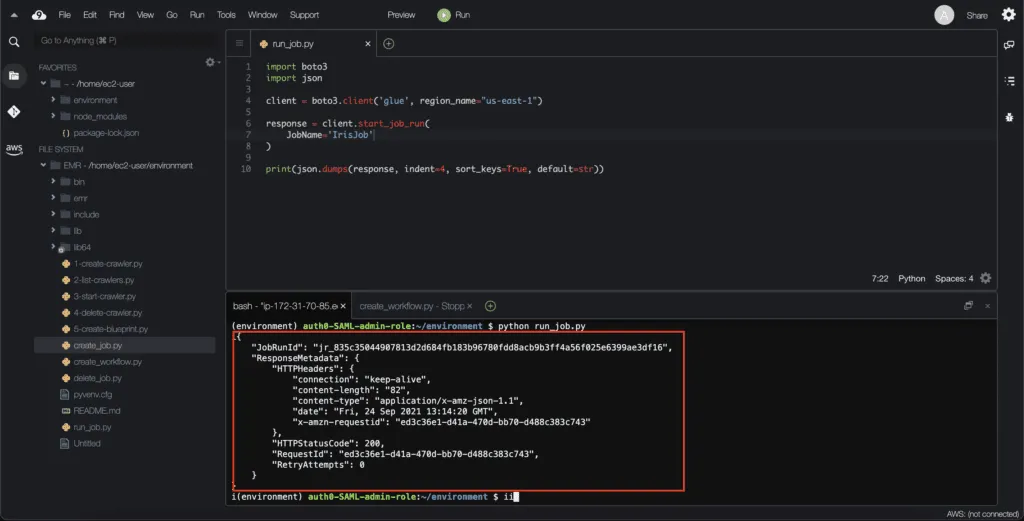
To start an AWS Glue Job, you need to use the start_job_run() method of the Boto3 Glue client. This method triggers the job execution, invoking the Python script in the S3 bucket.
import boto3
import json
client = boto3.client('glue', region_name="us-east-1")
response = client.start_job_run(
JobName='IrisJob'
)
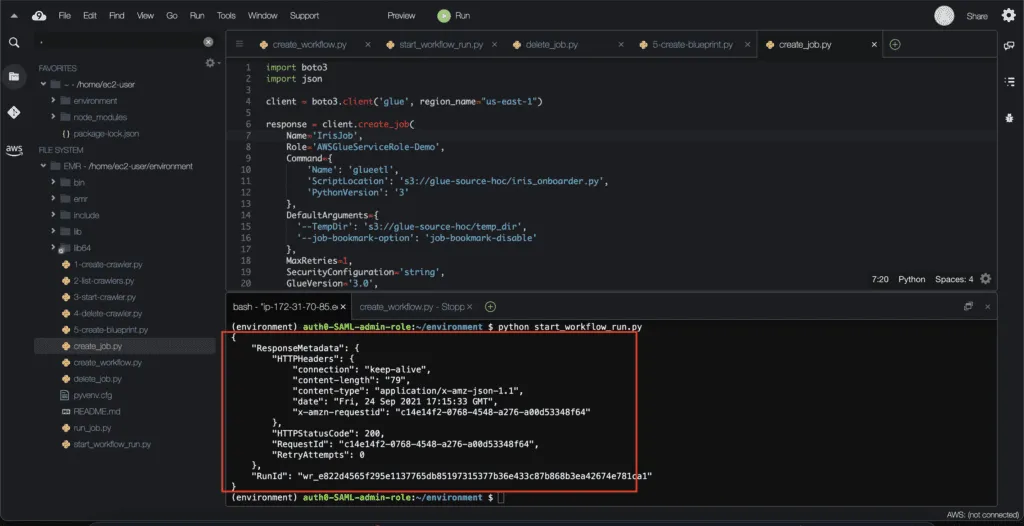
print(json.dumps(response, indent=4, sort_keys=True, default=str))Here’s an execution output:
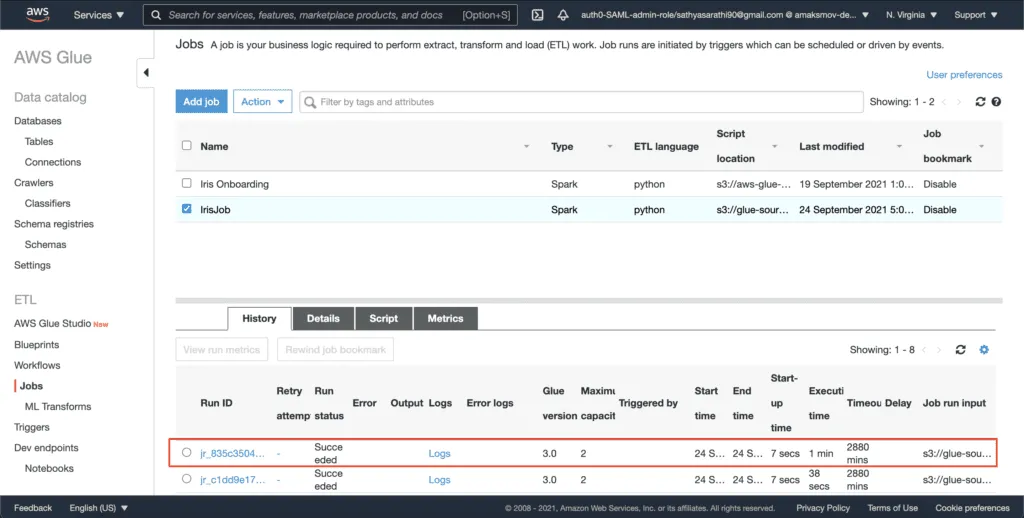
The AWS console shows the job execution status under the Jobs tab for every single job:
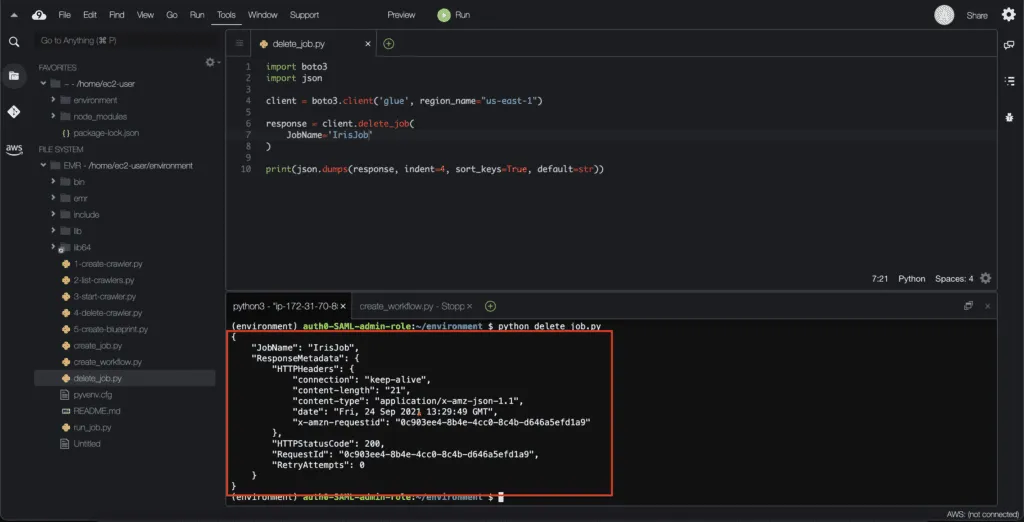
Deleting an AWS Glue Job
To delete an AWS Glue job, you need to use the delete_job() method of the Boto3 Glue client:
import boto3
import json
client = boto3.client('glue', region_name="us-east-1")
response = client.delete_job(
    JobName='IrisJob'
)
print(json.dumps(response, indent=4, sort_keys=True, default=str))
Here’s an execution output:
Working with AWS Glue Blueprints and Workflows
In AWS Glue, you can use workflows to create and visualize complex extract, transform, and load (ETL) activities involving multiple crawlers, jobs, and triggers. Each workflow manages the execution and monitoring of all its jobs and crawlers. As a workflow runs each component, it records execution progress and status. This provides you with an overview of the larger task and the details of each step.
AWS Glue blueprints provide a way to create and share AWS Glue workflows. When there is a complex ETL process that could be used for similar use cases, you can create a single blueprint rather than creating an AWS Glue workflow for each use case.
The blueprint specifies the jobs and crawlers to include in a workflow and specifies parameters that the workflow user supplies when they run the blueprint to create a workflow.
Check the official AWS documentation on Developing AWS Glue Blueprints for more information.
In the following sections, we will deploy a demo blueprint to create a workflow to crawl multiple S3 locations using Boto3.
git clone https://github.com/awslabs/aws-glue-blueprint-libs.git
cd aws-glue-blueprint-libs/samples/
zip crawl_s3_locations.zip crawl_s3_locations/*
Upload the crawl_s3_locations.zip file to your S3 bucket.
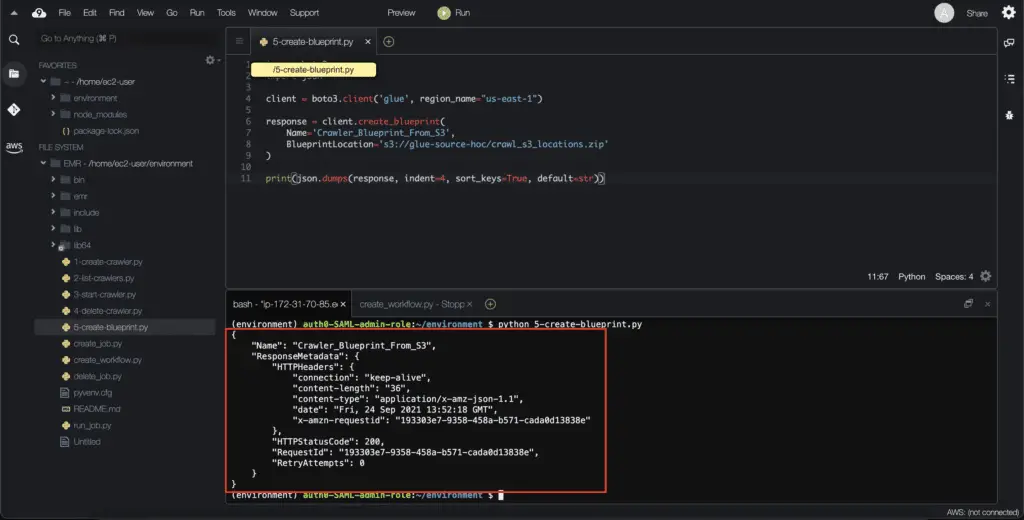
Creating an AWS Glue Blueprint
Tocreate an AWS Glue Blueprint, you need to use the create_blueprint() method of the Boto3 Glue client:
import boto3
import json
client = boto3.client('glue', region_name="us-east-1")
response = client.create_blueprint(
    Name='Crawler_Blueprint_From_S3',
    BlueprintLocation='s3://glue-source-hoc/crawl_s3_locations.zip'
)
print(json.dumps(response, indent=4, sort_keys=True, default=str))
Here’s an execution output:
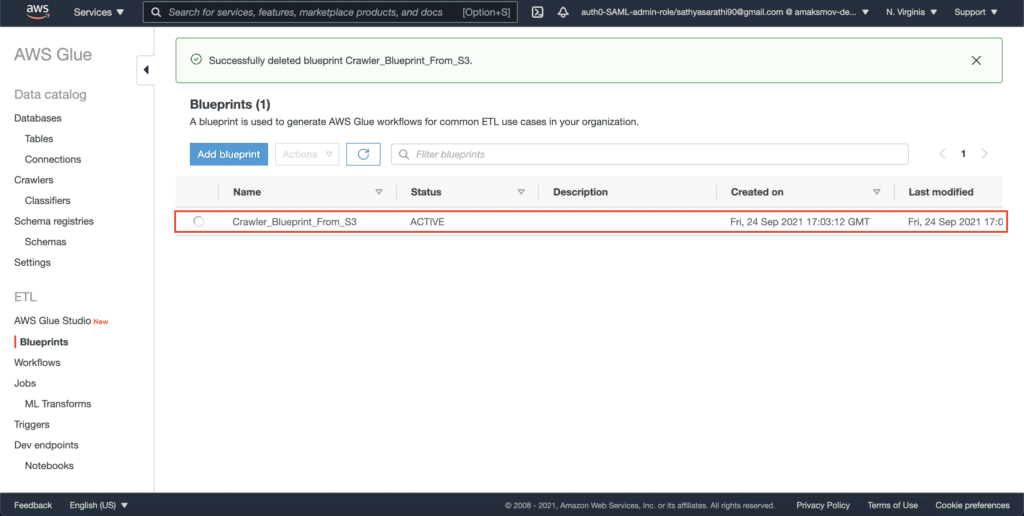
It might take a couple of seconds to deploy an AWS Glue Blueprint. On successful deployment, the Blueprint status will change to ACTIVE:
Listing AWS Glue Blueprints
Tolist AWS Glue Blueprints, you need to use the list_blueprints() method of the Boto3 Glue client:
import boto3
import json
client = boto3.client('glue', region_name="us-east-1")
response = client.list_blueprints()
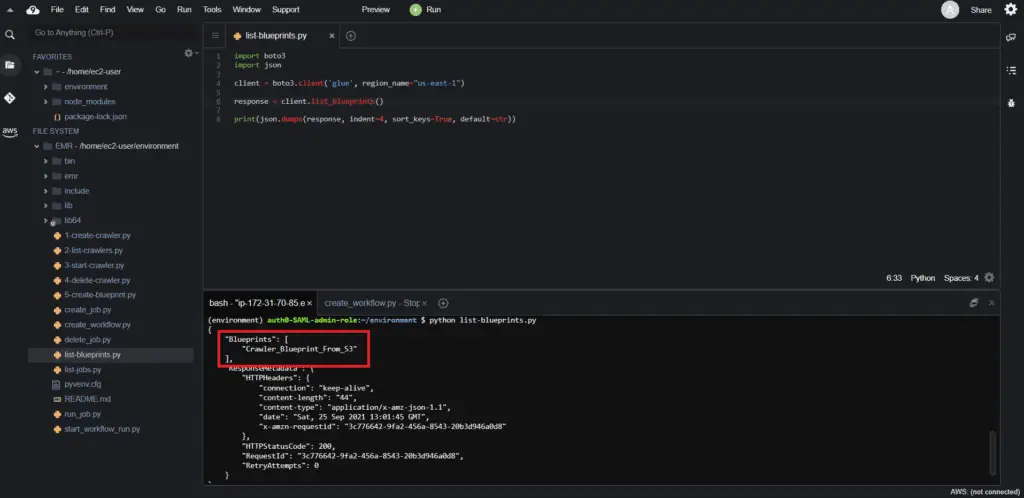
print(json.dumps(response, indent=4, sort_keys=True, default=str))This method returns the names of the blueprints that are currently available in the specified AWS Region in your account:
Creating an AWS Glue Workflow from a Blueprint
Once the blueprint is ready, you need to invoke the start_blueprint_run() method of the Boto3 Glue client with the parameters defined in the blueprint.cfg config file from the cloned repository. These parameters include the WorkflowName, IAMRole, S3Paths, and DatabaseName.
import boto3
import json
client = boto3.client('glue', region_name="us-east-1")
response = client.start_blueprint_run(
BlueprintName='Crawler_Blueprint_From_S3',
Parameters='{"WorkflowName": "s3_crawl_wflow", \
"IAMRole": "arn:aws:iam::585584209241:role/GlueFullAccess", \
"S3Paths": ["s3://covid19-lake/enigma-aggregation/json/global/", \
"s3://covid19-lake/enigma-aggregation/json/global_countries/", \
"s3://covid19-lake/enigma-aggregation/json/us_counties/", \
"s3://covid19-lake/enigma-aggregation/json/us_states/"], \
"DatabaseName": "blueprint_tutorial"}',
RoleArn='arn:aws:iam::585584209241:role/GlueForDemo'
)
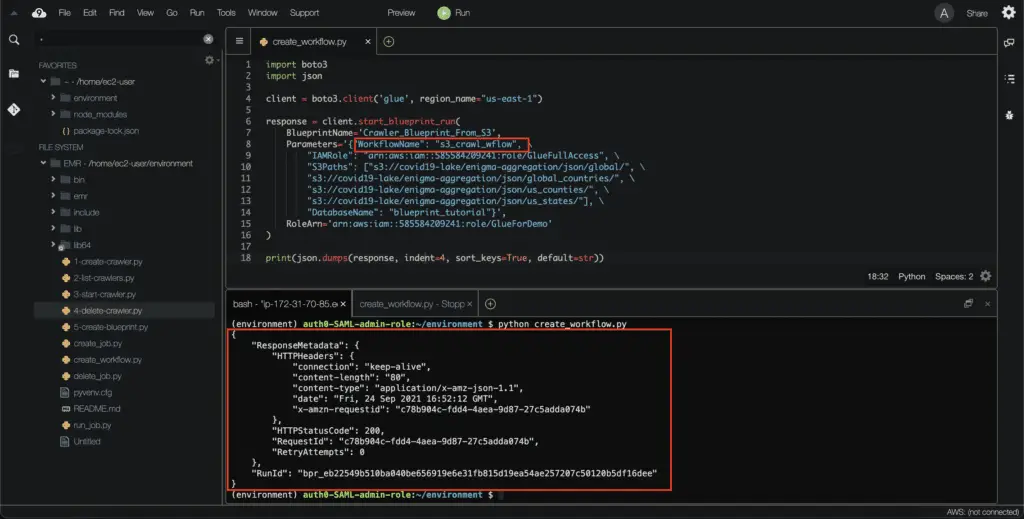
print(json.dumps(response, indent=4, sort_keys=True, default=str))Here’s an execution output:
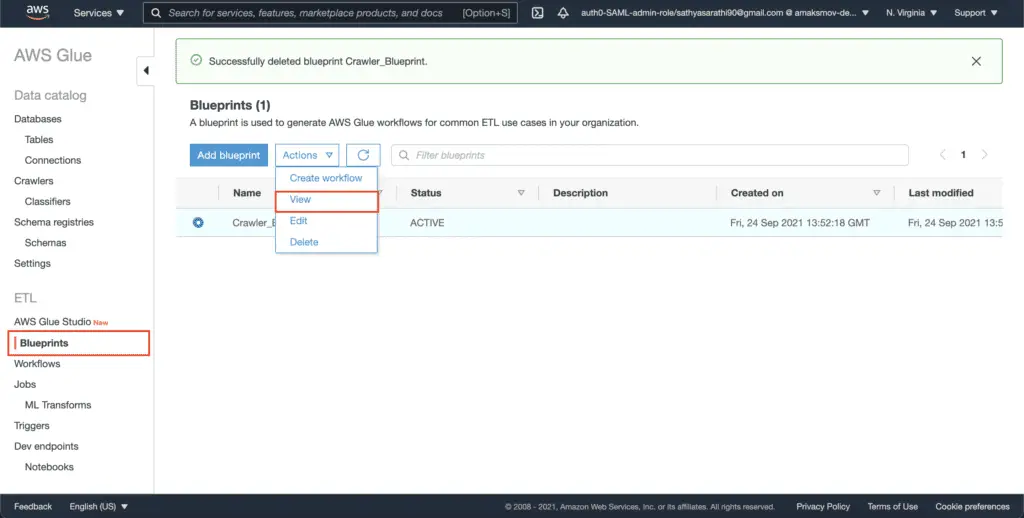
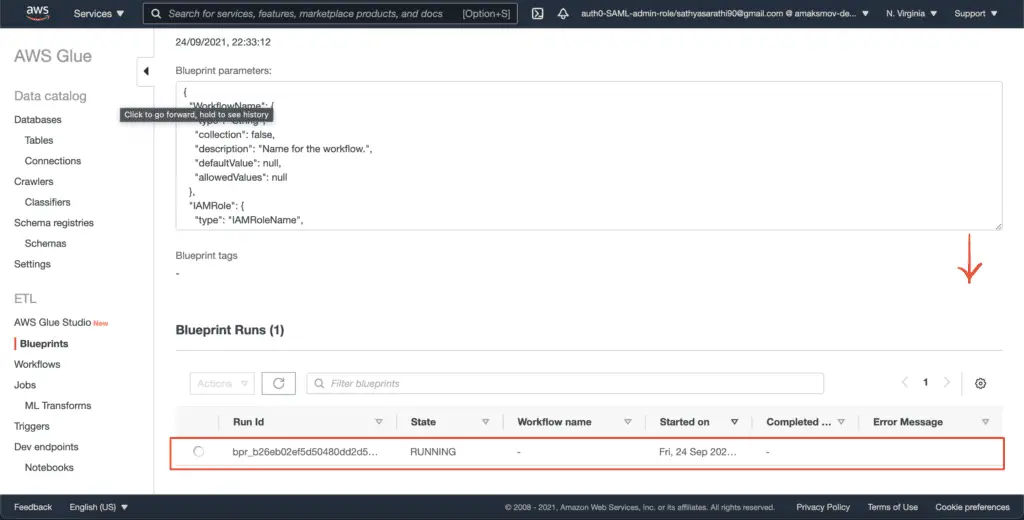
To review the workflow creation status, select the AWS Glue Blueprint in the AWS console and hit the View from the Actions drop-down menu:
Scrolling down to see the blueprint runs:
On completion, AWS Glue assigns the workflow name to the Blueprint run:
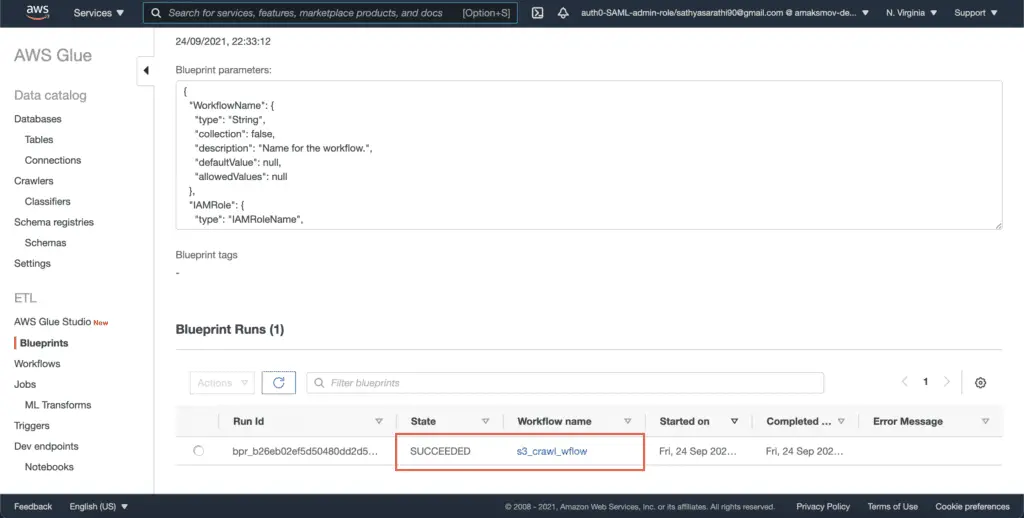
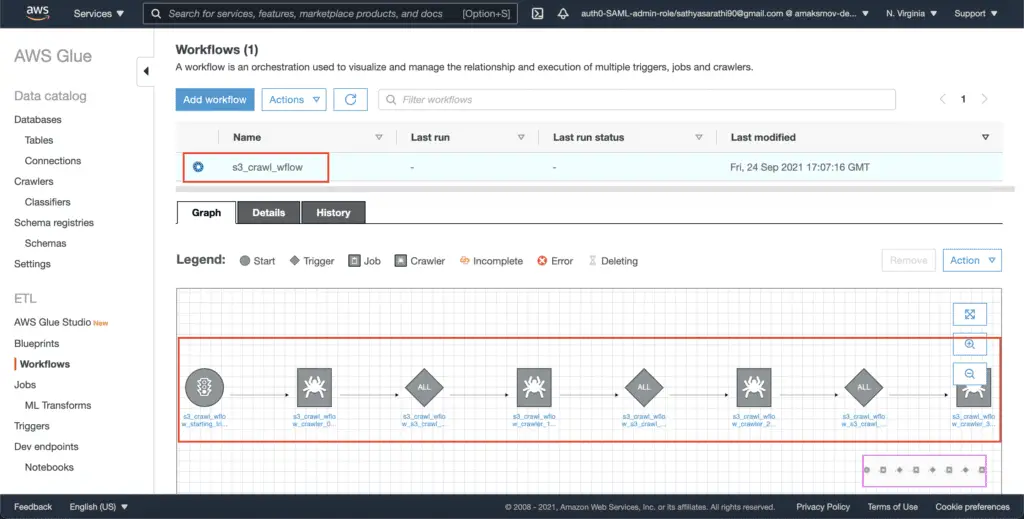
Click on the workflow to see the graph containing the sequence of steps that will be executed during the workflow run:
Listing AWS Glue Workflows
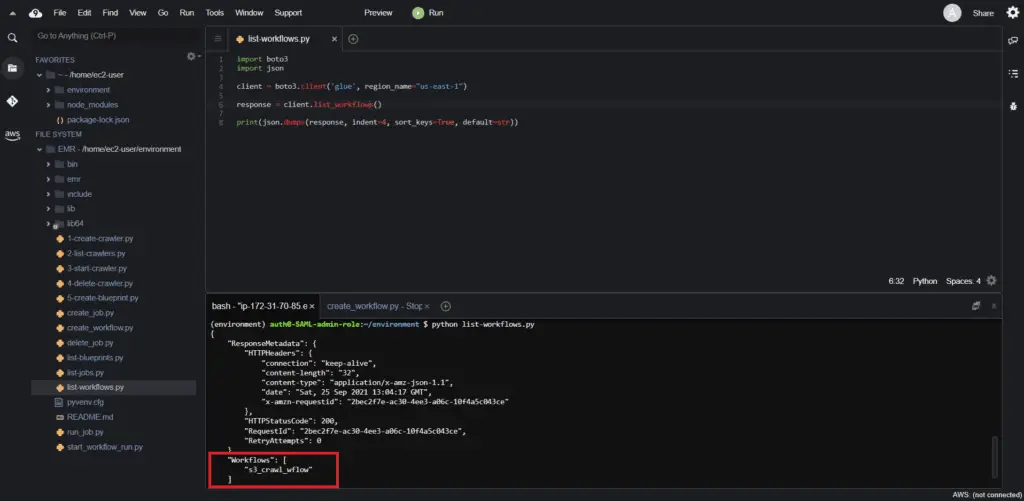
Tolist AWS Glue Workflows, you need to use the list_workflows() method of the Boto3 Glue client:
import boto3
import json
client = boto3.client('glue', region_name="us-east-1")
response = client.list_workflows()
print(json.dumps(response, indent=4, sort_keys=True, default=str))
This method returns the workflows in the specified AWS Region:
Starting an AWS Glue Workflow
Tostart an AWS Glue Workflow, you need to use the start_workflow_run() method of the Boto3 Glue client:
import boto3
import json
client = boto3.client('glue', region_name="us-east-1")
response = client.start_workflow_run(
    Name='s3_crawl_wflow'
)
print(json.dumps(response, indent=4, sort_keys=True, default=str))
You can check the status of the workflow in the AWS console:
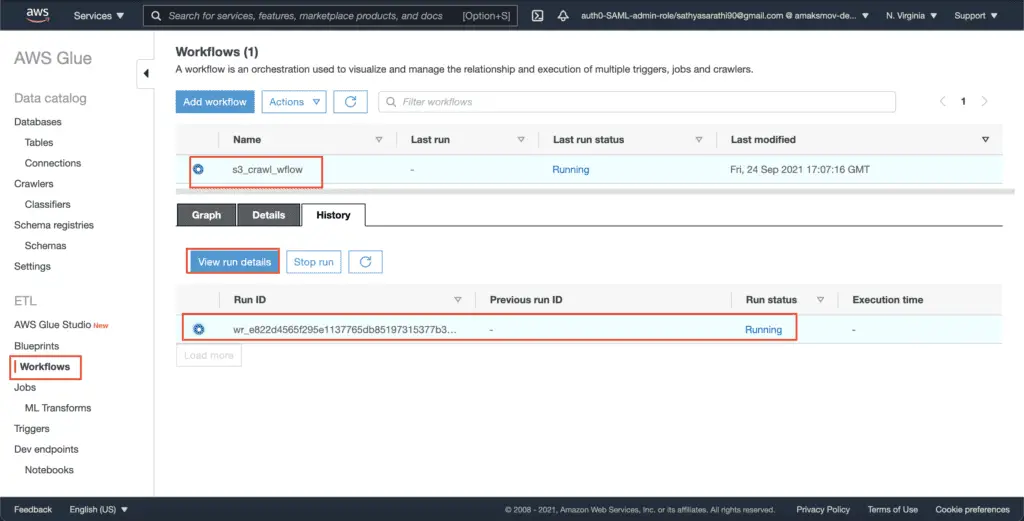
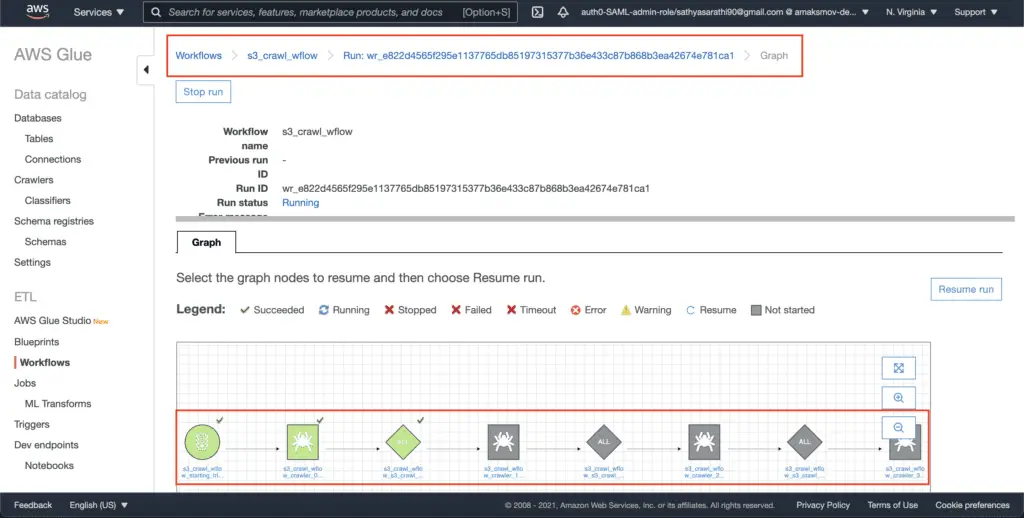
Click on the View run details button to see the workflow execution graph, which shows the current status of the workflow run.
Deleting an AWS Glue Workflow
Todelete an AWS Glue Workflow, you need to use the delete_workflow() method of the Boto3 Glue client:
import boto3
import json
client = boto3.client('glue', region_name="us-east-1")
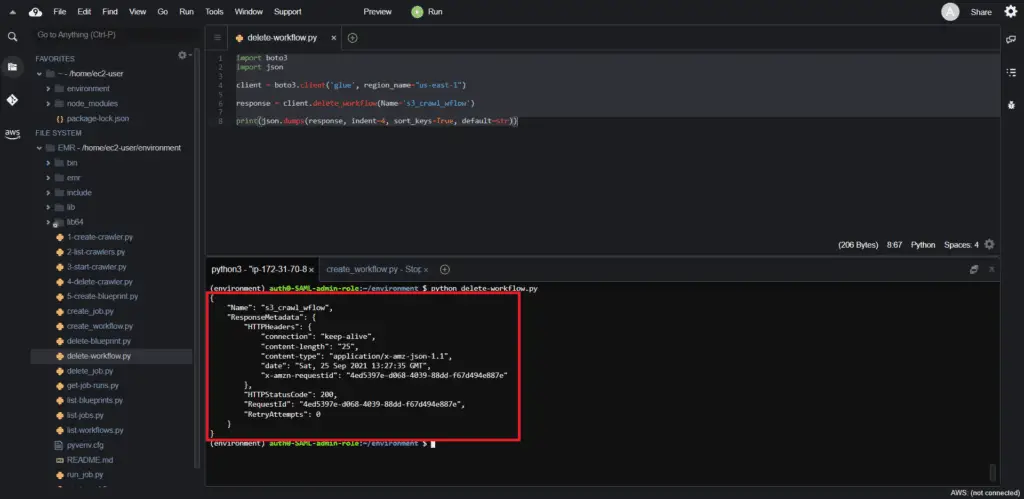
response = client.delete_workflow(Name='s3_crawl_wflow')
print(json.dumps(response, indent=4, sort_keys=True, default=str))Here’s an execution output:
Deleting an AWS Glue Blueprint
Todelete an AWS Glue Blueprint, you need to use the delete_blueprint() method of the Boto3 library. This method takes the Name of the Blueprint as an argument.
import boto3
import json
client = boto3.client('glue', region_name="us-east-1")
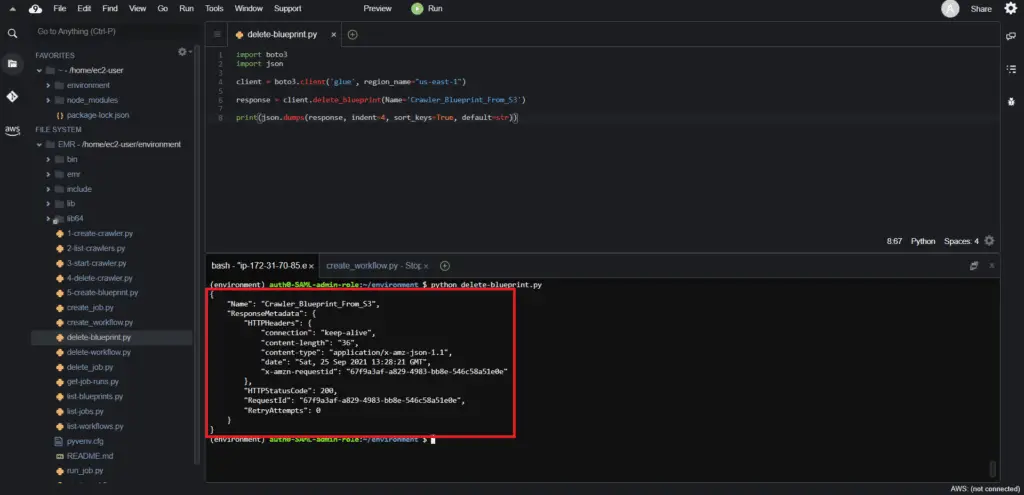
response = client.delete_blueprint(Name='Crawler_Blueprint_From_S3')
print(json.dumps(response, indent=4, sort_keys=True, default=str))Here’s an execution output:
Summary
This article covered how to use the Boto3 library to interact with AWS Glue, automate ETL jobs and crawlers, and define the Metadata Catalogs.
