Amazon Simple Email Service is a cost-effective, flexible, and scalable email service that enables developers to send mail from within any application. You can configure Amazon SES quickly to support several email use cases, including transactional, marketing, or mass email communications. This Boto3 SES tutorial covers verifying the sender (domain names, email addresses), creating email templates, and sending emails in Python using the Boto3 library.
Table of contents
Prerequisites
To start interacting with Amazon SES programmatically and making API calls, you must configure your Python environment.
In general, here’s what you need to have installed:
- Python 3
- Boto3
- AWS CLI tools
Alternatively, you can use a Cloud9 IDE.
What is SES?
Amazon Simple Email Service is an email platform that provides an easy, cost-effective way to send and receive email using your email addresses and domains. Built on the reliable and scalable infrastructure of Amazon Web Services (AWS), it is a cost-effective service for companies of all sizes that use email to communicate with their customers.
For example, you can send marketing emails such as special offers, transactional emails such as order confirmations, and other types of correspondence such as newsletters.
Difference between SNS, SQS, and SES
| Amazon SNS | Amazon SQS | Amazon SES |
|---|---|---|
| This service is designed to send a notification to subscribers of topics via multiple protocols such as HTTP, Email, SQS, and SMS. It is a fully managed distributed publish-subscribe system (pub-sub). The core functionality of Amazon SNS is to push a message to multiple subscribers as soon as it receives it from a publisher. | This service is a distributed queuing system. Messages are not pushed to receivers. Receivers have to poll or pull messages from SQS. Multiple receivers can’t receive messages at the same time. It’s the receiver’s responsibility to receive a message, process it, and delete it. | This service is a cloud-based email delivery service. Amazon SES can send HTML emails, while SNS can’t. SES can also use email templates. The primary purpose of SES is to send high-volume emails efficiently and securely. |
Sandbox mode
When you start using this service for the first time, you need to remove your AWS account from the Sandbox mode that applies certain restrictions while allowing all the features.
When you are in Sandbox mode, you can send a maximum of 200 messages per 24-hour period and a maximum of 1 message per second. You can only send mail to verified email addresses and domains or the Amazon SES mailbox simulator.
To get out of Sandbox mode, you need to provide additional information about your domain and Sending Statistics. To do that, you need to go to AWS SES Web Console, then click on Edit your account details.

Managing sender identity in SES using Boto3
Amazon Simple Email Service requires you to verify your identities (the domains or email addresses that you send email from) to confirm that you own them and to prevent unauthorized use.
There are two ways to verify sender identities:
- verifying an email domain
- verifying an email address
Which one to use depends on your business requirements.
Connecting to Amazon SES APIs using Boto3
The first thing you need to define in your Python script or Lambda function is to tell Boto3 how to connect to the Amazon SES. You must use the SES Boto3 client methods to connect to Amazon SES API. Currently, Boto3 resources for SES are not supported.
Here’s an example of using the Boto SES client() method:
import boto3
ses_client = boto3.client('ses')
Domain verification in SES using Boto3
In this case, I’m going to use my domain name, which is hosted on NameCheap.
import boto3
ses_client = boto3.client('ses')
response = ses_client.verify_domain_identity(
    Domain='luckytuvshee.me'
)
print(response)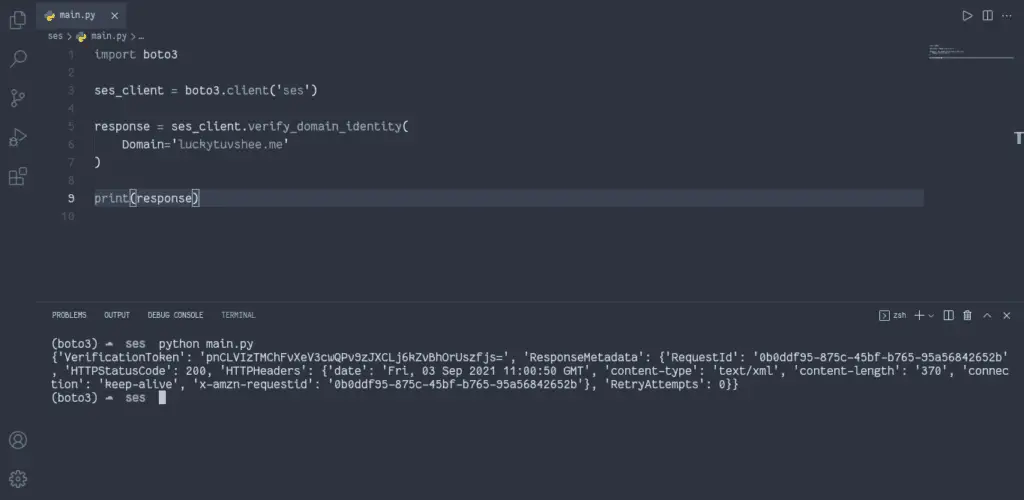
Here’s what you’ll see in the AWS console:
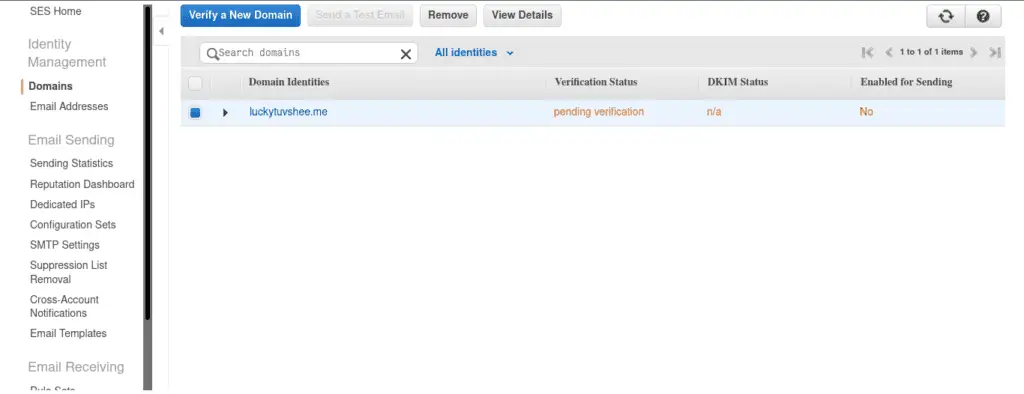
AWS will provide you with the TXT Name and TXT Value for the TXT record, which you must put into your DNS.
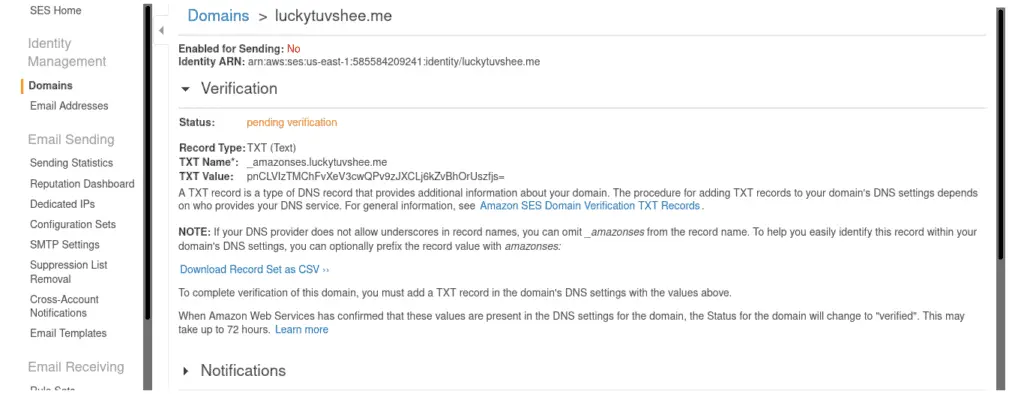
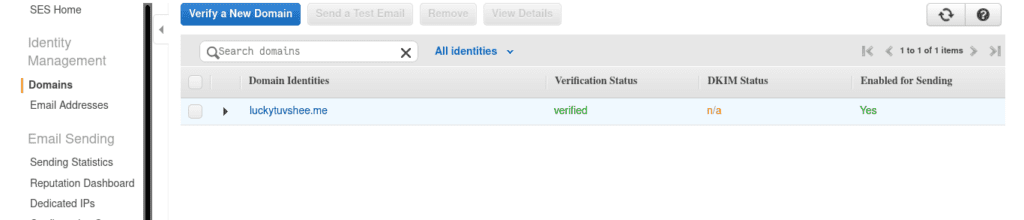
Once you’ve created the TXT record in your DNS, go back to the Verify a New Domain page in the Amazon SES web console and check if the domain has been verified.
If the correct TXT record is found, the domain status will change to verified.
Verify email in SES using Boto3
To verifyemail in SES, you need to use the verify_email_address() method of the SES client.
import boto3
ses_client = boto3.client('ses')
response = ses_client.verify_email_address(
    EmailAddress='luckytuvshee@protonmail.com'
)
print(response)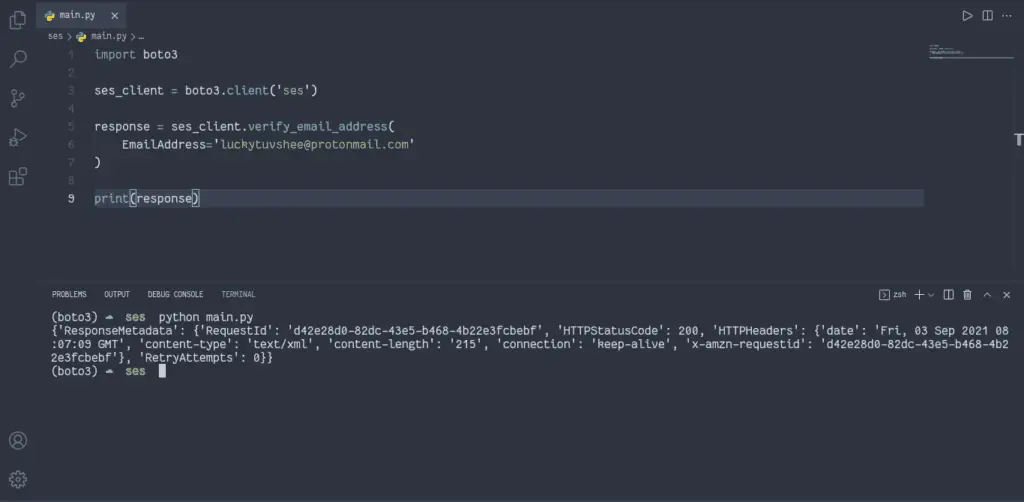
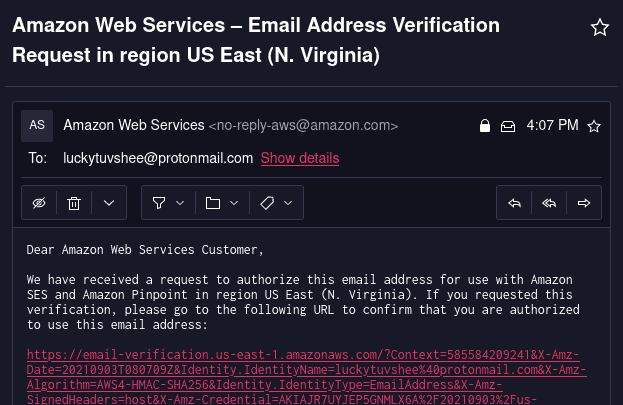
Here’s the email that was sent from AWS to verify the email. Click on the URL to the link in the email to verify it.
Once you’ve verified the email address ownership, you’ll see it in a new status in the AWS console.
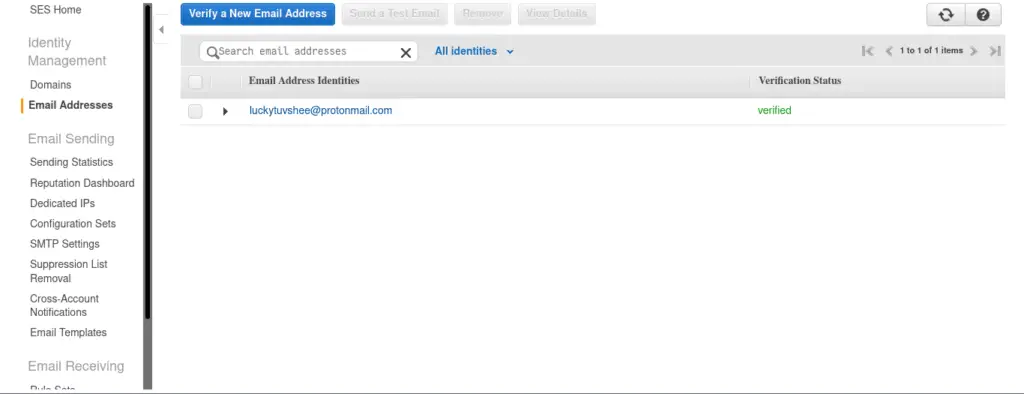
Now you can send emails on behalf of your verified email address.
List SES identities using Boto3
To list SES identities, you need to use the list_identities() method of the SES Boto3 client. This method returns a list that contains all identities (email addresses and domains) for your AWS account in the current AWS Region, regardless of the verification status.
import boto3
ses_client = boto3.client('ses')
response = ses_client.list_identities()
print(response)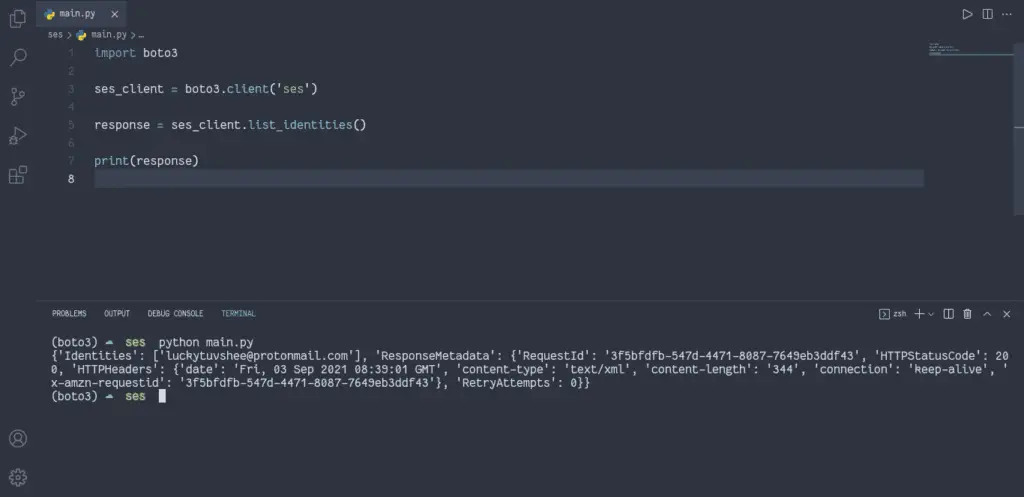
Delete SES identity using Boto3
Todelete SES identity, you need to use the delete_identity() method of the Boto3 SES client. This method deletes the specified identity (an email address or a domain) from the list of identities whether the entity has verified or is in pending status.
import boto3
ses_client = boto3.client('ses')
response = ses_client.delete_identity(
    Identity='luckytuvshee1999@gmail.com'
)
print(response)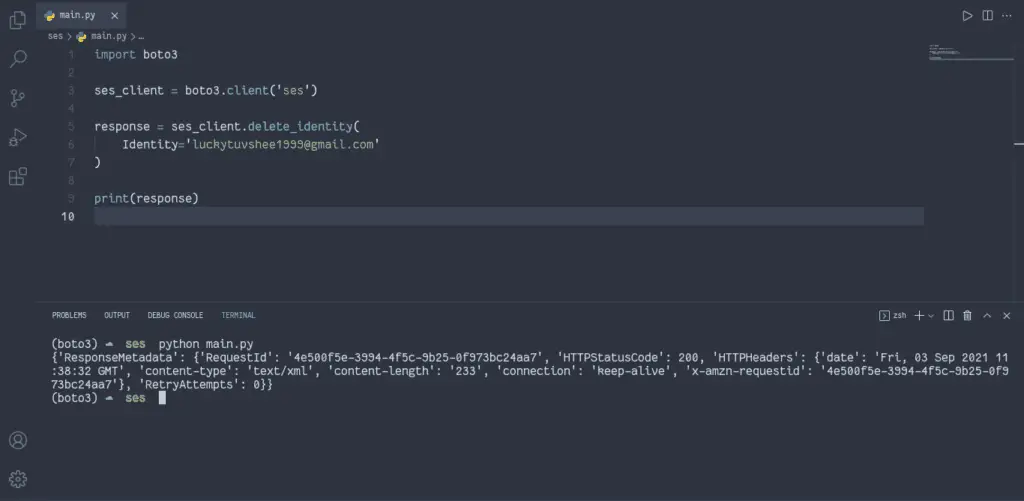
Managing SES email templates using Boto3
Amazon SES lets you send personalized emails to each recipient using templates. Templates include a subject line, text, and HTML parts of the email body. The subject and body sections can also contain unique values personalized for each recipient.
Create an email template in SES
To create an email template in SES, you need to use thecreate_template() method of the Boto3 SES client. For example, you can create a template whenever a user subscribes to a newsletter.
import boto3
ses_client = boto3.client('ses')
response = ses_client.create_template(
    Template={
        'TemplateName': 'subscribe-template',
        'SubjectPart': 'Welcome to Hands-on.cloud community',
        'TextPart': 'Thank you, you have subscribed to Hands-on.cloud',
        'HtmlPart': 'Thank you, you have subscribed to Hands-on.cloud'
    }
)
print(response)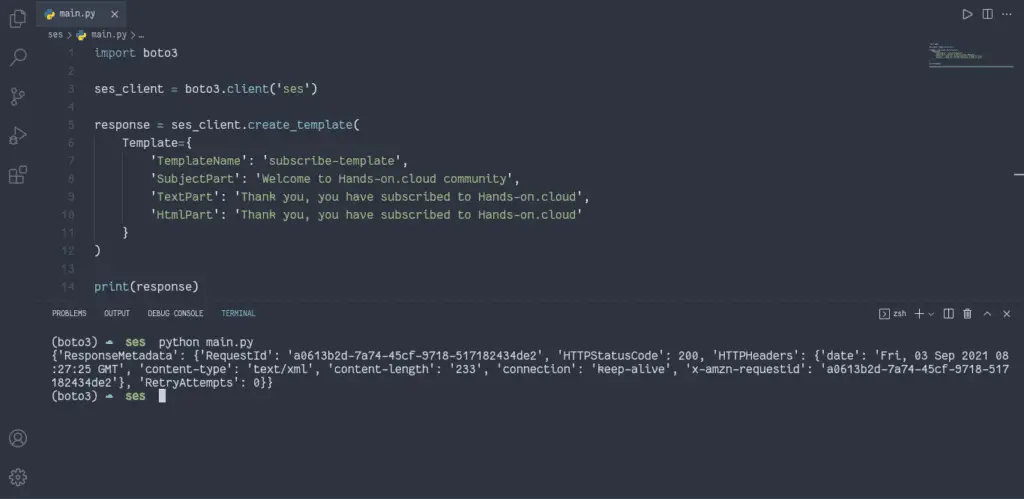
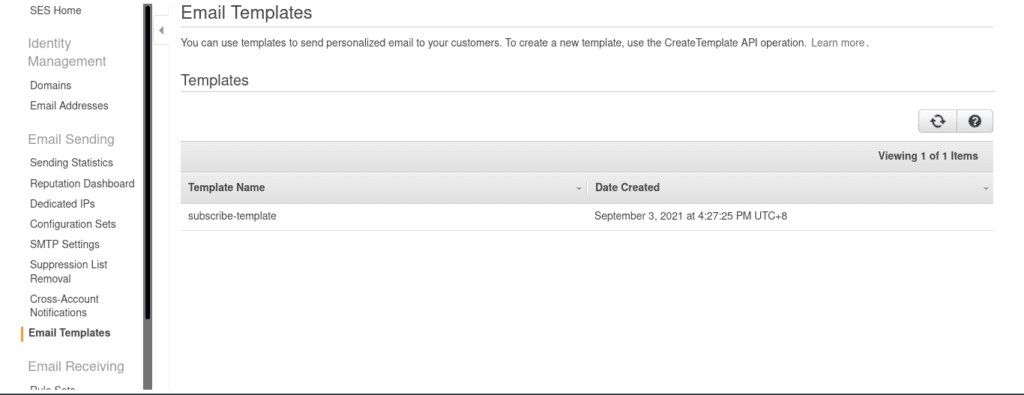
You may check that a new template has been created in the Amazon SES web console:
Describe an email template in SES
To describe an email template in SES, you need to use theget_template() method of the Boto3 SES client.
import boto3
ses_client = boto3.client('ses')
response = ses_client.get_template(
    TemplateName='subscribe-template'
)
print(response['Template'])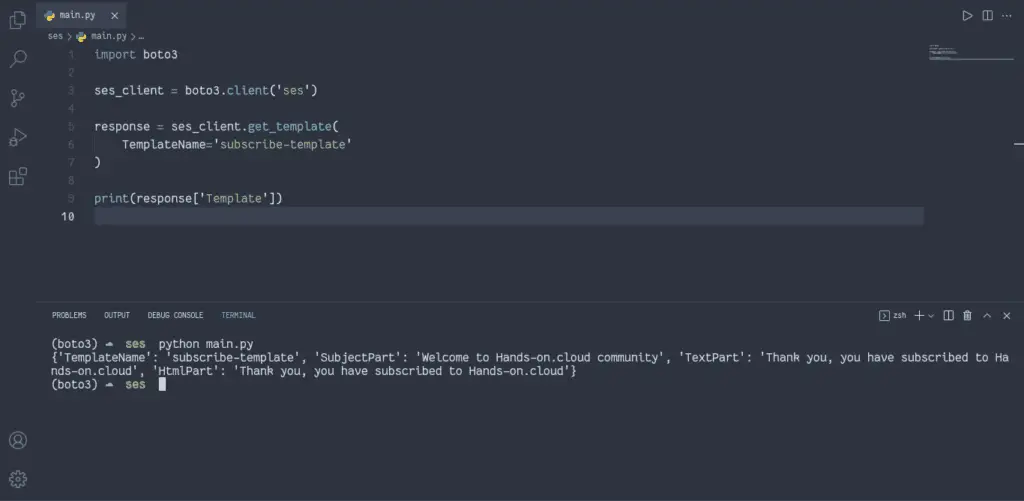
List SES email templates
To list email templates in SES, you need to use thelist_templates() method of the Boto3 SES client.
import boto3
ses_client = boto3.client('ses')
response = ses_client.list_templates()
print(response['TemplatesMetadata'])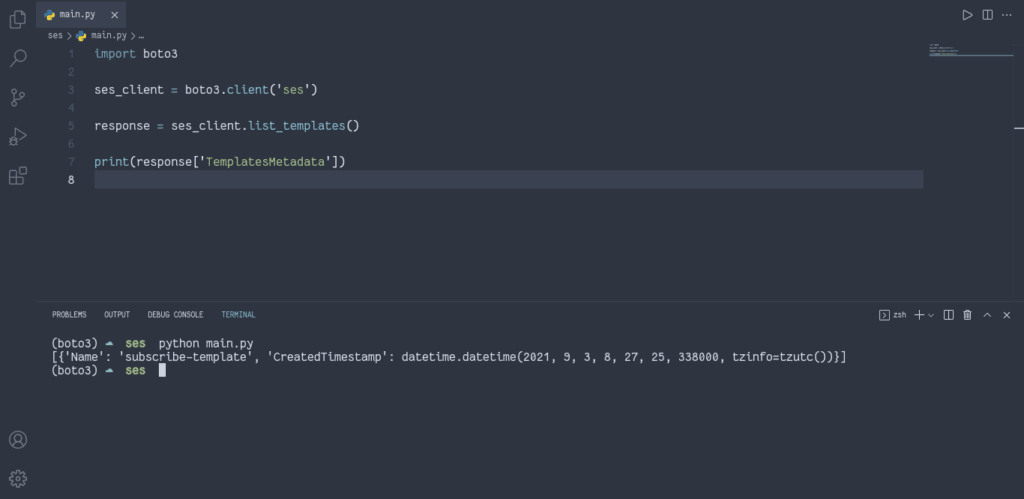
Update SES email template using Boto3
To update the SES email template, you need to use the update_template() method of the SES Boto3 client.
import boto3
ses_client = boto3.client('ses')
response = ses_client.update_template(
    Template={
        'TemplateName':'subscribe-template',
        'SubjectPart':'Hello World',
        'TextPart':'template text updated',
        'HtmlPart':'template text updated',
    }
)
print(response)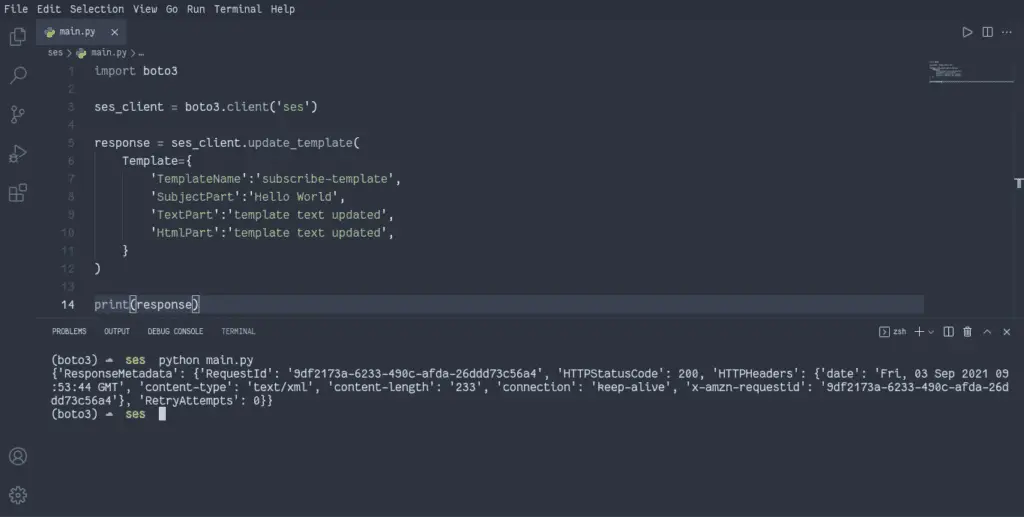
Delete SES email template
To delete the SES email template, you need to use the delete_template() method of the SES Boto3 client.
import boto3
ses_client = boto3.client('ses')
response = ses_client.delete_template(
    TemplateName='subscribe-template'
)
print(response)
Send email through SES using Boto3
This section of the article will cover how to use the Boto3 library to send emails through Amazon SES.
Send a templated email
To send templated emails through SES, you need to use the send_templated_email() method of the SES Boto3 client. This method composes an email message using an email template and immediately queues it for sending.
Notes:
- To send templated emails, you must be sent from a verified email address or domain. If your account is still in Sandbox mode, you can send emails only to verified addresses or domains or to email addresses associated with the Mailbox Simulator.
- The maximum message size is 10 MB.
- The destination for the email is composed of
To:,CC:, andBCC:fields. A destination can include up to 50 recipients across these three fields. - Parameter
TemplateDatais a list of replacement values to apply to the template. This parameter is a JSON object, typically consisting of key-value pairs in which the keys correspond to replacement tags in the email template.
I’ve added a new Gmail email address to the SES and sending an email to it.
import boto3
ses_client = boto3.client('ses')
response = ses_client.send_templated_email(
    Source='luckytuvshee@protonmail.com',
    Destination={
        'ToAddresses': ['luckytuvshee1999@gmail.com'],
        'CcAddresses': ['luckytuvshee1999@gmail.com'],
    },
    ReplyToAddresses=['luckytuvshee1999@gmail.com'],
    Template='subscribe-template',
    TemplateData='{"email_address": "luckytuvshee1999@gmail.com"}'
)
print(response)
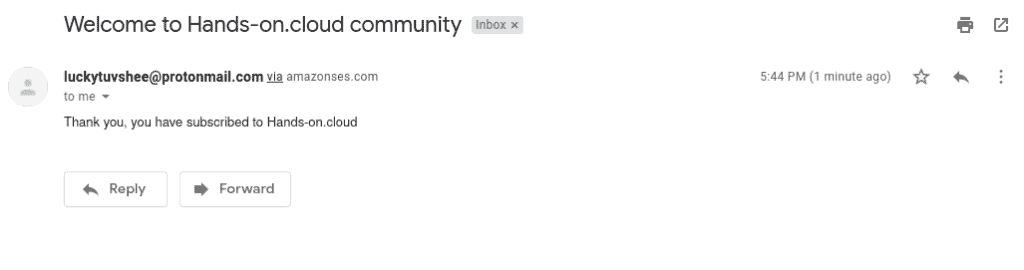
You should receive an email in your inbox once you’ve executed the code above. Check for the Spam folder if you don’t see a new email.
Send a plain-text email
To send a plain-text email from SES, you need to use the send_email() method of the SES Boto3 client. This method composes an email message and immediately queues it for sending.
For every message that you send, the total number of recipients (including each recipient in the To:, CC: and BCC: fields) is counted against the maximum number of emails you can send in 24 hours (your sending quota).
import boto3
ses_client = boto3.client('ses')
response = ses_client.send_email(
    Source='luckytuvshee@protonmail.com',
    Destination={
        'ToAddresses': ['luckytuvshee1999@gmail.com'],
        'CcAddresses': ['luckytuvshee1999@gmail.com'],
    },
    ReplyToAddresses=['luckytuvshee1999@gmail.com'],
    Message={
        'Subject': {
            'Data': 'Test Email',
            'Charset': 'utf-8'
        },
        'Body': {
            'Text': {
                'Data': 'hello world',
                'Charset': 'utf-8'
            },
            'Html': {
                'Data': 'hello world',
                'Charset': 'utf-8'
            }
        }
    }
)
print(response)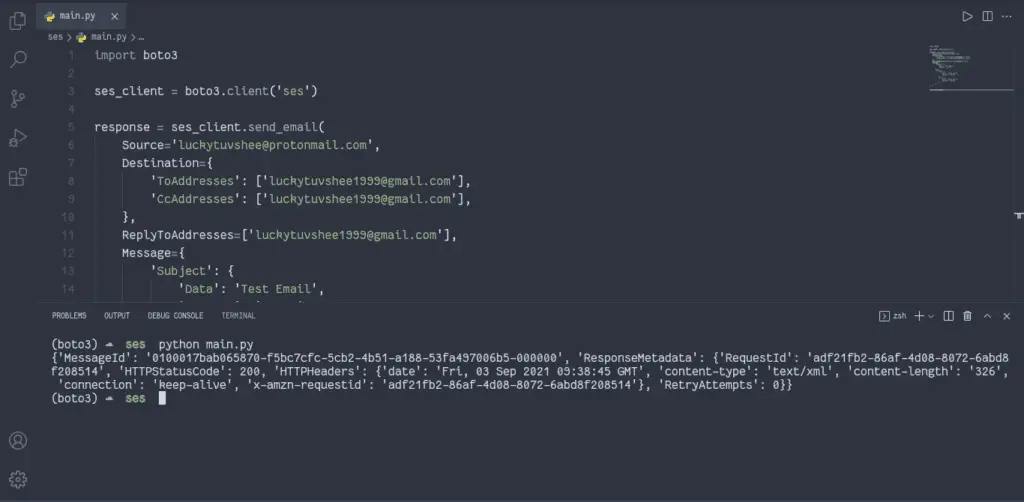
Send raw email
To send a plain-text email from SES, you need to use the send_raw_email() method of the SES Boto3 client. The method allows you to craft a more complex message formatting. This means you can use HTML formatting and design your message using HTML code.
For example, using the send_raw_email() method is useful when sending a multipart MIME email (an email message containing both a text and an attachment).
The raw data of the message needs to be base64-encoded. The Boto3 Python SDK for AWS handles base 64-encoding for you automatically.
import boto3
ses_client = boto3.client('ses')
html_data = """Subject: Subscription
MIME-Version: 1.0
Content-Type: text/HTML
<!DOCTYPE html>
    <html>
    <head>
        <style>
            h1   {color: #333;}
            p    {color: #555;}
        </style>
    </head>
    <body>
        <h1>Hi</h1>
        <p>you have subscribed to this newsletter.</p>
    </body>
</html>
"""
response = ses_client.send_raw_email(
    Source='luckytuvshee@protonmail.com',
    Destinations=[
        'luckytuvshee1999@gmail.com',
    ],
    RawMessage={
        'Data': html_data
    }
)
print(response['MessageId'])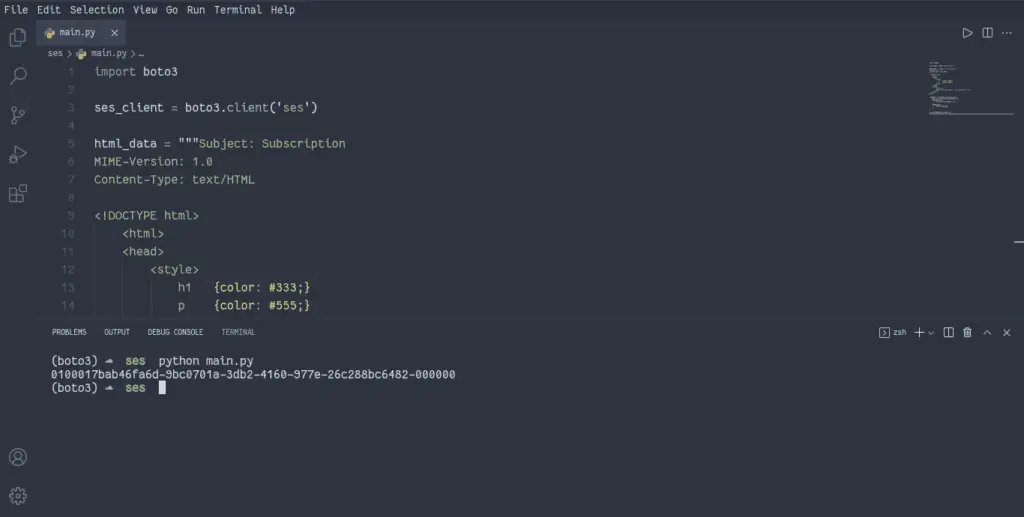
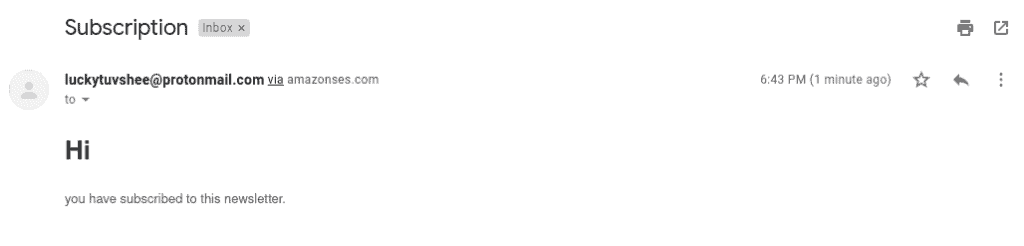
Here’s an example of an HTML-formatted message I’ve sent to my email address:
Summary
Amazon Simple Email Service is a simple email service to configure and use. This article covered how to get started with Amazon SES, verify a sender domain and email address, manage email templates, and send emails in various formats using the Boto3 library.
