How to install AWS CLI – Windows, Linux, OS X
We need to use AWS CLI when we want to manage our Amazon Web Services resources and applications programmatically. With the AWS Command Line Interface (CLI), we can control multiple AWS services from the command line and automate them through scripts. We can also access some features and services unavailable in the AWS Management Console, for example, deactivating Amazon GuardDuty.
This article provides quick guidance on how to install AWS CLI on Windows, Linux, and OS X operating systems.
Requirements
There are several prerequisites you need to check before moving forward.
OS X
- Mac OS X 10.9 or later
- Python 3.6 or later
Windows
- Microsoft-supported versions of 64-bit Windows
- PowerShell 3.0 or later
- Admin rights to install software
Linux
- Any modern Linux distribution
- Python 3.6 or later
AWS Credentials
You must have a valid IAM user and AWS credentials to interact with AWS infrastructure.
Install AWS CLI on OS X
There are two primary options for installing AWS CLI on OS X available for you:
- Homebrew
- Virtual environment
Homebrew
- Ensure that the Homebrew is installed:
/bin/bash -c "$(curl -fsSL https://raw.githubusercontent.com/Homebrew/install/master/install.sh)"- Install AWS CLI using Homebrew:
brew install awscli- Verify the installation process:
aws --version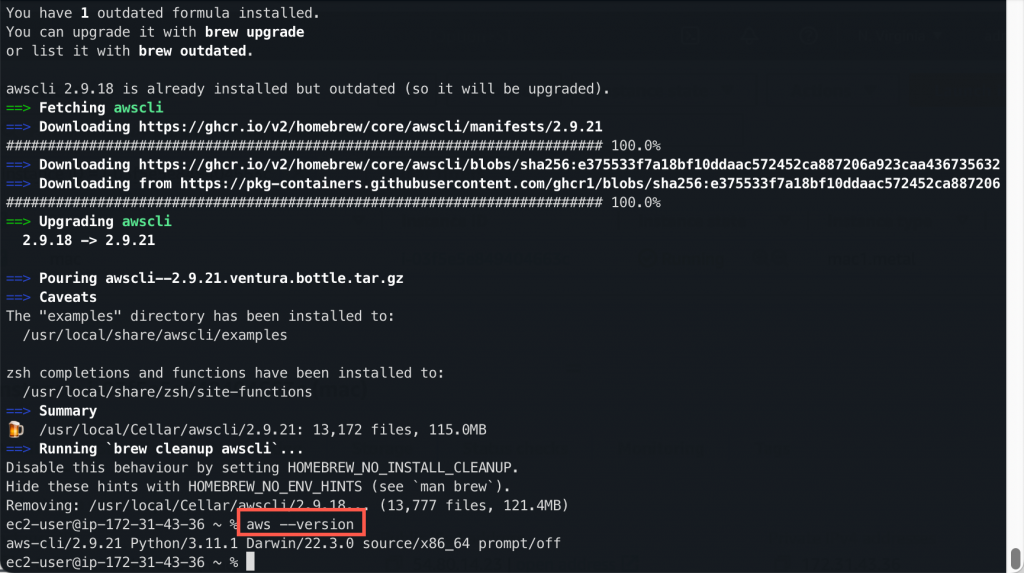
Next, you need to Configure AWS CLI Profile.
Python Virtual Environment
To install the AWS CLI in a Python virtual environment, follow these steps:
- Create a virtual environment
python3 -m venv myenv- Activate the virtual environment:
source myenv/bin/activate- Install the AWS CLI using pip:
pip install awscli- Verify the installation by running the following command:
aws --version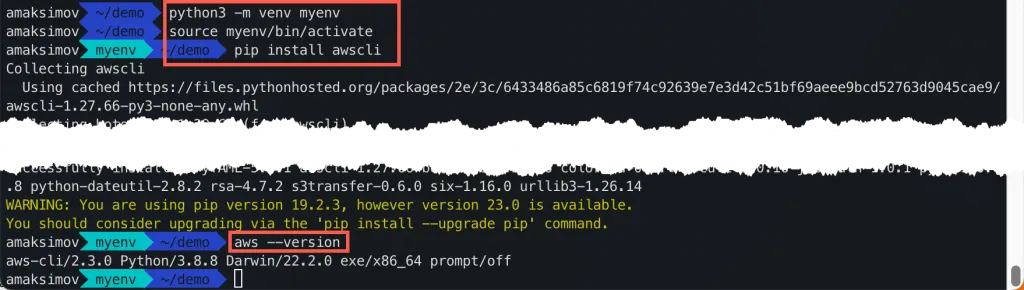
Next, you need to Configure AWS CLI Profile.
Install AWS CLI on Windows
To install the AWS CLI on Windows, you can use the MSI installer or automated installation using Chocolatey.
MSI installer
- Download the latest AWS CLI MSI installer for Windows from the AWS website.
- Double-click the downloaded MSI file to start the installation wizard.
- Follow the on-screen instructions to complete the installation.
Alternatively, you can execute the following msiexec command from the Windows terminal:
msiexec.exe /i https://awscli.amazonaws.com/AWSCLIV2.msi- Verify the installation by running the following command:
aws --versionNext, you need to Configure AWS CLI Profile.
Chocolatey
To install the AWS CLI on Windows using Chocolatey, you can follow these steps:
- Install Chocolatey:
Set-ExecutionPolicy Bypass -Scope Process -Force; [System.Net.ServicePointManager]::SecurityProtocol = [System.Net.ServicePointManager]::SecurityProtocol -bor 3072; iex ((New-Object System.Net.WebClient).DownloadString('https://community.chocolatey.org/install.ps1'))- Install the AWS CLI using Chocolatey:
choco install awscli
- Verify the installation by running the following command:
aws --version
Next, you need to Configure AWS CLI Profile.
Install AWS CLI on Ubuntu Linux
You can install AWS CLI on Linux using one of the two approaches.
Bundle installer
- Download the latest version of the AWS CLI bundled installer archive for Linux from the AWS website, unzip it, and execute the install script:
curl "https://awscli.amazonaws.com/awscli-exe-linux-x86_64.zip" -o "awscliv2.zip"
unzip awscliv2.zip
sudo ./aws/install- Verify the installation by running the following command:
aws --versionNext, you need to Configure AWS CLI Profile.
PIP package manager
- Install pip:
sudo apt-get install python-pip- Install the AWS CLI using pip:
sudo pip install awscliTo install AWS CLI inside a virtual environment for every independent project, use the following set of commands:
python3 -m venv myenv
source myenv/bin/activate
pip install awscli- Verify the installation by running the following command:
aws --versionNext, you need to Configure AWS CLI Profile.
AWS CLI Profile Configuration
Configure the AWS CLI Profile by using the following command:
aws configureYou will be prompted to enter your AWS Access Key ID, Secret Access Key, default region name, and default output format. Once the configuration is complete, you can use the AWS CLI to manage your AWS resources.
Finally, we recommend you consider using aws-vault for managing multiple AWS profiles instead of storing credentials in the text file.
