Setting up AWS Cloud9 IDE using AWS CloudFormation
You are at the right place if you’re looking for a quick and easy way to set up AWS Cloud9 IDE using AWS CloudFormation. This blog post will walk you through creating a Cloud9 environment with an EC2 instance using CloudFormation. By the end of this article, you will have a functional Cloud9 IDE environment ready for development.
Understand the AWS::Cloud9::EnvironmentEC2 Resource
The AWS::Cloud9::EnvironmentEC2 resource in CloudFormation creates an Amazon EC2 development environment in AWS Cloud9. The key properties of this resource include:
AutomaticStopTimeMinutes: The idle time in minutes before the environment is stopped.InstanceType: The type of instance for the Cloud9 environment.SubnetId: The ID of the subnet for the Cloud9 environment.OwnerId: The ARN of the user you’re using to access your AWS account
If you specified an incorrect OwnerId, you’ll be unable to use the provisioned Cloud9 IDE afterward.
Refer to the AWS CloudFormation User Guide for more properties and descriptions.
Preparing the CloudFormation Template
Here is a sample CloudFormation template for setting up a Cloud9 IDE environment with an EC2 instance. This template also includes an IAM role and instance profile for the Cloud9 instance.
AWSTemplateFormatVersion: '2010-09-09'
Description: CloudFormation template for Cloud9 IDE
Parameters:
  InstanceType:
    Type: String
    Default: t2.micro
    Description: EC2 Instance Type for the Cloud9 Environment
    AllowedValues:
      - t2.micro
      - t2.small
      - t2.medium
      # Add other instance types as needed
  Cloud9EnvironmentName:
    Type: String
    Default: MyCloud9Environment
    Description: Name for the Cloud9 Environment
  SubnetId:
    Type: String
    Description: The ID of the subnet for the Cloud9 Environment
Resources:
  Cloud9Environment:
    Type: AWS::Cloud9::EnvironmentEC2
    Properties:
      Name: !Sub "${Cloud9EnvironmentName}-Environment"
      InstanceType: !Ref InstanceType
      ImageId: amazonlinux-2023-x86_64
      ConnectionType: CONNECT_SSM
      AutomaticStopTimeMinutes: 60
      OwnerArn: !Sub "arn:aws:iam::${AWS::AccountId}:federated-user/admin"
      SubnetId: !Ref SubnetId
      Tags:
        - Key: "Environment"
          Value: !Ref Cloud9EnvironmentName
  Cloud9InstanceRole:
    Type: AWS::IAM::Role
    Properties:
      RoleName: !Sub "${Cloud9EnvironmentName}-InstanceRole"
      AssumeRolePolicyDocument:
        Statement:
          - Effect: Allow
            Principal:
              Service: [ec2.amazonaws.com]
            Action: ['sts:AssumeRole']
      Path: "/"
      Policies:
        - PolicyName: !Sub "${Cloud9EnvironmentName}-AdminAccess"
          PolicyDocument:
            Statement:
              - Effect: Allow
                Action: '*'
                Resource: '*'
  Cloud9InstanceProfile:
    Type: AWS::IAM::InstanceProfile
    Properties:
      InstanceProfileName: !Sub "${Cloud9EnvironmentName}-InstanceProfile"
      Roles: [!Ref Cloud9InstanceRole]
Outputs:
  Cloud9URL:
    Description: "Cloud9 IDE URL"
    Value:
      Fn::Join:
      - ''
      - - !Sub https://${AWS::Region}.console.aws.amazon.com/cloud9/ide/
        - !Ref 'Cloud9Environment'
Deploying the Template
AWS Console
To deploy this CloudFormation template:
- Log in to your AWS account and navigate to the CloudFormation console.
- Choose ‘Create Stack’ and upload the above template.
- Fill in the parameters as required.
- Review and create the stack.
AWS CLI
To deploy the CloudFormation template using the AWS Command Line Interface (CLI), follow these steps:
- Install and Configure AWS CLI: Make sure you have the AWS CLI installed and configured with the appropriate credentials and default region. You can download and install it from the official AWS CLI page.
- Prepare Your Template: Save your CloudFormation template in a file, for example,
cloud9-template.yaml. - Deploy the Stack: Open your command line tool and execute the following command to create a CloudFormation stack:
aws cloudformation create-stack \
	--stack-name MyCloud9Stack \
	--template-body file://path_to_your_template/cloud9-template.yaml \
	--parameters \
		ParameterKey=InstanceType,ParameterValue=t2.micro \
		ParameterKey=SubnetId,ParameterValue=subnet-xxxxxx \
	--capabilities CAPABILITY_NAMED_IAM
Replace path_to_your_template with the actual path to your CloudFormation template file and subnet-xxxxxx with your subnet ID.
- Monitor Stack Creation: You can monitor the progress of stack creation using the AWS Management Console or the CLI command:
aws cloudformation describe-stacks --stack-name MyCloud9StackAccessing Your Cloud9 Environment
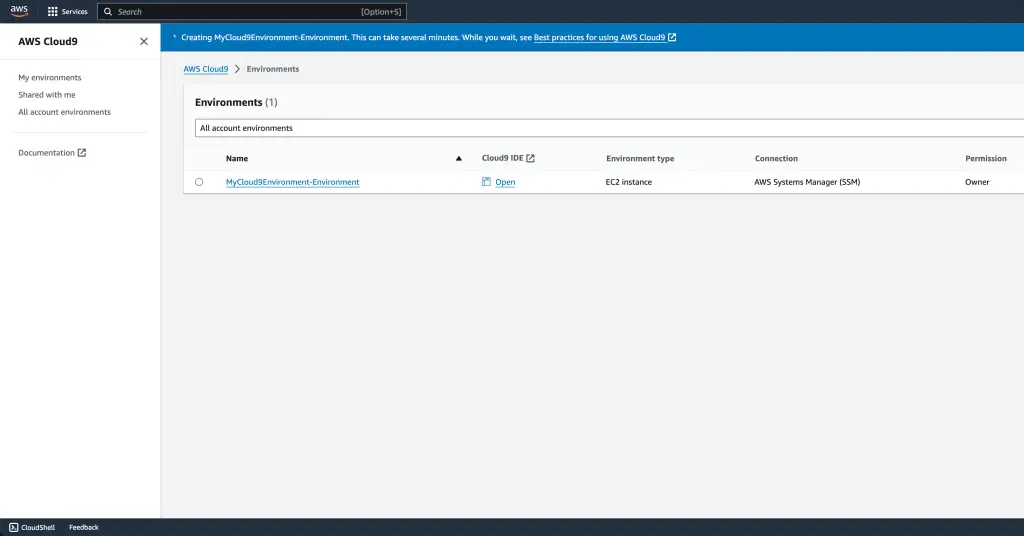
Once the stack creation is complete, you can access your Cloud9 environment through the AWS Management Console. Navigate to the Cloud9 service and find your environment listed there.
Alternatively, use the following AWS CLI command to get CloudFormation stack output:
aws cloudformation describe-stacks \
	--stack-name MyCloud9Stack \
	--query 'Stacks[0].Outputs[?OutputKey==`Cloud9URL`].OutputValue' \
	--output text
Additional Considerations
- Ensure your IAM roles and policies are set up correctly. The Cloud9 instance will need appropriate permissions to interact with other AWS services.
- Customize your Cloud9 environment by adjusting the template parameters and resource properties to fit your specific requirements.
Cleanup: Deleting the Deployment Stack
AWS Console
- Navigate to the AWS CloudFormation Console: Log in to your AWS Management Console and go to the CloudFormation service.
- Select the Stack: Find and select the stack you created for the Cloud9 environment (e.g.,
MyCloud9Stack). - Delete the Stack: Click the “Delete” button with the stack selected. Confirm the deletion when prompted. AWS CloudFormation will then delete all the resources associated with the stack.
AWS CLI
- Open Command Line Tool: Open your CLI tool with AWS CLI configured.
- Execute Delete Command: Run the following command to delete the stack:
aws cloudformation delete-stack --stack-name MyCloud9StackReplace MyCloud9Stack with the name of your Cloud9 CloudFormation stack.
- Verify Deletion: Optionally, you can run the
describe-stackscommand again to ensure the stack has been removed:
aws cloudformation describe-stacks --stack-name MyCloud9StackThis command should return an error indicating that the stack does not exist, confirming that it has been successfully deleted.
Following these steps, you can deploy and manage your AWS Cloud9 environment using the AWS Management Console and the AWS CLI, ensuring a flexible and efficient workflow.
Conclusion
Using AWS CloudFormation to set up AWS Cloud9 provides a repeatable and automated way to provision development environments. This approach is particularly useful for teams requiring consistent and pre-configured development environments.
For more detailed information and advanced configurations, refer to the AWS CloudFormation User Guide and explore other useful resources like the AWS Cloud9 Bootstrapping Example on GitHub for practical implementations.
Feel free to modify the provided template to suit your project’s needs better and leverage the power of CloudFormation for efficient and scalable cloud resource management.
